 BM 2610034444
 04-14_DGSH181 4/2/14 11:24 AM Page 11
Operating Instructions
PROTECTION AGAINST DEEP
DISCHARGING
The lithium ion battery is protected against deep discharging by the “Electronic Cell Protection (ECP)”. When the battery is empty, the cordless grinder is switched off by means of a protective circuit.
Do not continue to press the ! CAUTION On/Off switch after the tool
has been automatically switched off. The battery can be damaged.
! WARNING Hold the tool with both hands while starting the
tool, since torque from the motor can cause the tool to twist.
SLIDE ON-OFF SWITCH WITH LOCK
The tool is switched “ON” by the switch button located at the side of the motor housing. The switch can be locked in the “ON” position, a convenience for long grinding operations.
TO TURN THE TOOL “ON” without locking it, slide the switch button forward by applying pressure ONLY at the REAR portion of the button. When pressure is released the switch button will snap to “OFF” position.
TO LOCK THE SWITCH “ON”, slide the switch button forward and press “IN” the FRONT portion.
TO UNLOCK THE SWITCH, simply press and release the REAR portion of the button. Switch is spring loaded and will snap back automatically.
TOOL TIPS
Always hold the tool away from your face. Accessories can be damaged during handling, and can fly apart as they come up to speed. This is not common, but it does happen.
Start the tool before applying to work and let the tool come to full speed before contacting the workpiece. Lift the tool from the work before releasing the switch. DO NOT turn the switch “ON” and “OFF” while the tool is under load; this will greatly decrease the switch life.
Practice on scrap materials first to see how the tool performs. Keep in mind that the work is done by the speed of the tool and by the accessory in the collet. You should not lean on or push the tool during use.
Instead, lower the spinning accessory lightly to the work and allow it to touch the point at which you want grinding to begin. Concentrate on guiding the tool over the work using very little pressure from your hand. Allow the accessory to do the work.
Usually, it is best to make a series of passes with the tool rather than attempt to do all the work in one pass.
INSERTING AND RELEASING
BATTERy PACK
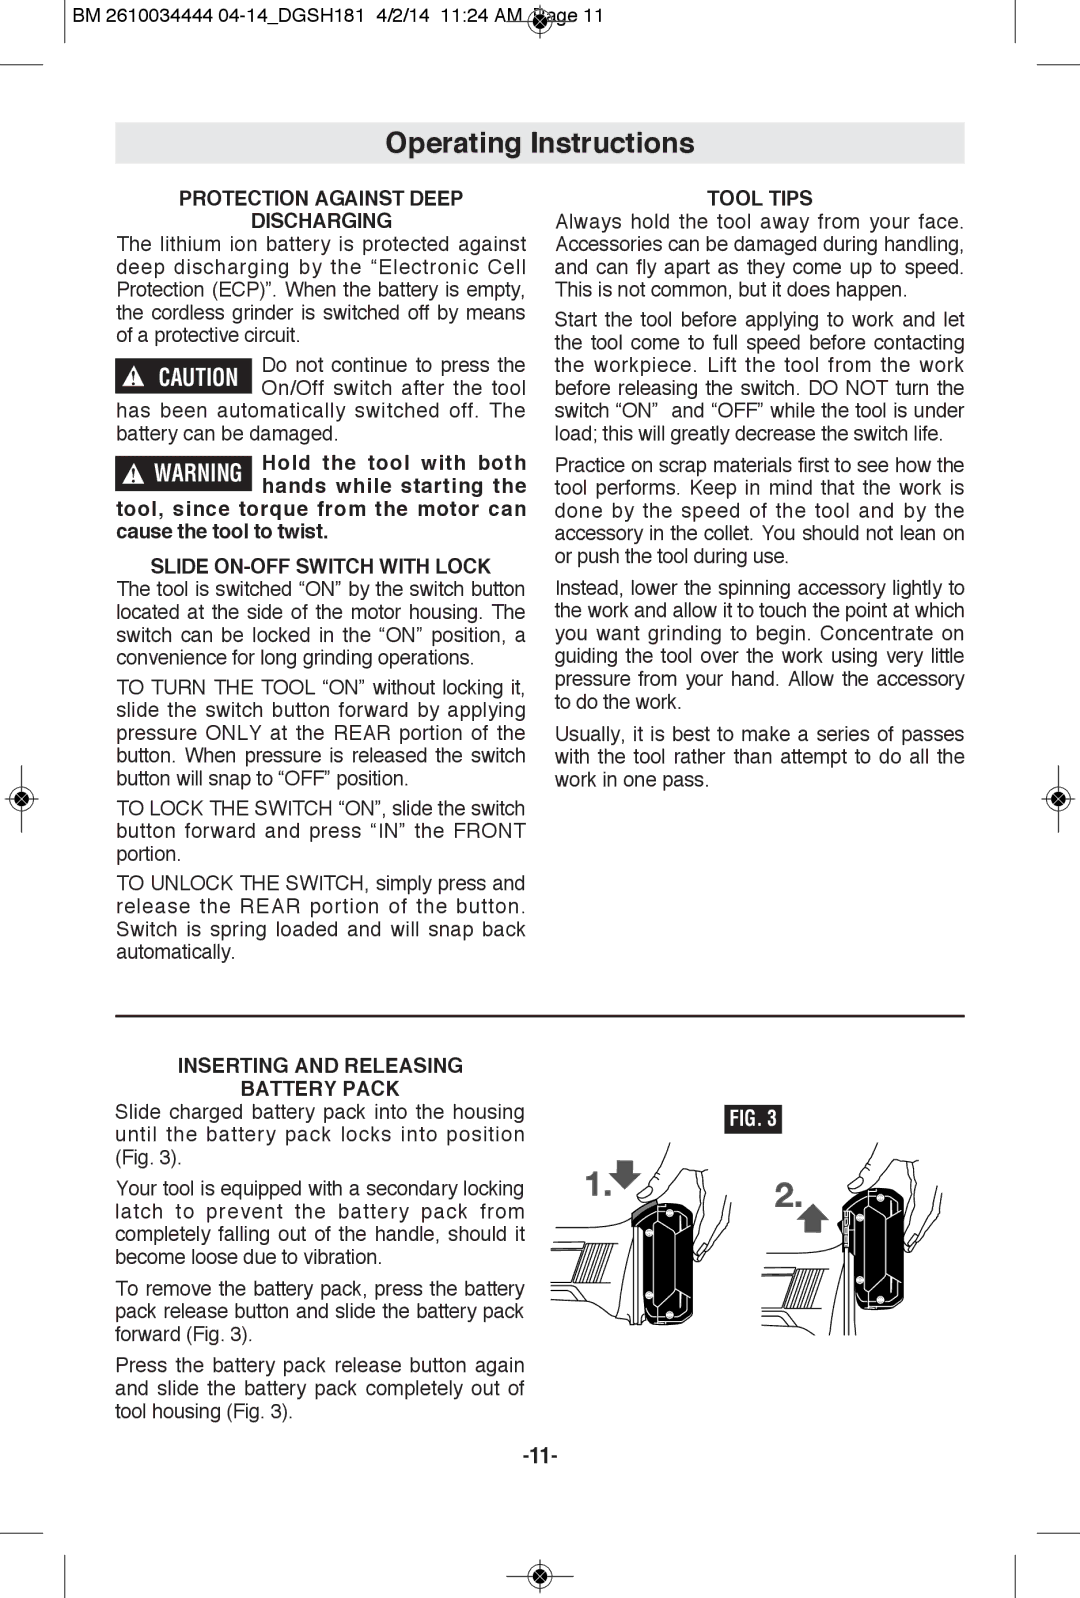
Slide charged battery pack into the housingFIG. 3 until the battery pack locks into position
(Fig. 3).
Your tool is equipped with a secondary locking latch to prevent the battery pack from completely falling out of the handle, should it become loose due to vibration.
To remove the battery pack, press the battery pack release button and slide the battery pack forward (Fig. 3).
Press the battery pack release button again and slide the battery pack completely out of tool housing (Fig. 3).
