Installing Your Speakers From The Front Of The Bulkhead
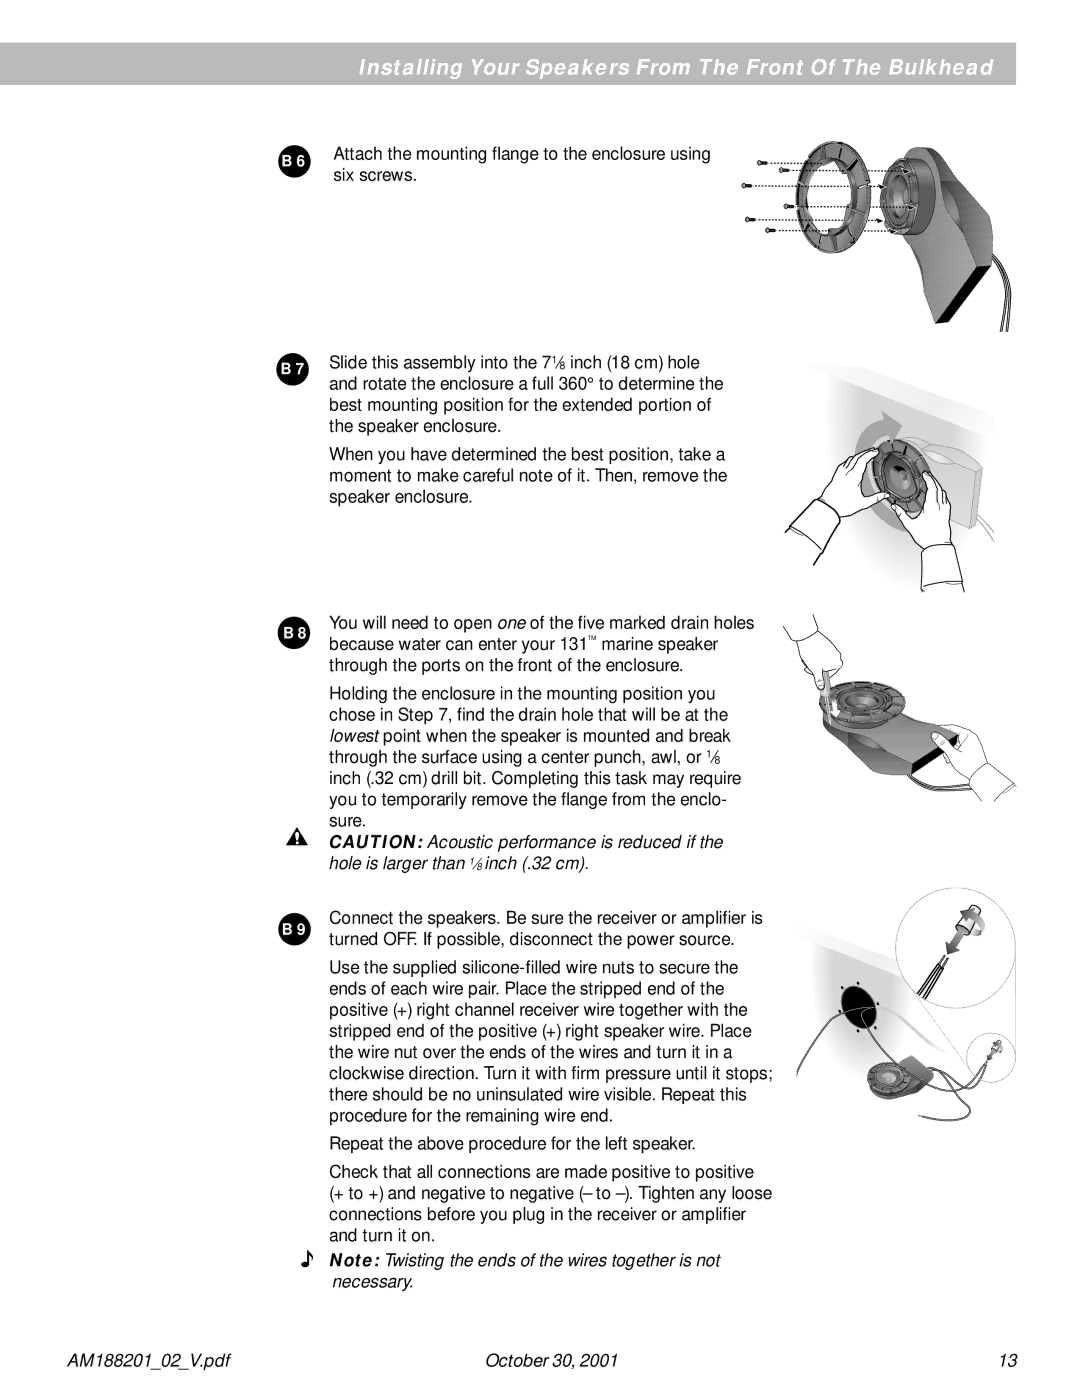
B 6
B 7
Attach the mounting flange to the enclosure using six screws.
Slide this assembly into the 71⁄8 inch (18 cm) hole and rotate the enclosure a full 360° to determine the best mounting position for the extended portion of the speaker enclosure.
When you have determined the best position, take a moment to make careful note of it. Then, remove the speaker enclosure.
You will need to open one of the five marked drain holes B 8 because water can enter your 131TM marine speaker
through the ports on the front of the enclosure.
Holding the enclosure in the mounting position you chose in Step 7, find the drain hole that will be at the lowest point when the speaker is mounted and break through the surface using a center punch, awl, or 1⁄8 inch (.32 cm) drill bit. Completing this task may require you to temporarily remove the flange from the enclo- sure.
CAUTION: Acoustic performance is reduced if the hole is larger than 1⁄8 inch (.32 cm).
B 9
Connect the speakers. Be sure the receiver or amplifier is turned OFF. If possible, disconnect the power source.
Use the supplied
Repeat the above procedure for the left speaker.
Check that all connections are made positive to positive (+ to +) and negative to negative (– to
Note: Twisting the ends of the wires together is not necessary.
AM188201_02_V.pdf | October 30, 2001 | 13 |