151, BOSE151WHT, 151SEW specifications
Bose has long been synonymous with premium audio quality, and their line of outdoor speakers exemplifies this commitment, particularly the Bose 151SEW and 151WHT models. Designed to bring exceptional sound to outdoor settings, these speakers are engineered to withstand the elements while delivering an immersive listening experience.The Bose 151SEW and 151WHT are designed for versatility. They can be mounted on walls or placed on patios, gardens, or by the poolside, making them ideal for any outdoor gathering. Their sleek, weather-resistant design ensures durability, allowing them to perform in a variety of environmental conditions. These speakers feature a special enclosure that protects them from moisture and UV exposure, so users can enjoy their favorite tunes without worry, rain or shine.
One of the standout features of the Bose 151 series is the Stereo Everywhere speaker performance. This technology is designed to distribute sound evenly across a wide area, filling outdoor spaces with balanced audio. Rather than confining the listening experience to a small sweet spot, the Bose 151 models allow listeners to enjoy consistent sound quality from various positions, making them perfect for social gatherings.
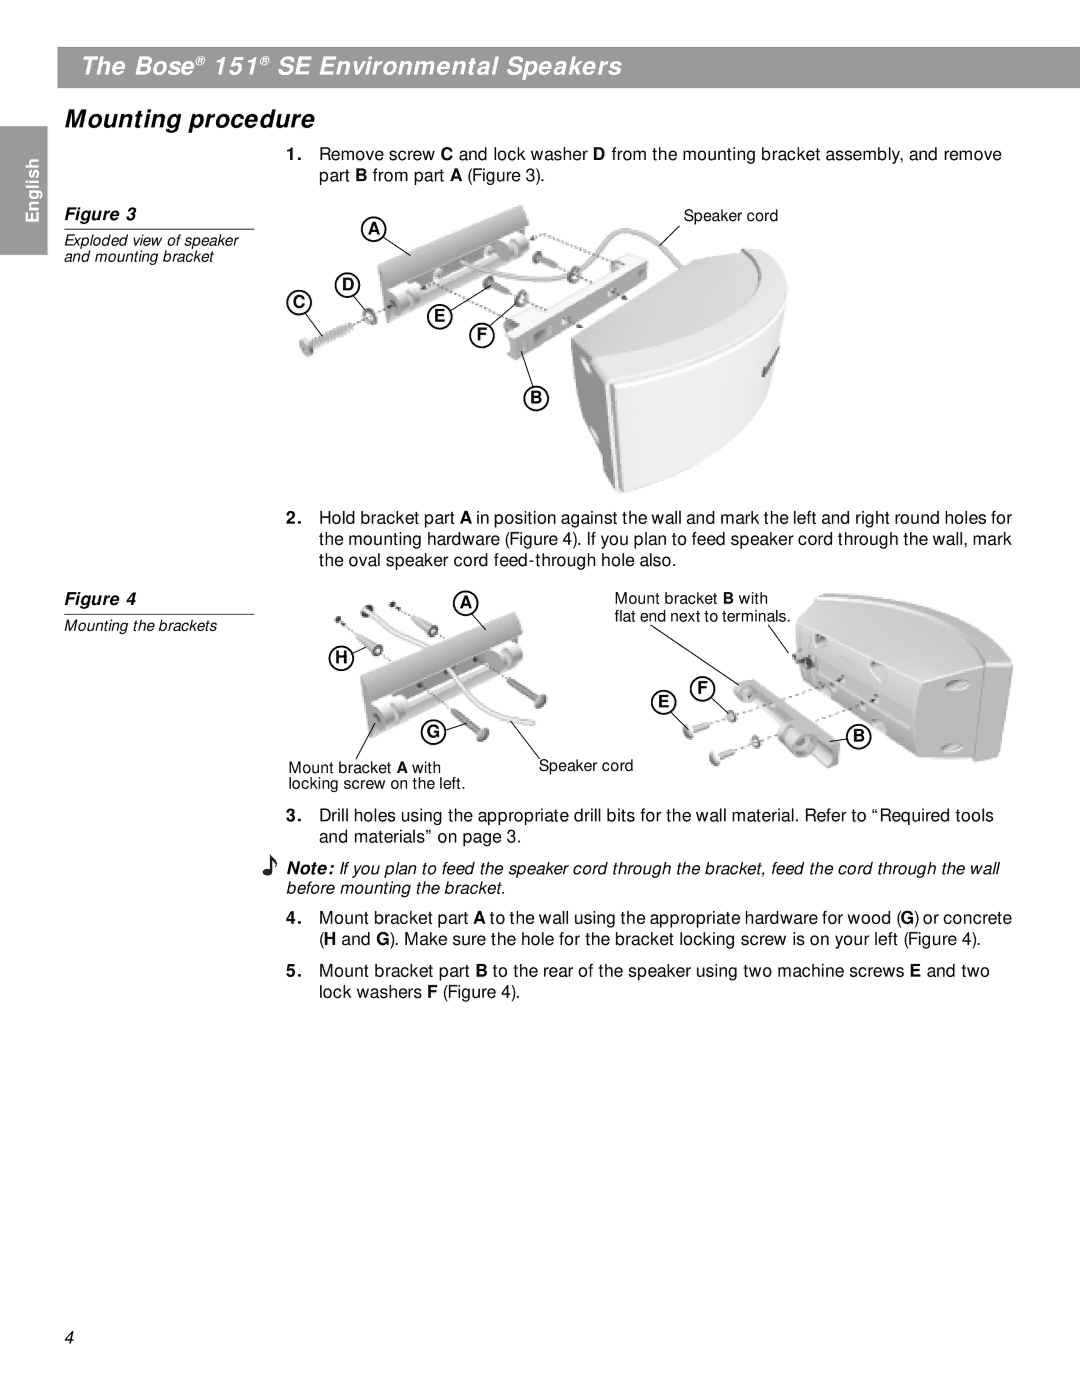
Another key characteristic of the Bose 151SEW and 151WHT is their innovative mounting system. Each speaker includes a unique multi-position bracket that allows for flexible installation. Whether you want them mounted horizontally, vertically, or at an angle, these speakers can adapt to fit the space you have. This flexibility ensures that you get the most out of your outdoor audio experience.
In terms of sound quality, the Bose 151 speakers utilize a combination of high-performance drivers and a proprietary bass reflex port. This setup enables rich, full-range audio with impressive low frequencies that defy expectations for outdoor speakers. Whether you’re listening to music, hosting a barbecue, or cheering on your favorite sports team, the clarity and depth of sound will enhance any outdoor occasion.
In conclusion, the Bose 151SEW and 151WHT are exemplary outdoor speakers that showcase Bose's dedication to quality, durability, and sound innovation. With weather-resistant features, stereo performance, flexible mounting options, and powerful audio capabilities, they are perfect for outdoor enthusiasts looking to elevate their listening experience. For anyone seeking exceptional sound outdoors, the Bose 151 series is a compelling choice that truly delivers on performance.

