Manuals
/
Boss Audio Systems
/
Home Audio
/
Stereo System
Boss Audio Systems
BV7280
manual
Installation, Removing the unit, DIN REAR-MOUNTMethod B
Models:
BV7280
1
6
22
22
Download
22 pages
17.5 Kb
3
4
5
6
7
8
9
10
Troubleshooting
Specification
Install
Wiring Connection
Reset function
Setup Menu
Setting Memory
yRemote Control
How to
Safety
Page 6
Image 6
Page 5
Page 7
Page 6
Image 6
Page 5
Page 7
Contents
Page
drivers should not watch video or
To ensure safety while driving
and to comply with laws
operate the video device while driving
yFull Detachable Panel yPreset Equalization
yRemote Control
yAV IN interface on the front panel
BV7280
CONTENTS
Installation Opening
INSTALLATION
Installing the unit
DIN FRONT/REAR-MOUNT
INSTALLATION
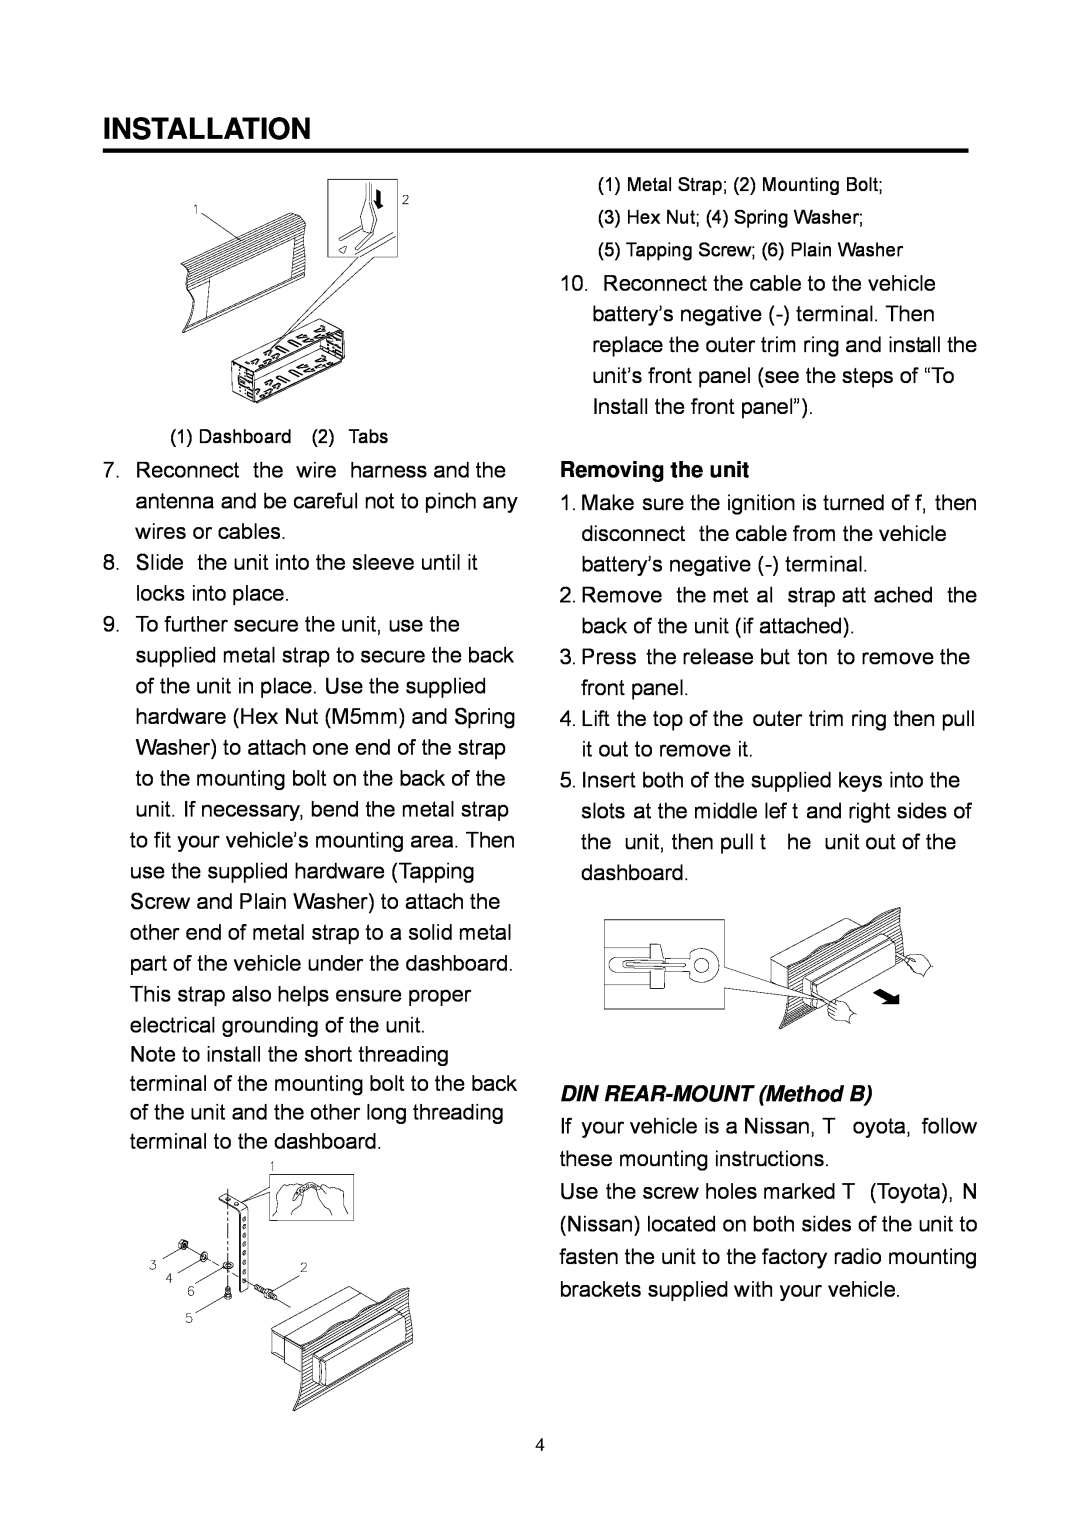
Removing the unit
DIN REAR-MOUNTMethod B
Screw Factory Radio Mounting Bracket Screw
INSTALLATION
Side View showing Screw Holes marked T, N or S
Dashboard or Console
Precautions when handling
USING THE DETACHABLE FRONT PANEL
To Install the Front Panel
To Detach the Front panel
WIRING CONNECTION
Connector A
Connector B
OPERATION
LOCATION OF KEYS
LOCATIONS AND FUNCTION OF THE REMOTE CONTROL
LOCATIONS AND FUNCTION OF THE REMOTE CONTROL
2. MODE
Using the Remote Control
LOCATIONS AND FUNCTION OF THE REMOTE CONTROL
Preparing the Remote Control
Inserting the Batteries
OPERATION
Reset function
Volume level adjustment
Turn the unit on/off
OPERATION
Power-downmemory function
Pausing play
Mode selection
Slow motion playback for Video file only
OPERATION
Rapid forward / rapid reverse
Skipping track
Setup Menu
OPERATION
Goto Function
On-screenDisplay Function
OPERATION
MEMORY CARD OPERATION
Last Play Memory
OPERATION
Switching to Radio Mode
Setting Memory
87.50MHZ
AV IN OPERATION
Switching Area USA/EUR
OPERATION
Local/Distant
Nothing happens when the button are pressed
TROUBLE SHOOTING
The power does not turn on
The file can not play
RADIO
SPECIFICATION
GENERAL
SUPPORTED FILE TYPE
Top
Page
Image
Contents