INSTALLATION
Notes:
yChoose the mounting location where the unit will not interfere with the normal driving function of the driver.
yBefore fastening the unit to the vehicle make sure all function are operating properly.
yUse only the parts included with the unit to ensure proper installation. The use of unauthorized parts can cause malfunctions.
yConsult with your nearest dealer if installation requires the drilling of holes or other modifications of the vehicle.
yInstall the unit where it does not get in the driver’s way and cannot injure the passenger if there is a sudden stop.
yAvoid installing the unit where it would be
subject to high temperature, such as from direct sunlight or hot air from the heater.
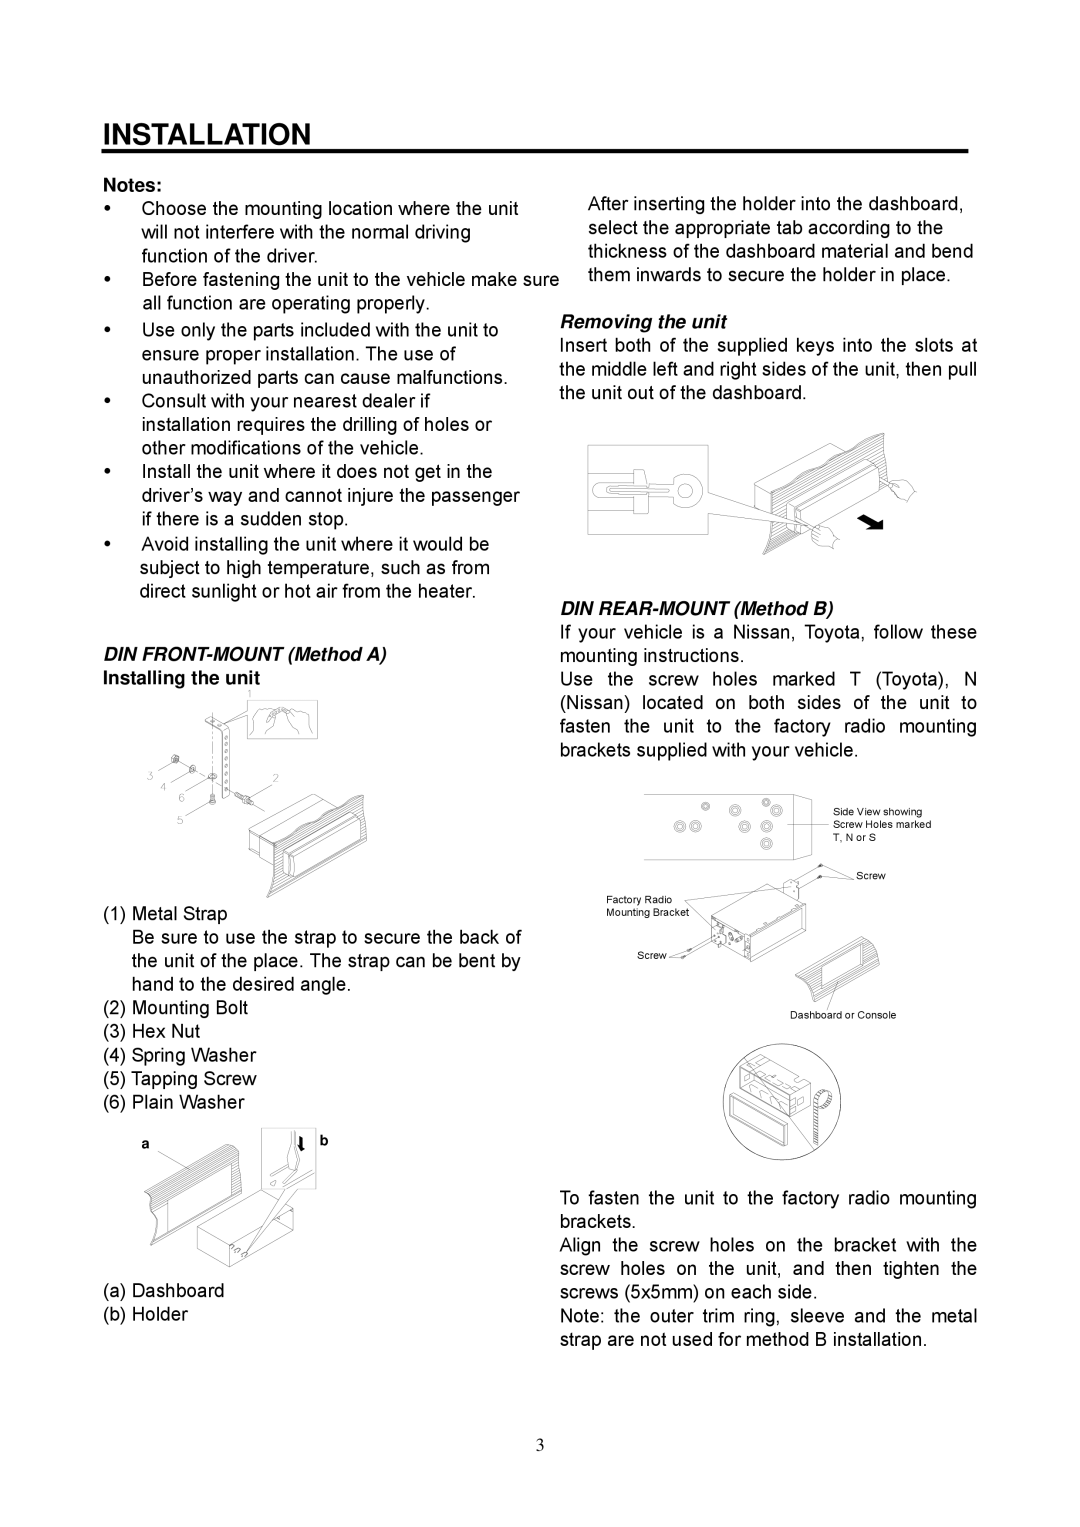
DIN FRONT-MOUNT (Method A)
Installing the unit
(1)Metal Strap
Be sure to use the strap to secure the back of the unit of the place. The strap can be bent by hand to the desired angle.
(2)Mounting Bolt
(3)Hex Nut
(4)Spring Washer
(5)Tapping Screw
(6)Plain Washer
a | b |
(a)Dashboard
(b)Holder
3