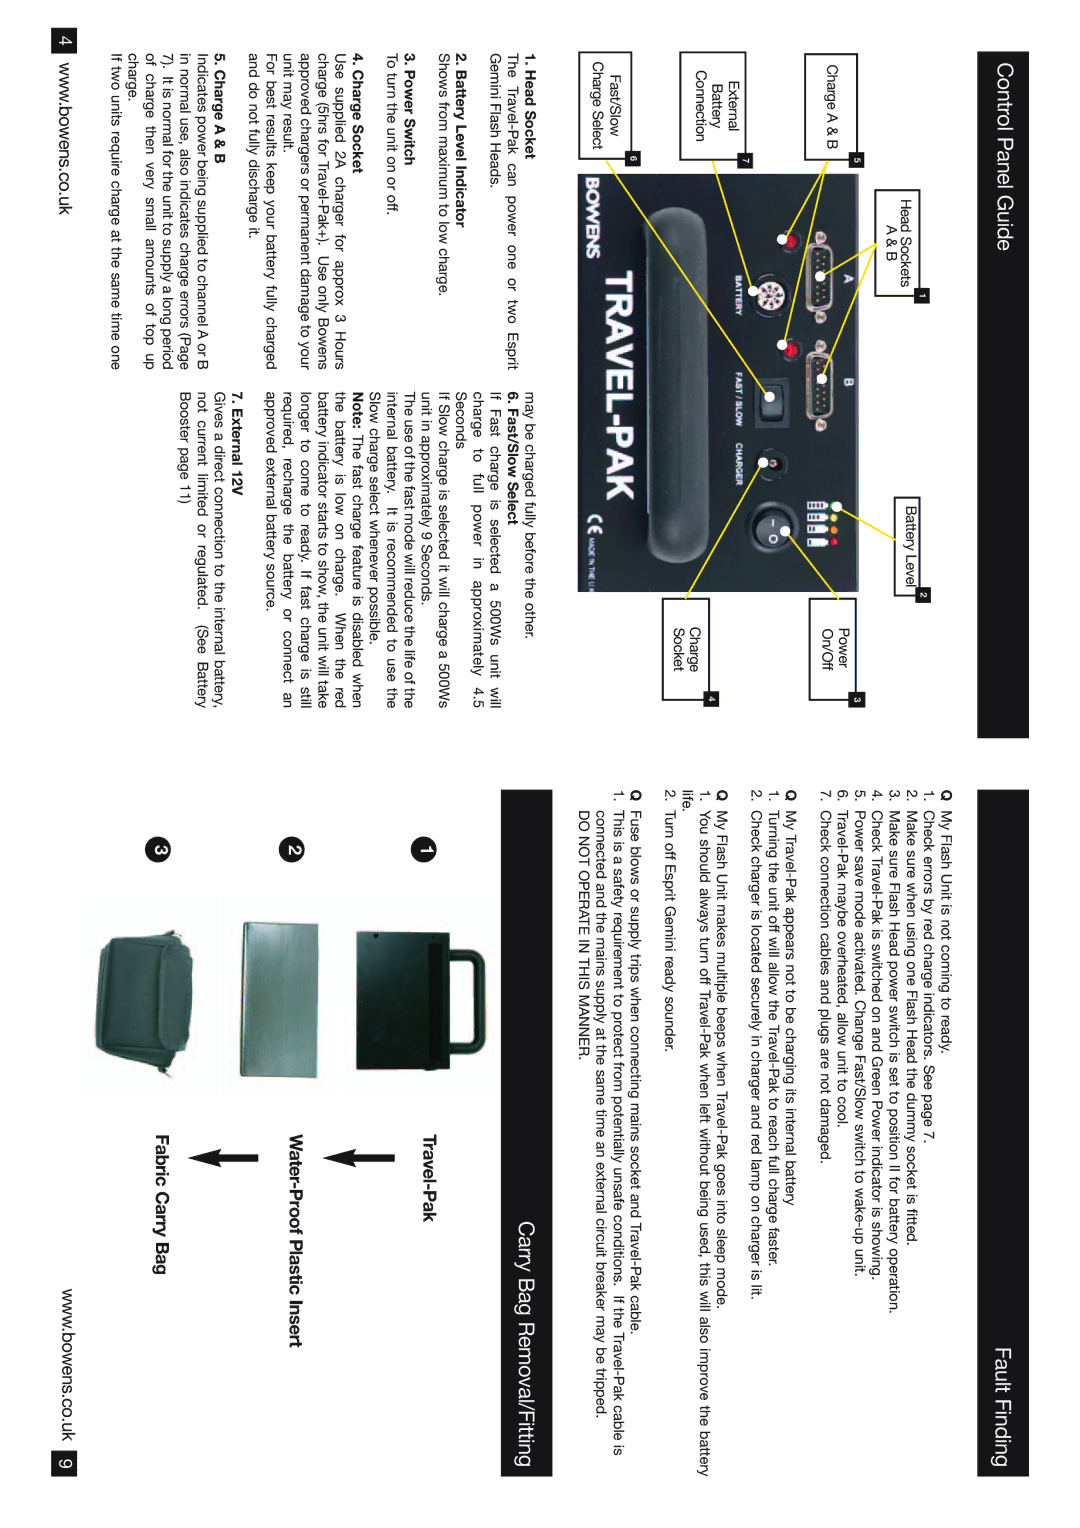
Control Panel Guide
Fault Finding
QMy Flash Unit is not coming to ready.
1
Head Sockets
A & B
5
Charge A & B
7
External
Battery
Connection
6
Fast/Slow
Charge Select
2
Battery Level
3
Power
On/Off
4
Charge
Socket
1.Check errors by red charge indicators. See page 7.
2.Make sure when using one Flash Head the dummy socket is fitted.
3.Make sure Flash Head power switch is set to position II for battery operation.
4.Check
5.Power save mode activated. Change Fast/Slow switch to
6.
7.Check connection cables and plugs are not damaged.
QMy
1.Turning the unit off will allow the
2.Check charger is located securely in charger and red lamp on charger is lit.
QMy Flash Unit makes multiple beeps when
1.You should always turn off
2.Turn off Esprit Gemini ready sounder.
QFuse blows or supply trips when connecting mains socket and
1.This is a safety requirement to protect from potentially unsafe conditions. If the
DO NOT OPERATE IN THIS MANNER.
1. Head Socket
The
2. Battery Level Indicator
Shows from maximum to low charge.
3. Power Switch
To turn the unit on or off.
4. Charge Socket
Use supplied 2A charger for approx 3 Hours charge (5hrs for
For best results keep your battery fully charged and do not fully discharge it.
5. Charge A & B
Indicates power being supplied to channel A or B in normal use, also indicates charge errors (Page 7). It is normal for the unit to supply a long period of charge then very small amounts of top up charge.
If two units require charge at the same time one
may be charged fully before the other.
6. Fast/Slow Select
If Fast charge is selected a 500Ws unit will charge to full power in approximately 4.5 Seconds
If Slow charge is selected it will charge a 500Ws unit in approximately 9 Seconds.
The use of the fast mode will reduce the life of the internal battery. It is recommended to use the Slow charge select whenever possible.
Note: The fast charge feature is disabled when the battery is low on charge. When the red battery indicator starts to show, the unit will take longer to come to ready. If fast charge is still required, recharge the battery or connect an approved external battery source.
7. External 12V
Gives a direct connection to the internal battery, not current limited or regulated. (See Battery Booster page 11)
Carry Bag Removal/Fitting
1 |
2 |
3 | Fabric Carry Bag |
4 | www.bowens.co.uk | www.bowens.co.uk | 9 |
