BOXLIGHT manual Lamp Replacement, BOXLIGHT CD-725c User’s Guide, Step Step Step Step

Models: CD-725c

1 33
Download 33 pages 56.4 Kb
Page 26
Image 26
Lamp Replacement

BOXLIGHT CD-725c User’s Guide

Lamp Replacement

Step 1 Caution

To reduce the risk of electrical shock, always turn off the projector and dis- connect the power cord before changing the lamp.

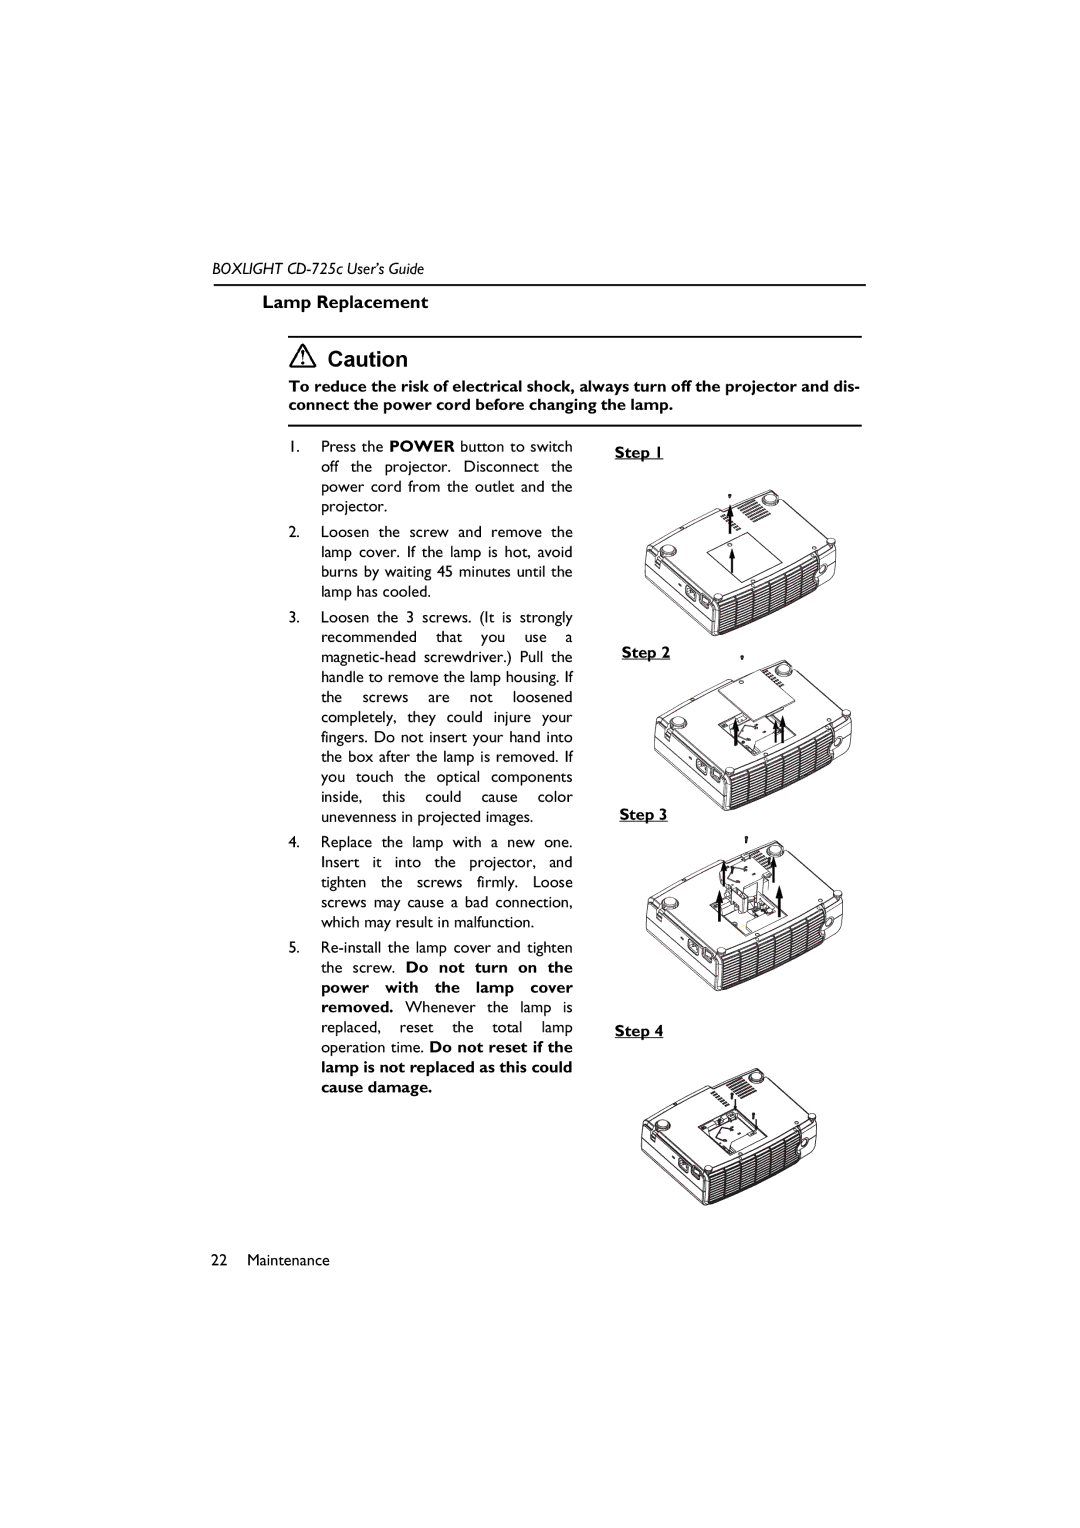
1.Press the POWER button to switch off the projector. Disconnect the power cord from the outlet and the projector.

2.Loosen the screw and remove the lamp cover. If the lamp is hot, avoid burns by waiting 45 minutes until the lamp has cooled.

3.Loosen the 3 screws. (It is strongly recommended that you use a magnetic-head screwdriver.) Pull the handle to remove the lamp housing. If the screws are not loosened completely, they could injure your fingers. Do not insert your hand into the box after the lamp is removed. If you touch the optical components inside, this could cause color unevenness in projected images.

4.Replace the lamp with a new one. Insert it into the projector, and tighten the screws firmly. Loose screws may cause a bad connection, which may result in malfunction.

5.Re-install the lamp cover and tighten the screw. Do not turn on the power with the lamp cover removed. Whenever the lamp is replaced, reset the total lamp operation time. Do not reset if the lamp is not replaced as this could cause damage.

Step 1

Step 2

Step 3

Step 4

22 Maintenance

Page 26
Image 26
BOXLIGHT manual Lamp Replacement, BOXLIGHT CD-725c User’s Guide, Step Step Step Step