BEFORE OPERATION
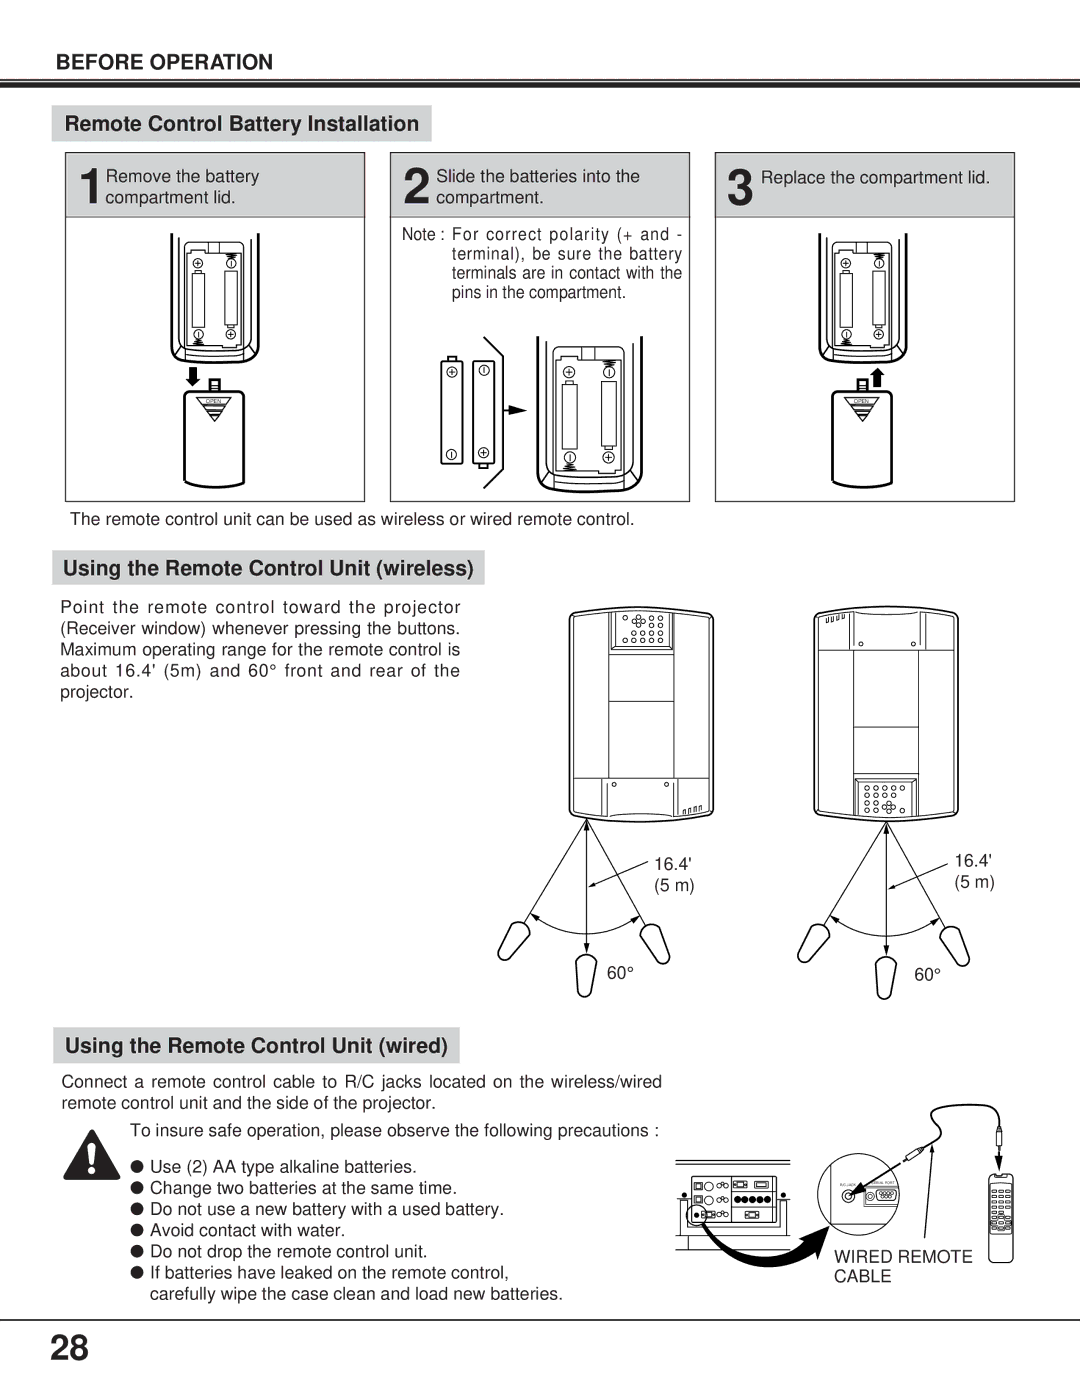
Remote Control Battery Installation
Remove the battery |
| Slide the batteries into the | ||||||||||
1compartment lid. |
| 2 compartment. | ||||||||||
|
|
|
|
|
|
|
|
|
|
|
| Note : For correct polarity (+ and - |
|
|
|
|
|
|
|
|
|
|
|
| terminal), be sure the battery |
|
|
|
|
|
|
|
|
|
|
|
| |
|
|
|
|
|
|
|
|
|
|
|
| |
|
|
|
|
|
|
|
|
|
|
|
| terminals are in contact with the |
|
|
|
|
|
|
|
|
|
|
|
| pins in the compartment. |
|
|
|
|
|
|
|
|
|
|
|
|
|
|
|
|
|
|
|
|
|
|
|
|
|
|
|
|
|
|
|
|
|
|
|
|
|
|
|
|
|
|
|
|
|
|
|
|
|
|
|
|
|
|
|
|
|
|
|
|
|
|
|
|
|
OPEN
3 Replace the compartment lid.
OPEN
The remote control unit can be used as wireless or wired remote control.
Using the Remote Control Unit (wireless)
Point the remote control toward the projector (Receiver window) whenever pressing the buttons. Maximum operating range for the remote control is about 16.4' (5m) and 60° front and rear of the projector.
16.4' (5 m)
60°
16.4' (5 m)
60°
Using the Remote Control Unit (wired)
Connect a remote control cable to R/C jacks located on the wireless/wired remote control unit and the side of the projector.
To insure safe operation, please observe the following precautions :
● Use (2) AA type alkaline batteries.
● Change two batteries at the same time. |
● Do not use a new battery with a used battery. |
● Avoid contact with water. |
● |
R/C JACK
SERIAL PORT
Do not drop the remote control unit. |
● If batteries have leaked on the remote control, |
carefully wipe the case clean and load new batteries. |
WIRED REMOTE CABLE
28
