
lap18eulba specifications
The Bretford LAP18EULBA is an innovative and versatile charging cart designed to meet the evolving needs of educational and professional environments. As organizations increasingly adopt mobile technology, the demand for efficient charging solutions has surged. The LAP18EULBA stands out with its thoughtful design and robust features, providing a reliable way to keep devices powered and organized.One of the main features of the LAP18EULBA is its ability to accommodate up to 18 devices simultaneously. This makes it ideal for classrooms, libraries, and offices where multiple devices, such as tablets and laptops, need to be charged at the same time. The cart includes adjustable dividers that can accommodate various device sizes, ensuring that both larger laptops and smaller tablets fit securely without risk of damage.
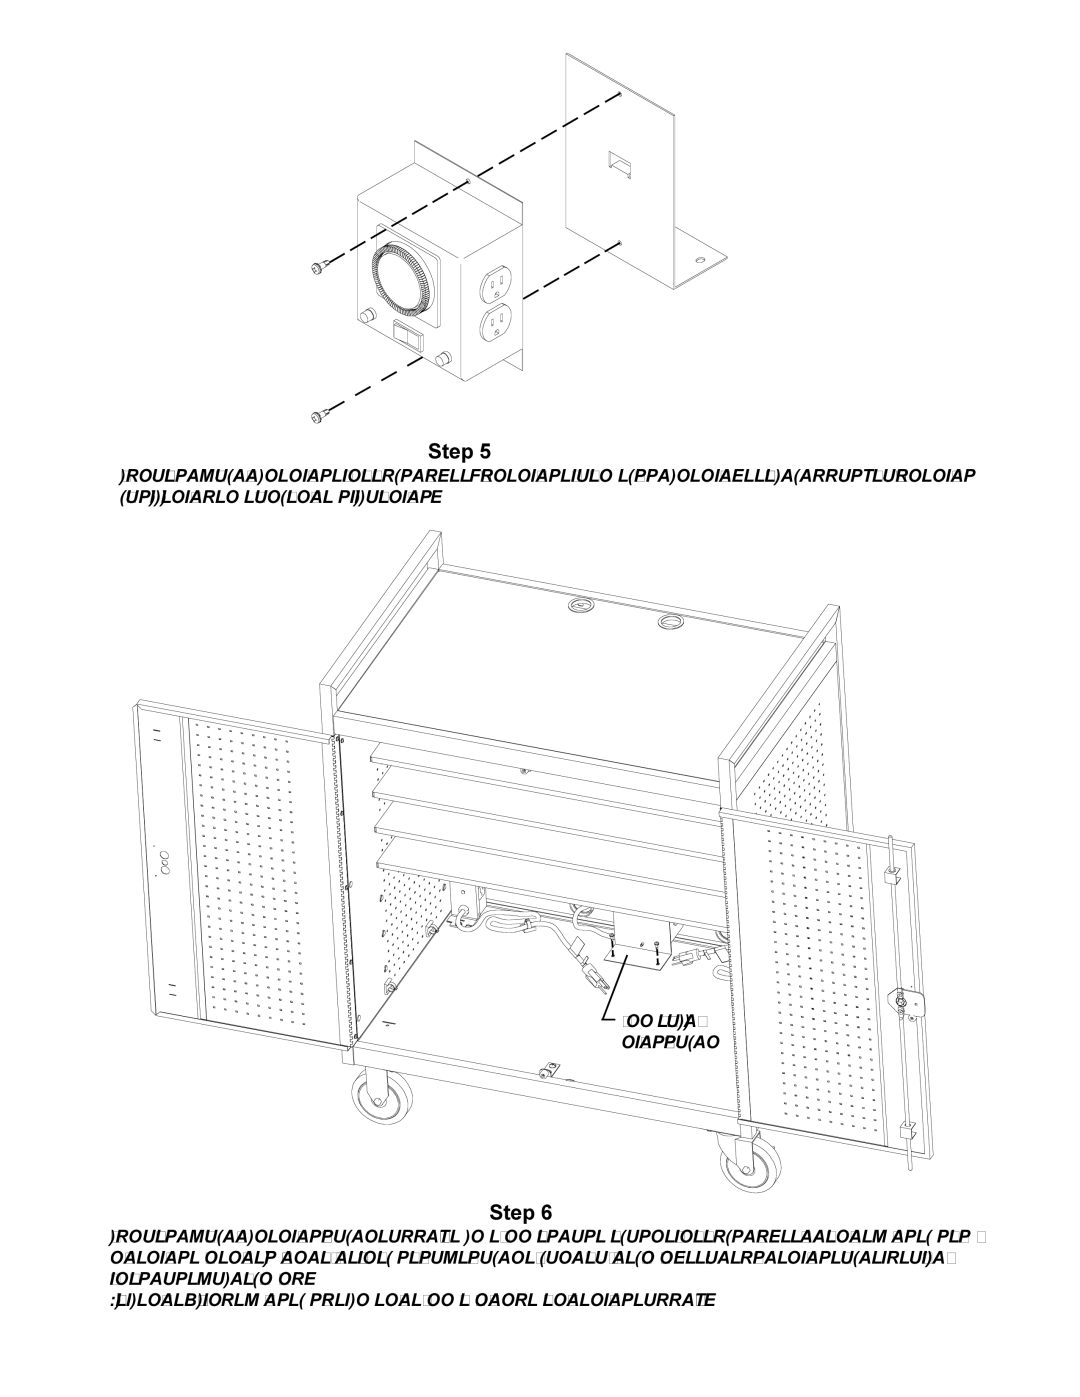
The LAP18EULBA incorporates advanced charging technologies, ensuring a safe and efficient charging experience. It is equipped with a built-in surge protector that safeguards devices from electrical fluctuations, a critical feature in preventing damage. Additionally, the cart supports smart charging, which automatically detects the power needs of each device and adjusts the charging output accordingly, fostering faster charging times while preventing overheating.
Portability is another key characteristic of the LAP18EULBA. With durable, locking casters, the cart can be easily moved from room to room, making it a flexible solution for dynamic environments. This mobility, combined with a sleek design and a neutral color palette, ensures that the cart integrates seamlessly into any setting.
The LAP18EULBA also boasts excellent organizational capabilities. It features a secure locking mechanism to protect devices, ensuring they remain safe when not in use. The open design includes cable management solutions that keep cords tangle-free and out of sight, contributing to a tidy workspace.
In conclusion, the Bretford LAP18EULBA charging cart is a comprehensive solution designed for the efficient management of multiple devices. Its user-friendly features, advanced charging technologies, and portability make it an essential tool for any modern educational or professional setting. With increased reliance on technology, the LAP18EULBA provides peace of mind while ensuring that devices are always ready for use.