
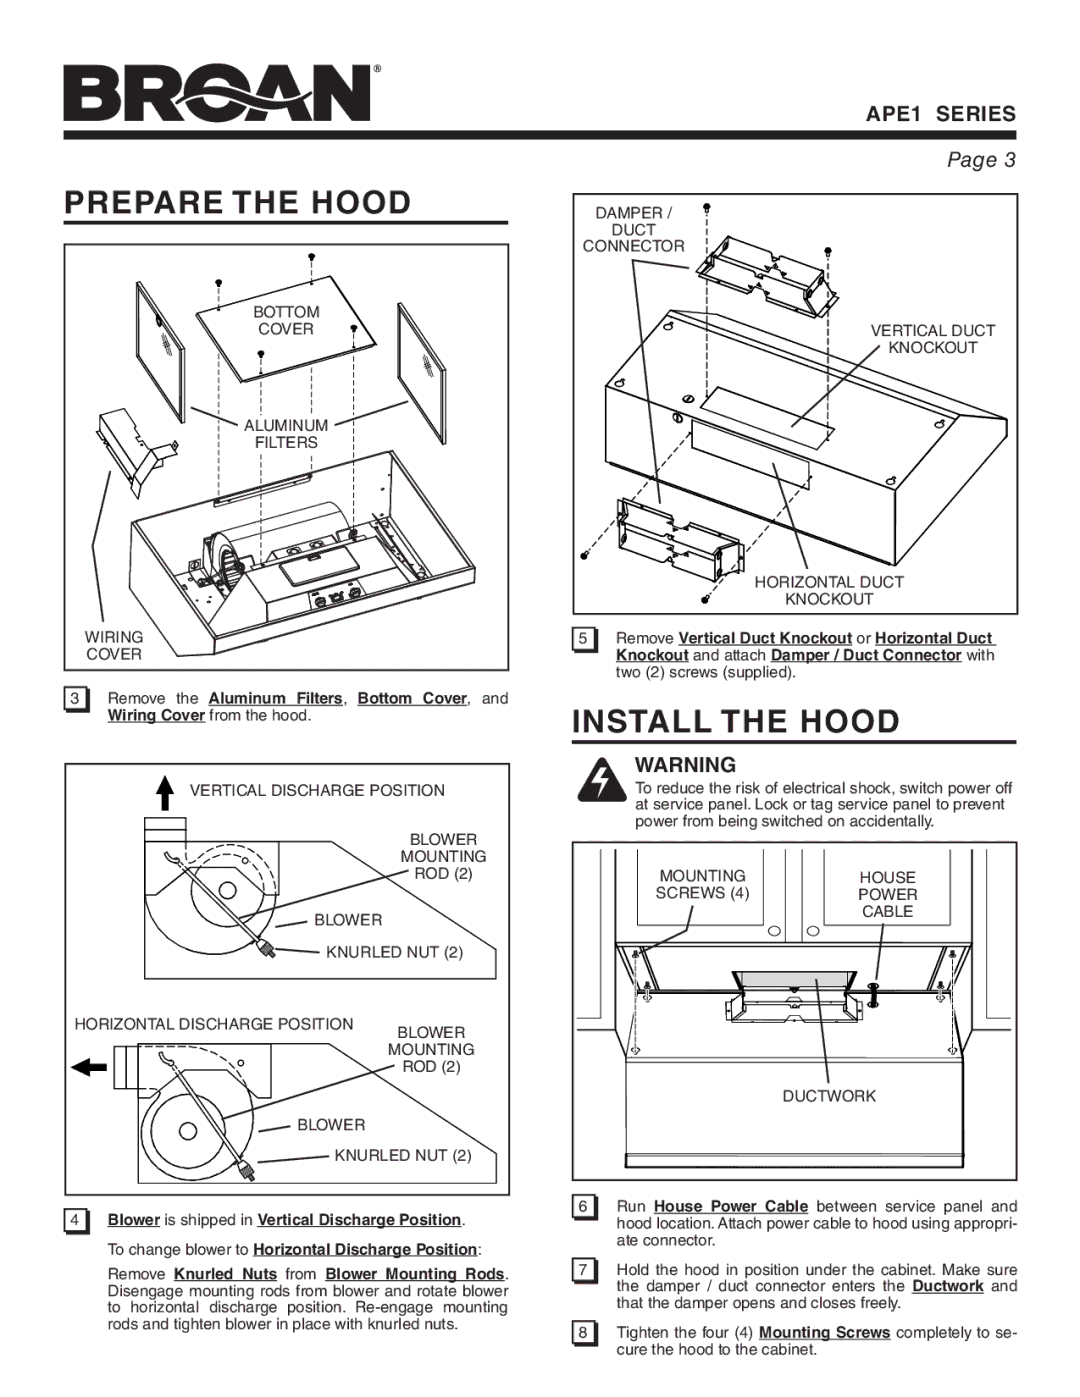
APE1 specifications
The Broan APE1 is a standout kitchen appliance designed to merge style with functionality, making it an essential addition to modern homes. This advanced range hood is engineered to enhance air quality while complementing contemporary kitchen aesthetics. One of the primary features of the Broan APE1 is its powerful ventilation system. It effectively removes smoke, odors, and airborne grease arising from cooking, ensuring that your kitchen remains fresh and inviting.Equipped with a robust motor, the APE1 offers multiple speed settings, allowing users to customize airflow according to cooking needs. The intuitive controls make it easy to switch between different speeds, ensuring optimal performance no matter the cooking scenario. In addition to its powerful performance, the Broan APE1 boasts an array of smart technologies aimed at enhancing the user experience. The built-in Bluetooth connectivity allows users to control the hood remotely via a smartphone app, making it convenient to adjust settings without interrupting cooking.
Energy efficiency is another hallmark of the Broan APE1. This model is designed with LED lighting that provides bright illumination over cooking surfaces while consuming minimal energy. The lights are not only practical but also add an elegant touch to the kitchen ambiance. Moreover, the APE1 features a dishwasher-safe aluminum mesh filter that captures grease effectively while being easy to clean, ensuring maintenance is quick and straightforward.
Another noteworthy characteristic of the Broan APE1 is its sleek design. Available in various finishes, it seamlessly integrates into different kitchen styles, from minimalist to traditional. The design prioritizes both performance and aesthetics, making it a true centerpiece in any cooking space.
The Broan APE1 also emphasizes quiet operation. Its engineering minimizes noise levels, allowing for a more enjoyable cooking experience without the distraction of loud fans. With its combination of style, efficiency, and advanced features, the Broan APE1 range hood is an excellent investment for anyone looking to elevate their kitchen's functionality while maintaining a chic look. Ideal for both culinary enthusiasts and casual cooks, the APE1 ensures that every cooking session is pleasant and problem-free.