
PE 150 specifications
The Brother PE 150 is a compact and versatile embroidery machine that caters to both beginners and experienced crafters alike. Launched as part of Brother's renowned line of embroidery equipment, the PE 150 stands out for its combination of user-friendly features and advanced technologies.One of the primary features of the Brother PE 150 is its built-in embroidery design library. The machine comes with 35 pre-installed designs, allowing users to start their embroidery projects right out of the box. Whether you are looking for floral patterns, cartoon characters, or intricate monograms, the versatility in design options makes it easy to find something that suits your project.
In addition to the built-in designs, the PE 150 allows for personalization and creativity. It supports multiple embroidery formats, enabling users to import their own designs via a compact flash memory card. This feature is particularly beneficial for those looking to expand their design choices and customize their projects. Users can easily modify designs on the machine's LCD display, where they can resize, rotate, and reposition the patterns to achieve the desired look.
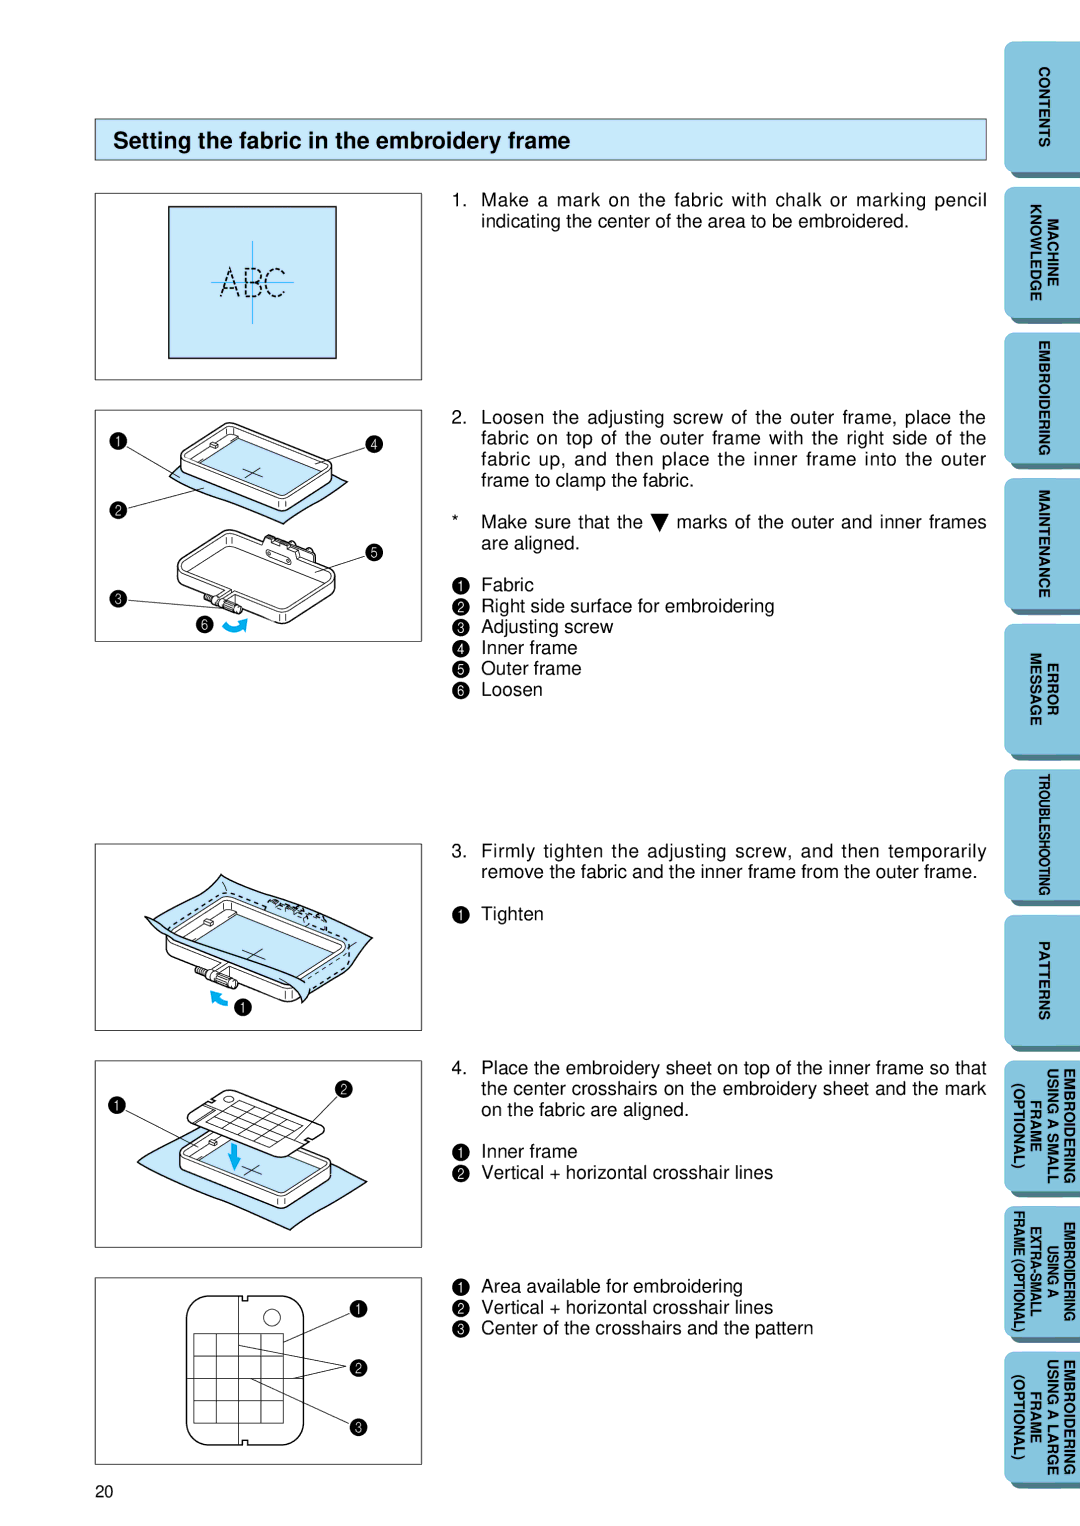
The PE 150 is equipped with a 4"x4" embroidery area, which provides ample space for various projects. This size is ideal for items such as shirts, hats, bags, and home decor. The machine also features an automatic needle threader, which takes the hassle out of preparing for embroidery, making it accessible for those who might be intimidated by traditional threading methods.
Another significant characteristic of the Brother PE 150 is its user-friendly interface. The control panel is intuitive, featuring clearly labeled buttons and an easy-to-read display that enables seamless navigation between functions. Additionally, the machine incorporates a quick-set bobbin system that simplifies the process of replacing and winding bobbins.
The Brother PE 150 employs advanced technology with its high-speed embroidery capabilities, capable of stitching at speeds up to 650 stitches per minute. This efficiency ensures that users can work quickly without sacrificing quality. Whether you are creating personalized gifts or home decor items, the precision and speed of this machine make it a valuable tool for any project.
In summary, the Brother PE 150 is an excellent choice for anyone looking to venture into the world of embroidery. Its combination of built-in designs, user-friendly features, and advanced technology makes it suitable for a wide range of users. Whether you are a novice or a seasoned embroiderer, the PE 150 is designed to inspire creativity and bring your embroidery visions to life.