
PT-1230PC specifications
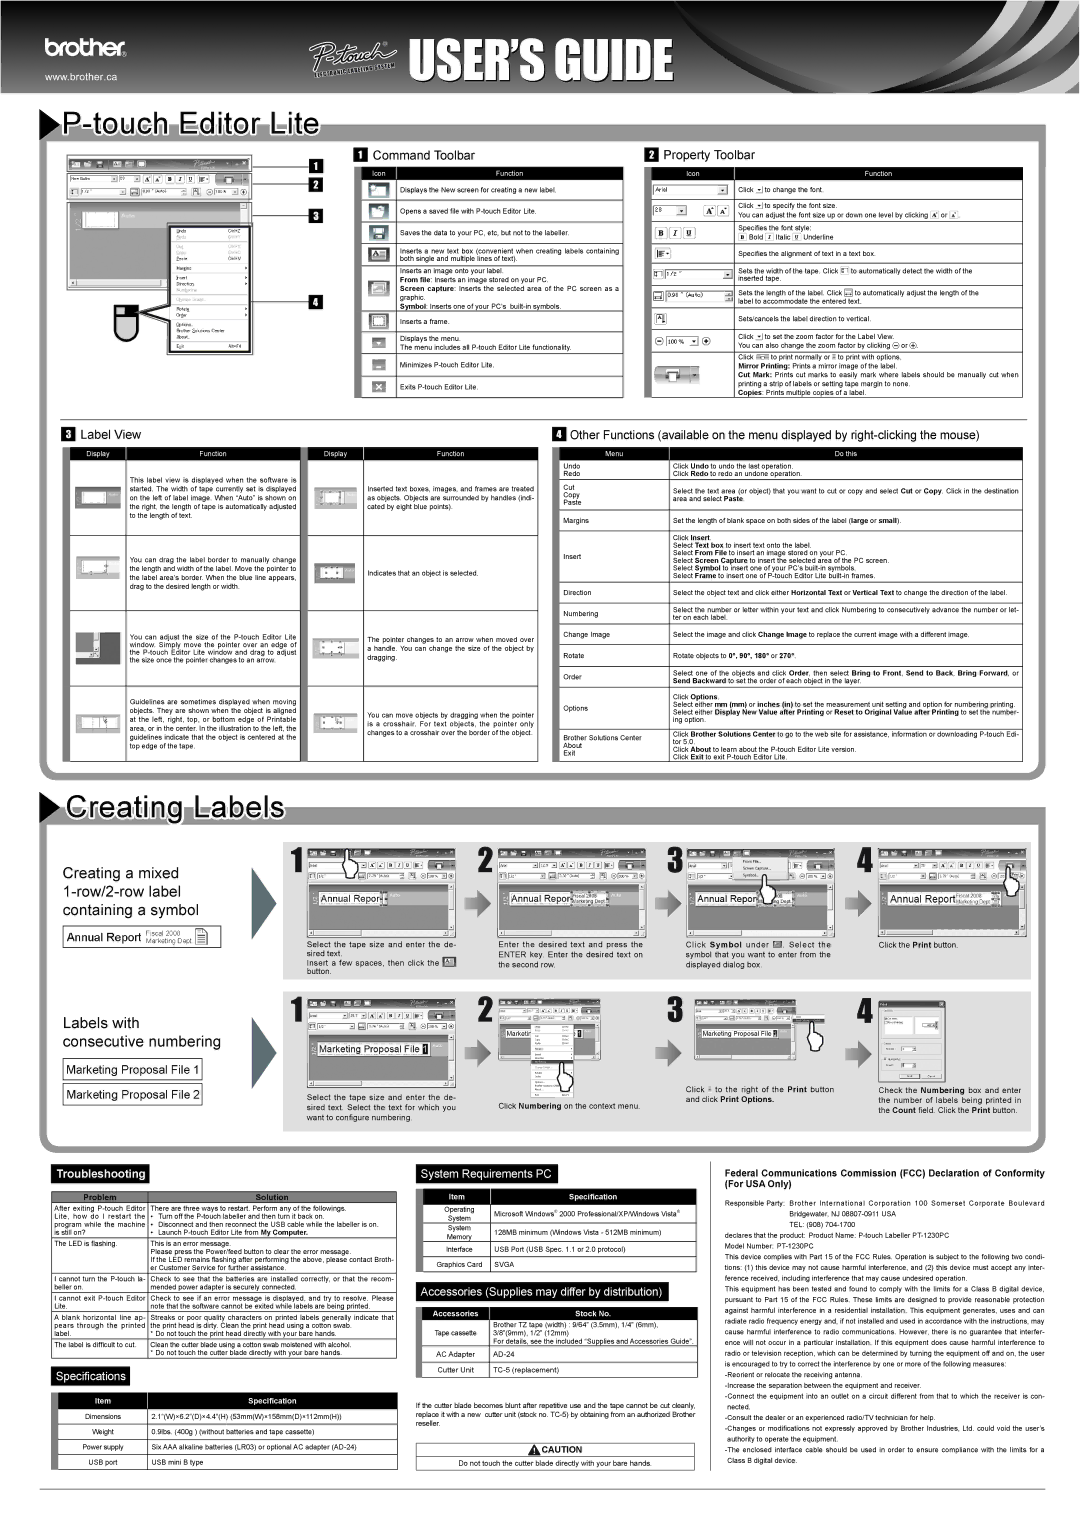
The Brother PT-1230PC is a sophisticated yet user-friendly label maker designed to meet a variety of labeling needs. Perfect for home, office, or school use, it combines efficient functionality with a sleek design ideal for both novice and experienced users.One of the standout features of the PT-1230PC is its seamless compatibility with Windows and Mac operating systems. Users can connect the device directly to a computer via USB, enabling them to create custom labels using the advanced Brother P-touch Editor software. This software offers a plethora of design options, including various fonts, frames, and symbols that allow for personalized creations tailored to any project.
In terms of printing technology, the Brother PT-1230PC uses direct thermal printing, which means it does not require ink or toner. Instead, it utilizes special thermal transfer labels that produce high-quality prints that are smudge-proof and water-resistant, ensuring durability under various conditions. The labels produced by this device are available in different sizes and colors, giving users the flexibility to choose the perfect label for their specific needs.
The compact design of the PT-1230PC is another significant advantage. Weighing merely 1.5 pounds, it is lightweight and easily portable, making it convenient for users who need to label items on the go. Despite its small size, the device boasts a full QWERTY keyboard, allowing for quick and efficient text input.
Among its key characteristics are the ability to create multi-line labels and the inclusion of a preview feature. The multi-line option enables users to print longer labels in a neat and organized manner, while the preview function ensures that the layout is correct before printing, minimizing waste and enhancing productivity.
Additionally, the PT-1230PC supports symbols and formatting options, providing ample creative freedom. Users can easily switch between different font styles and sizes, enabling customized label creation suitable for anything from organizational tasks at home to professional applications in the workplace.
In summary, the Brother PT-1230PC label maker combines advanced technology, user-friendly features, and elegant design to deliver an excellent labeling solution for a wide range of users. Its versatility and functionality make it an essential tool in today's digitally-driven environment, whether for personal or professional use.