Ultra 2, ULTRA-1 specifications
The Bunn ULTRA-1 is a state-of-the-art coffee brewing system designed for commercial use, offering an unmatched combination of speed, efficiency, and flavor extraction. This single-serve coffee brewer is tailored for businesses that require high-quality coffee brews in a fast-paced environment, such as cafes, restaurants, and office kitchens.One of the standout features of the Bunn ULTRA-1 is its ability to brew up to 14 different cup sizes, accommodating various customer preferences. This flexibility allows operators to serve everything from small espresso shots to larger coffee servings, making it a versatile addition to any beverage-serving establishment. At the heart of this brewing system is Bunn's patented brewing technology, which ensures precise water temperature and ideal brew time, optimizing the extraction process for a full-bodied flavor profile.
The ULTRA-1 is equipped with a large, easy-to-read LCD screen that provides real-time feedback, allowing users to monitor brewing progress, select cup sizes, and customize brewing parameters. This intuitive interface simplifies operation, reducing the learning curve for new staff members and enhancing overall efficiency during peak hours.
Another innovative aspect of the Bunn ULTRA-1 is its advanced thermal carafe system, which keeps brewed coffee at the optimal serving temperature without the need for a traditional warming plate. This technology helps preserve the coffee's rich flavor and aroma by preventing it from becoming bitter or stale due to prolonged exposure to heat.
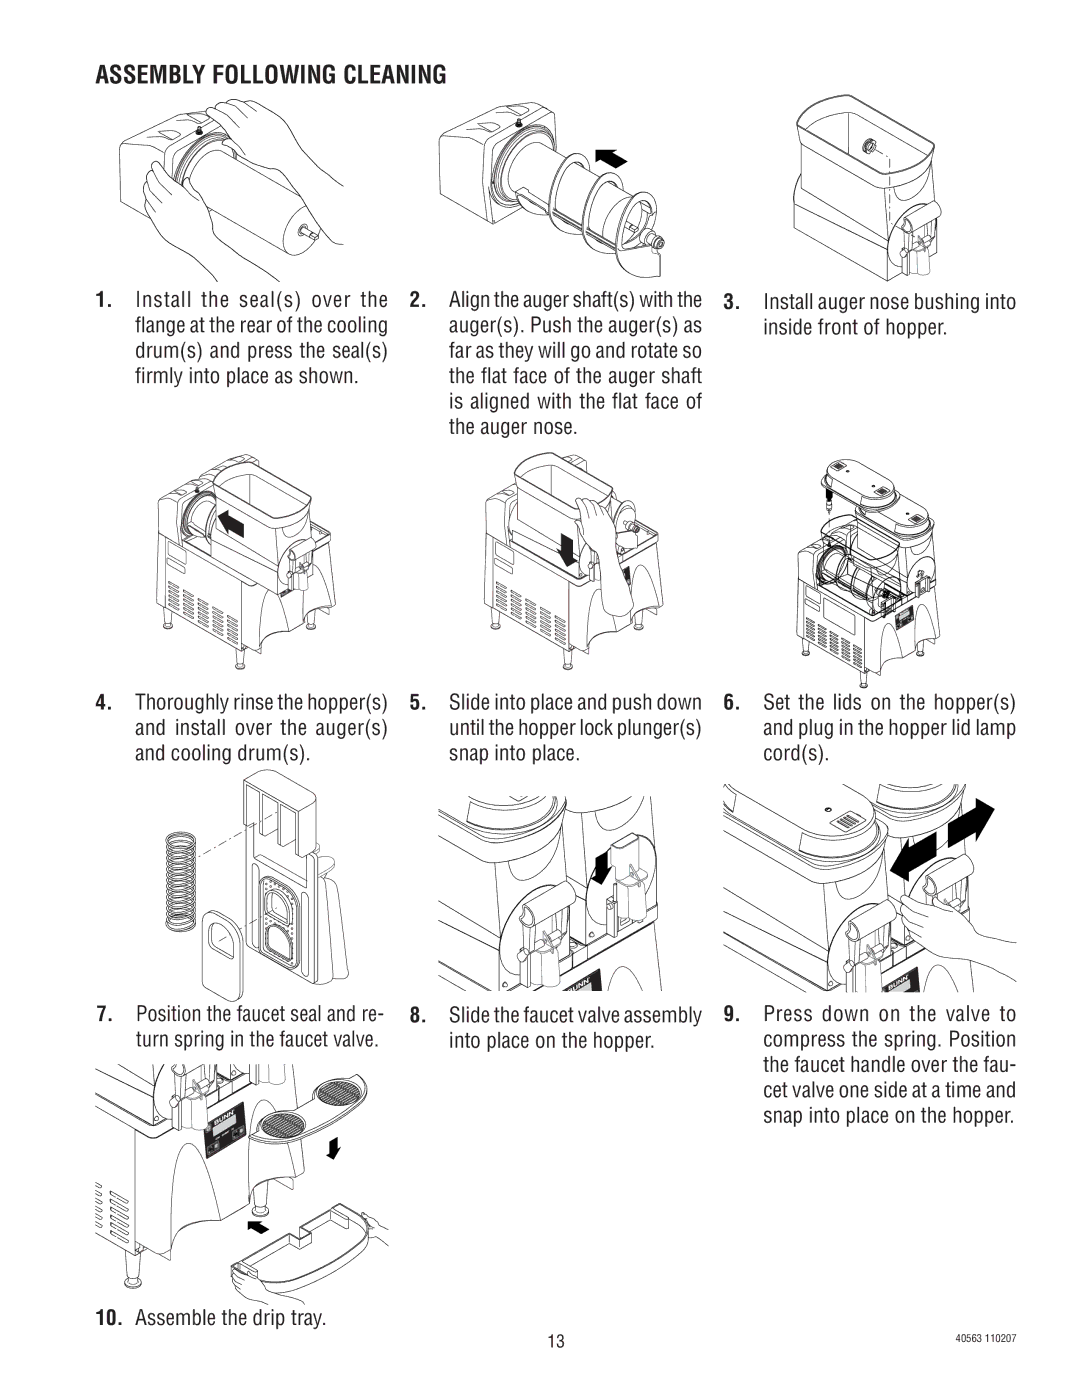
The ULTRA-1 emphasizes ease of maintenance with its removable brew chamber and drip tray, allowing for quick cleaning and routine upkeep. Additionally, the brewer features a self-diagnostic system, alerting operators to any potential issues, further minimizing downtime.
From its sleek design to its robust construction, the Bunn ULTRA-1 combines aesthetics and durability, making it a reliable choice for any coffee-centric business. The compact design ensures it can fit on counters without taking up excessive space, while its stainless steel components provide longevity and resistance to wear and tear.
In conclusion, the Bunn ULTRA-1 stands out in the crowded market of commercial coffee brewers due to its advanced technology, versatility, and user-friendly features. It is designed to meet the demands of modern coffee service while ensuring that every cup brewed meets the highest standards for taste and quality.

