
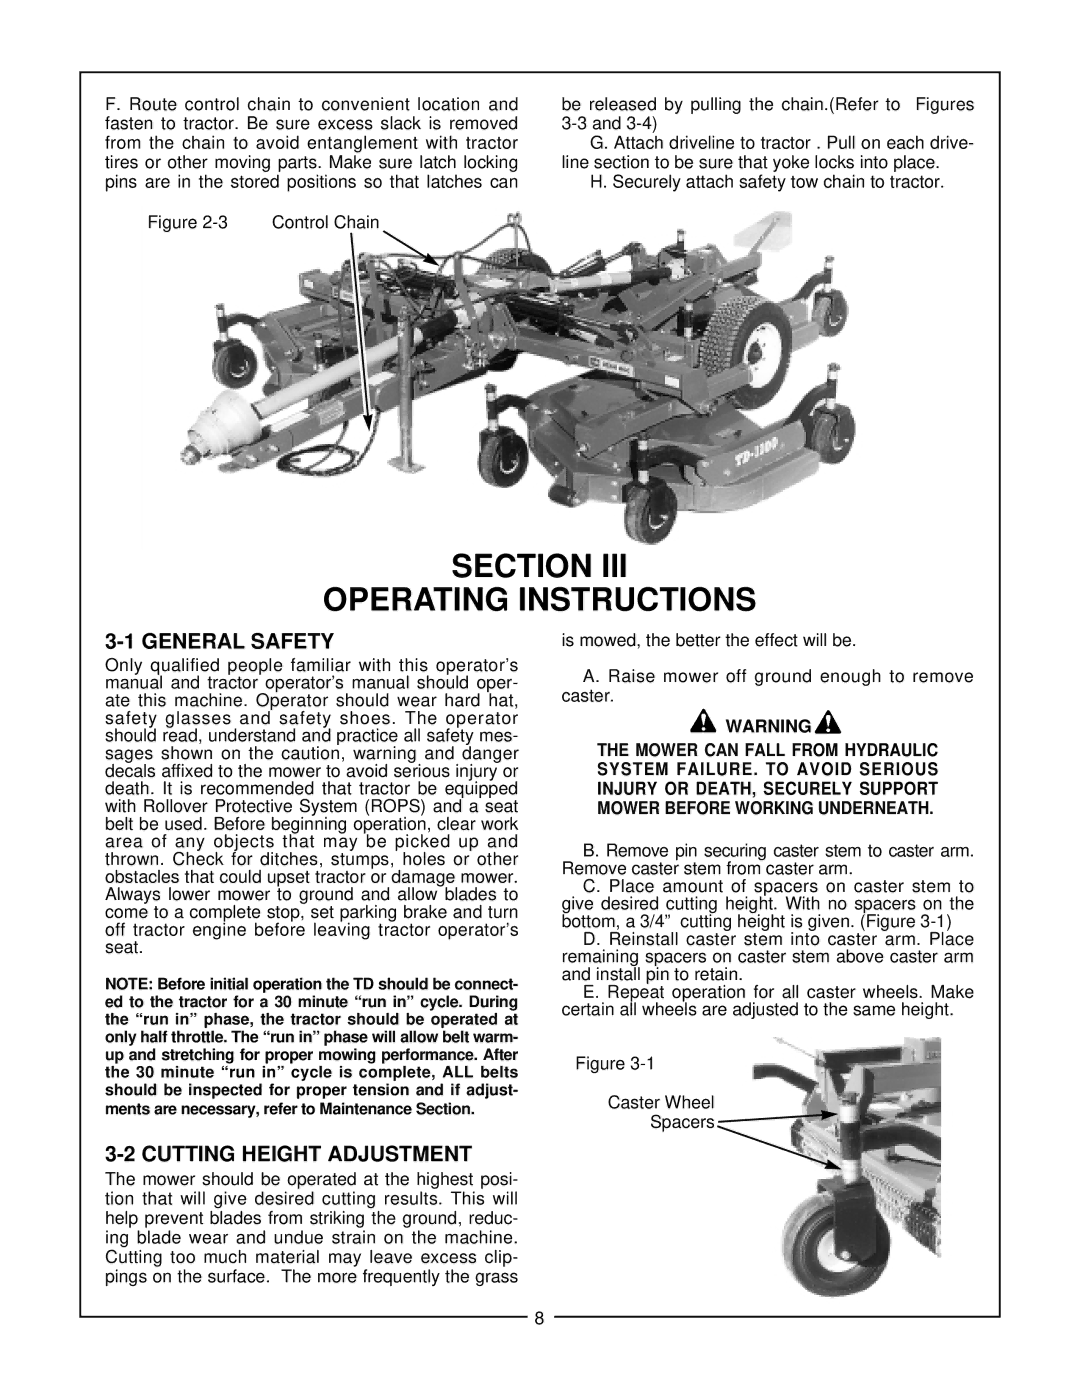
TD-1100 specifications
The Bush Hog TD-1100 is a versatile and powerful implement designed for agricultural and landscaping applications. Renowned for its robust construction and reliability, this rotary cutter is capable of handling a variety of vegetation types, making it an ideal choice for both professional and amateur land maintenance tasks.One of the standout features of the TD-1100 is its cutting width of 11 feet, which allows for efficient and thorough mowing of large areas in a single pass. This size not only enhances productivity but also ensures that users can cover more ground in less time. The machine is equipped with a heavy-duty, durable frame designed to withstand the rigors of tough field conditions, providing longevity and dependability for years of service.
Technologically, the Bush Hog TD-1100 incorporates a series of high-quality blades that offer a sharp and clean cut, reducing the likelihood of damage to the vegetation and promoting healthier plant growth. The blades are designed for easy replacement, ensuring that maintenance is straightforward and can be performed quickly. Additionally, its gearbox is built to handle high torque loads, delivering power efficiently from the tractor to the cutter, further enhancing cutting performance.
The TD-1100 features adjustable cutting height settings, allowing users to customize the height based on specific needs and conditions. This capability is particularly useful for managing different types of vegetation and achieving the desired finish. Furthermore, the rotary cutter comes equipped with safety features such as a shielded design and a slip clutch, ensuring safe operation even in challenging environments.
Another notable characteristic of the Bush Hog TD-1100 is its compatibility with a wide range of tractors. With a minimum horsepower requirement, it fits easily among various agricultural setups, making it accessible for a broader range of users.
Overall, the Bush Hog TD-1100 rotary cutter stands out as a reliable, effective, and user-friendly solution for those looking to maintain their landscapes efficiently. Its combination of durability, advanced technology, and practical features make it a top choice in the market for rotary cutters, whether for large farms or small hobby projects.
Investing in a Bush Hog TD-1100 ensures that users can tackle heavy-duty mowing tasks with confidence and ease, enhancing productivity and the overall appearance of their properties.