LCD display
1. ![]() High Quality Mode (less file compression)
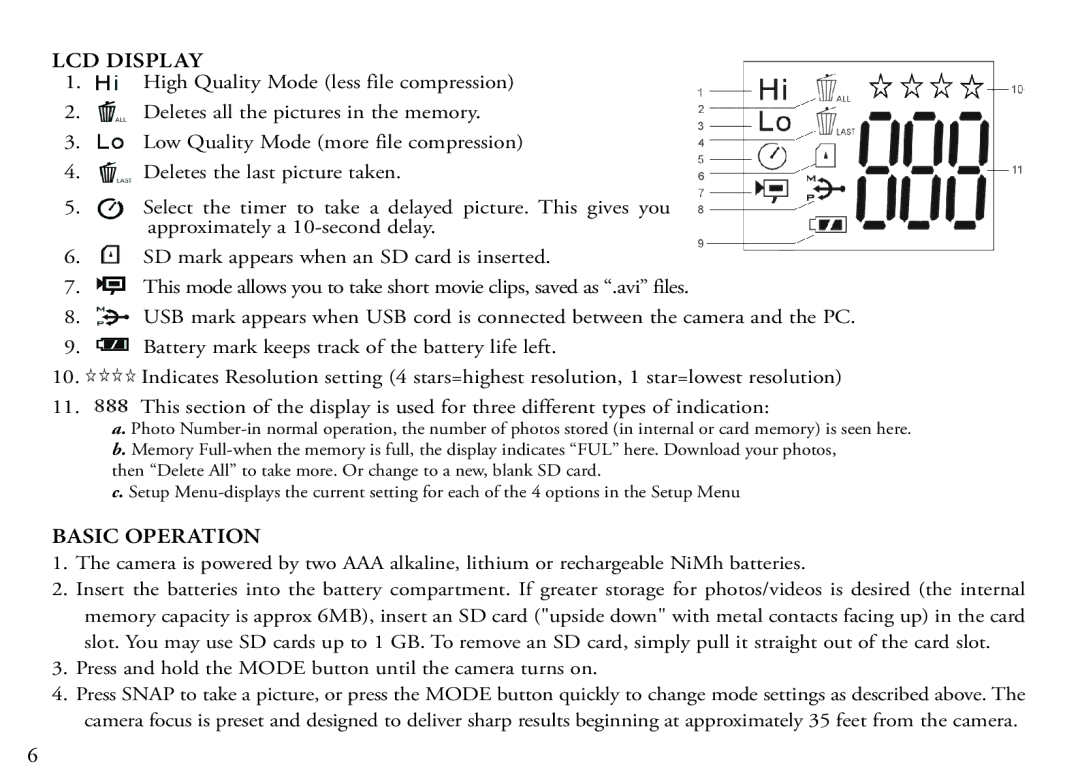
High Quality Mode (less file compression)
2.![]() Deletes all the pictures in the memory.
Deletes all the pictures in the memory.
3.![]() Low Quality Mode (more file compression)
Low Quality Mode (more file compression)
4.![]() Deletes the last picture taken.
Deletes the last picture taken.
5.Select the timer to take a delayed picture. This gives you approximately a
6.![]() SD mark appears when an SD card is inserted.
SD mark appears when an SD card is inserted.
7. This mode allows you to take short movie clips, saved as “.avi” files.
8.![]() USB mark appears when USB cord is connected between the camera and the PC.
USB mark appears when USB cord is connected between the camera and the PC.
9.![]() Battery mark keeps track of the battery life left.
Battery mark keeps track of the battery life left.
10.![]() Indicates Resolution setting (4 stars=highest resolution, 1 star=lowest resolution)
Indicates Resolution setting (4 stars=highest resolution, 1 star=lowest resolution)
11. ![]() This section of the display is used for three different types of indication:
This section of the display is used for three different types of indication:
a. Photo
then “Delete All” to take more. Or change to a new, blank SD card.
c. Setup
BASIC OPERATION
1.The camera is powered by two AAA alkaline, lithium or rechargeable NiMh batteries.
2.Insert the batteries into the battery compartment. If greater storage for photos/videos is desired (the internal memory capacity is approx 6MB), insert an SD card ("upside down" with metal contacts facing up) in the card slot. You may use SD cards up to 1 GB. To remove an SD card, simply pull it straight out of the card slot.
3.Press and hold the MODE button until the camera turns on.
4.Press SNAP to take a picture, or press the MODE button quickly to change mode settings as described above. The camera focus is preset and designed to deliver sharp results beginning at approximately 35 feet from the camera.
6