GETTING STARTED
OPERATIONAL SUMMARY
While looking through the Pro 1M™, depress the power button once to activate the Vivid Display. Place the aiming circle (located in the center of the field of view) upon a target at least 5 yards away, depress and hold the power button down until the range reading is displayed near the bottom of the
Note: Once activated, the display will remain active and display the last distance measurement for 10 seconds. You can depress the power button again at any time to distance to a new target. As with any laser device, it is not recommended to directly view the emissions for long periods of time with magnified lenses. The maximum time the laser is transmitted (fired) is 10 seconds. To
ADJUSTING THE EYEPIECE
Your Pro 1M™ is constructed with a
VIVID DISPLAY INDICATORS
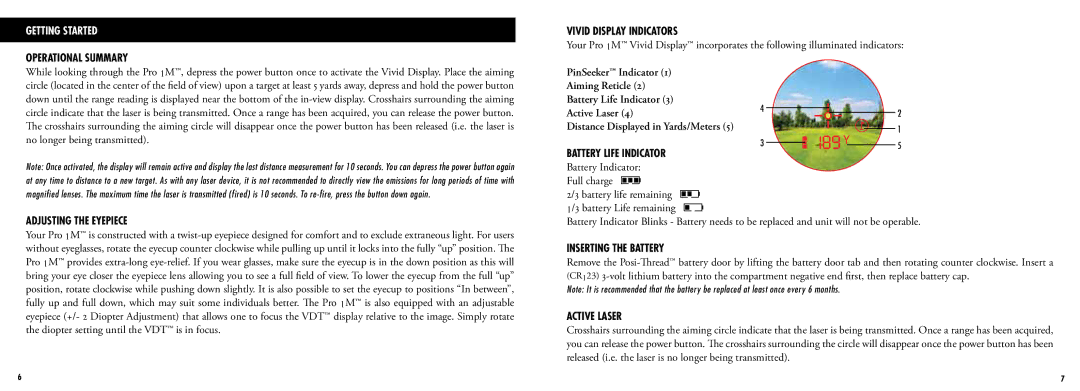
Your Pro 1M™ Vivid Display™ incorporates the following illuminated indicators:
PinSeeker™ Indicator (1)
Aiming Reticle (2)
Battery Life Indicator (3)
Active Laser (4) | 4 | 2 |
| ||
Distance Displayed in Yards/Meters (5) |
| 1 |
BATTERY LIFE INDICATOR | 3 | 5 |
|
|
Battery Indicator: Full charge ![]()
2/3 battery life remaining ![]()
![]() 1/3 battery Life remaining
1/3 battery Life remaining ![]()
![]()
Battery Indicator Blinks - Battery needs to be replaced and unit will not be operable.
INSERTING THE BATTERY
Remove the
Note: It is recommended that the battery be replaced at least once every 6 months.
ACTIVE LASER
Crosshairs surrounding the aiming circle indicate that the laser is being transmitted. Once a range has been acquired, you can release the power button. The crosshairs surrounding the circle will disappear once the power button has been released (i.e. the laser is no longer being transmitted).
6 | 7 |