
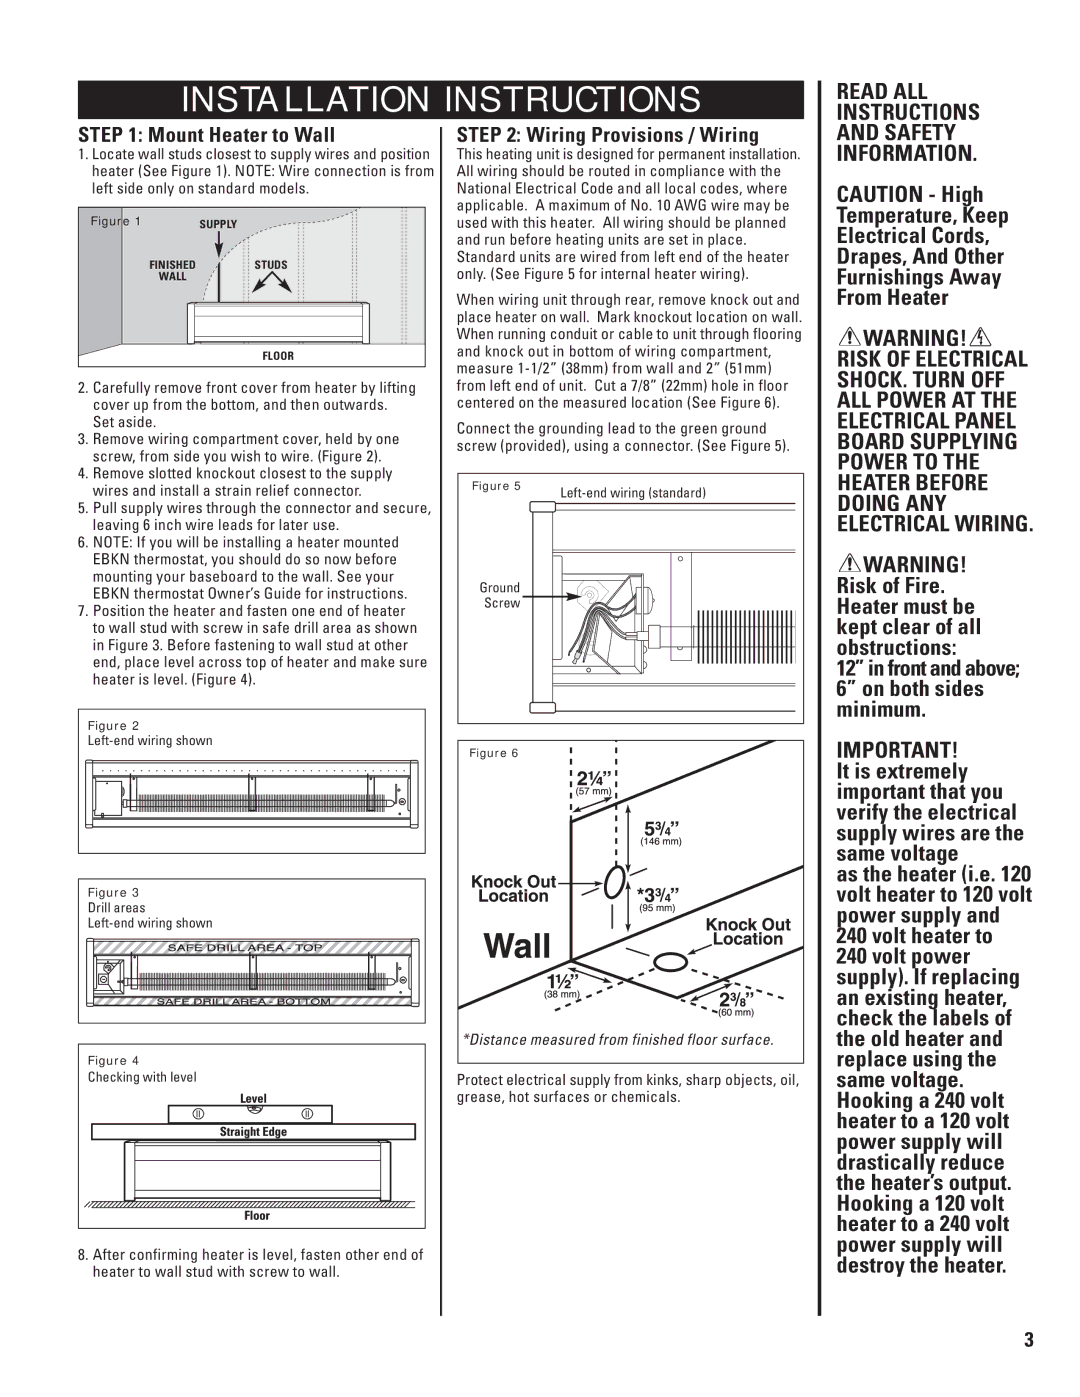
EBHN1000-8, EBHN1250-8, EBHN1000, EBHN1250, EBHN500 specifications
The Cadet series of heaters, including the EBHN1000, EBHN1500, EBHN500-8, EBHN750-8, and EBHN1250-8 models, showcases advanced heating technology ideal for residential and commercial applications. These electric wall heaters stand out for their energy efficiency, sleek design, and ease of installation, making them an excellent choice for any space seeking consistent, reliable warmth.The EBHN1000 model is engineered to provide ample heat for medium-sized rooms, with a power output of 1000 watts. Its built-in thermostat ensures optimal temperature control, providing comfort without unnecessary energy expenditure. This model features a durable steel construction that enhances its longevity while also being aesthetically pleasing, ensuring it blends seamlessly into any environment.
Moving to the EBHN1500, this unit elevates heating capabilities with a robust 1500-watt output. It caters especially well to larger areas or spaces with higher heating demands. Like its counterpart, it incorporates advanced thermostat technology for precise temperature management, enabling users to maintain their desired comfort level efficiently.
The EBHN500-8 and EBHN750-8 are designed for smaller spaces, providing 500 watts and 750 watts of heating power, respectively. These compact units are perfect for bedrooms, office spaces, or hallways, ensuring that even the coziest corners maintain a warm atmosphere. Both models come equipped with safety features such as thermal protection to prevent overheating, making them safe options for homes with children or pets.
Finally, the EBHN1250-8 combines versatility and performance with its 1250 watts capability, making it ideal for versatile uses. It features a modern design that is not only functional but also complements contemporary décor.
All models in the Cadet series incorporate the company's commitment to eco-friendly technology, designed to minimize energy consumption while maximizing heat output. Their whisper-quiet operation ensures that users enjoy a peaceful environment without disruptive noise. With easy installation and maintenance, the Cadet series heaters offer a seamless heating solution, making them a favored choice among homeowners and businesses alike.
In summary, the Cadet EBHN series represents a blend of advanced heating technology, efficiency, and safety features, making them a perfect solution for effective temperature control in any setting.