3B. Attaching Camera to Tripod or Stand
To mount the camera, attach the Focus Block (16) to your tripod or stand fitted with a 3/8” mounting thread. (NOTE: Use of a
NOTE: All “right” and “left” references in this in struction guide are made from standing behind the camera.
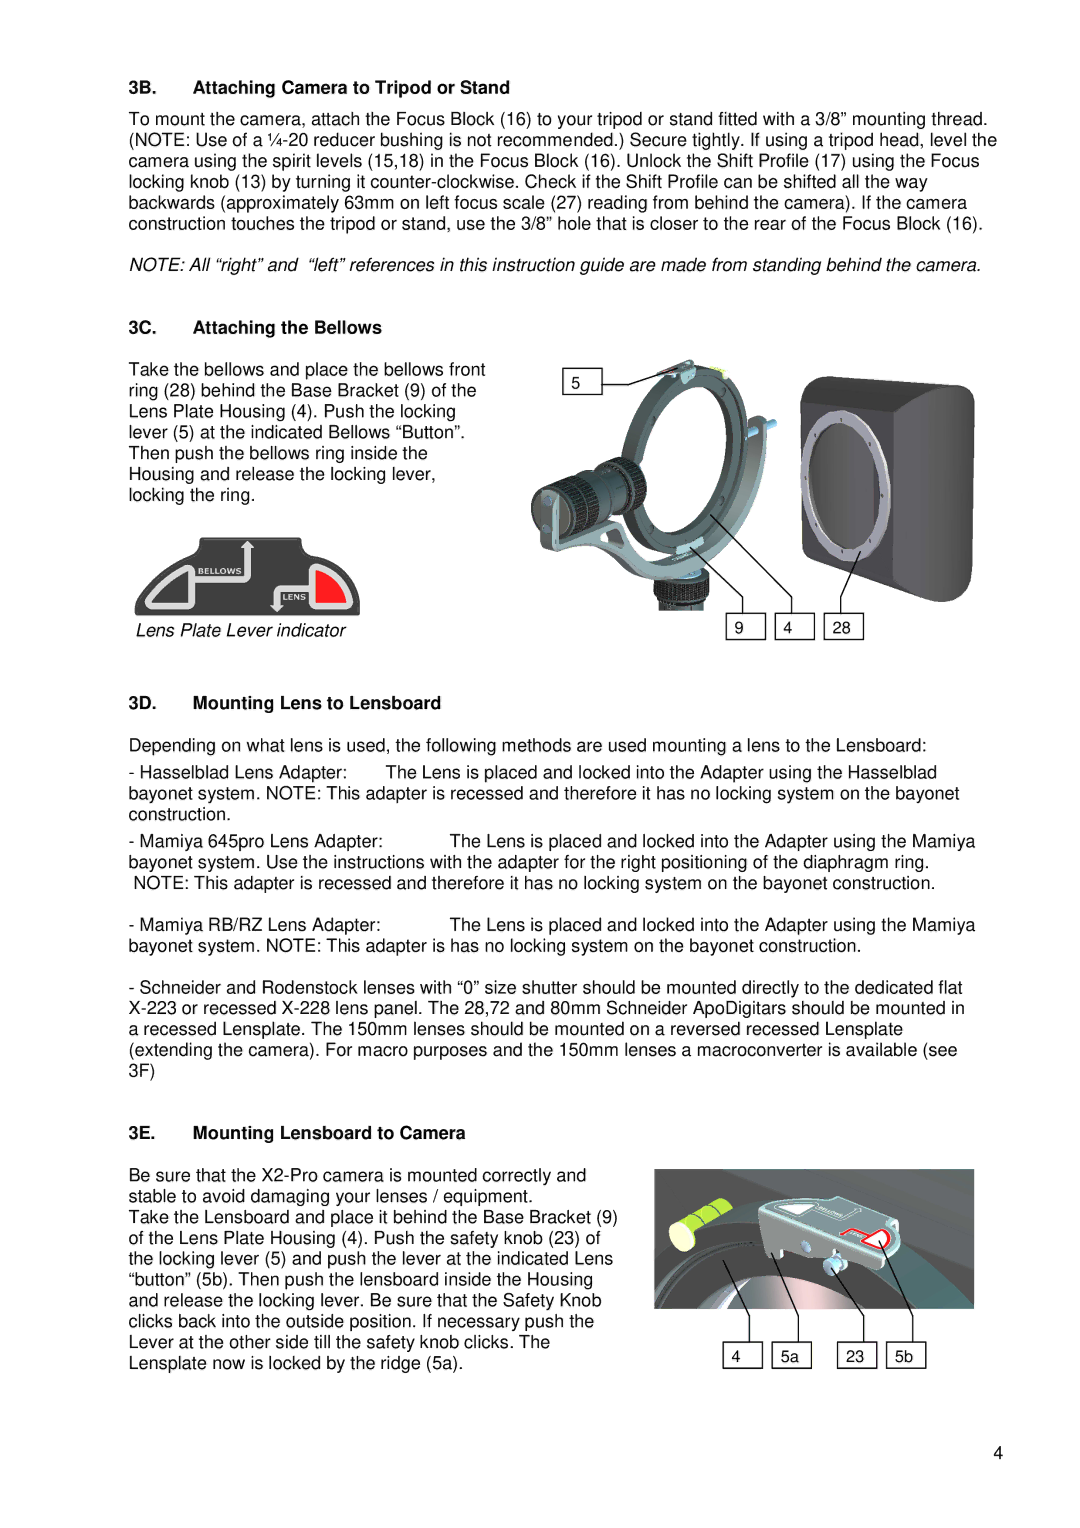
3C. Attaching the Bellows
Take the bellows and place the bellows front ring (28) behind the Base Bracket (9) of the Lens Plate Housing (4). Push the locking lever (5) at the indicated Bellows “Button”. Then push the bellows ring inside the Housing and release the locking lever, locking the ring.
5
Lens Plate Lever indicator
9
4
28
3D. Mounting Lens to Lensboard
Depending on what lens is used, the following methods are used mounting a lens to the Lensboard:
- Hasselblad Lens Adapter: The Lens is placed and locked into the Adapter using the Hasselblad
bayonet system. NOTE: This adapter is recessed and therefore it has no locking system on the bayonet construction.
- Mamiya 645pro Lens Adapter: | The Lens is placed and locked into the Adapter using the Mamiya |
bayonet system. Use the instructions with the adapter for the right positioning of the diaphragm ring. | |
NOTE: This adapter is recessed and therefore it has no locking system on the bayonet construction. | |
- Mamiya RB/RZ Lens Adapter: | The Lens is placed and locked into the Adapter using the Mamiya |
bayonet system. NOTE: This adapter is has no locking system on the bayonet construction.
-Schneider and Rodenstock lenses with “0” size shutter should be mounted directly to the dedicated flat
3E. Mounting Lensboard to Camera
Be sure that the
Take the Lensboard and place it behind the Base Bracket (9) of the Lens Plate Housing (4). Push the safety knob (23) of the locking lever (5) and push the lever at the indicated Lens “button” (5b). Then push the lensboard inside the Housing and release the locking lever. Be sure that the Safety Knob clicks back into the outside position. If necessary push the Lever at the other side till the safety knob clicks. The Lensplate now is locked by the ridge (5a).
4
5a
23
5b
4