
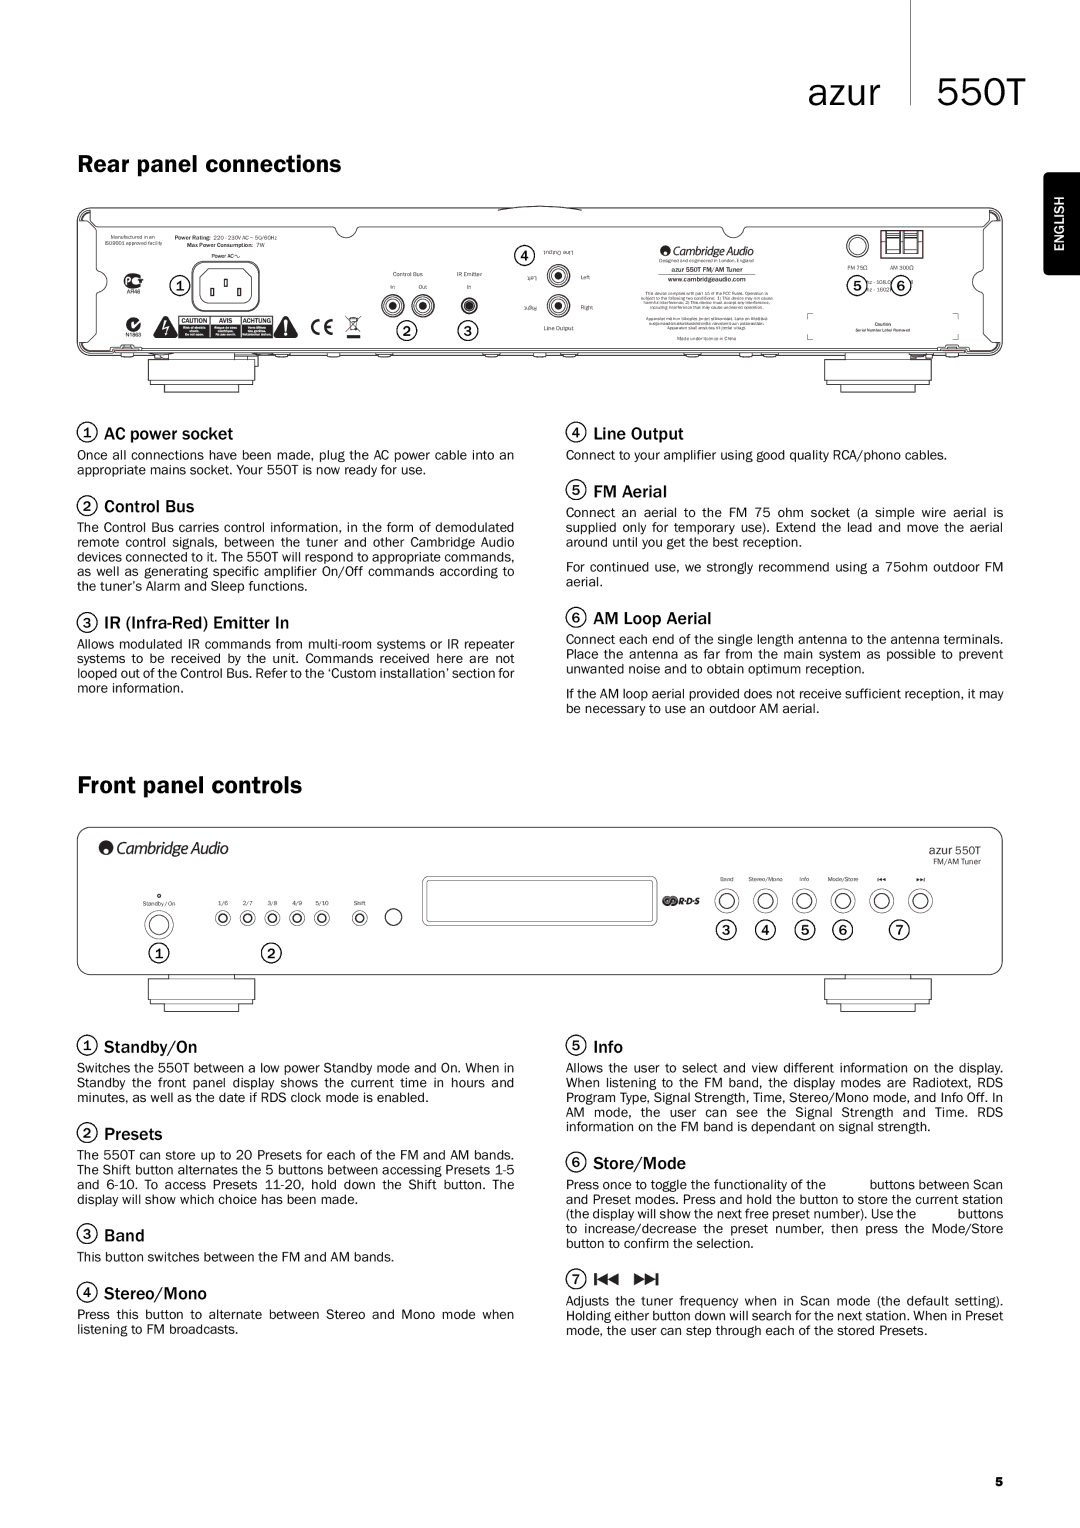
550T specifications
The Cambridge Audio 550T is a powerful, high-performance FM/DAB radio tuner designed to enhance your audio listening experience. With its sleek design and modern features, the 550T is an ideal addition to any home audio system, especially for those who appreciate the richness of radio broadcasts.One of the standout features of the 550T is its exceptional digital signal processing. The tuner utilizes advanced technologies to ensure superior audio quality and clarity, delivering a listening experience that rivals digital streaming. This technology also enhances weak signals, allowing you to enjoy a wider range of stations without interruptions, making it suitable for both urban and rural environments.
The 550T supports both FM and DAB/DAB+ bands, providing access to a vast array of radio stations. With DAB, listeners can enjoy the benefits of digital radio, such as improved sound quality, more channel choices, and additional information such as song titles and artist names displayed on the screen. The tuner also has a built-in memory which enables users to store their favorite stations for quick access, making it convenient to switch between channels.
Another significant characteristic of the 550T is its user-friendly interface. The large, clear display provides easy navigation through various settings and stations, enhancing the overall user experience. The tuner features an intuitive remote control, allowing you to manage your listening experience from a distance without hassle.
Additionally, the Cambridge Audio 550T is designed with connectivity in mind. It includes both digital and analog outputs, allowing seamless integration with a range of audio systems. The digital output ensures minimal signal degradation, while the analog output is perfect for compatibility with traditional audio setups.
The build quality of the 550T reflects Cambridge Audio's commitment to excellence. The robust construction not only contributes to its longevity but also minimizes interference, ensuring clear sound reproduction.
Overall, the Cambridge Audio 550T is a versatile and high-quality tuner that blends advanced technology with ease of use. Ideal for anyone who appreciates radio as a source of entertainment and information, the 550T embodies the perfect balance of traditional radio and modern audio technology. Whether you're tuning into your favorite music station or catching the latest news, the 550T will deliver a listening experience that meets and exceeds expectations.