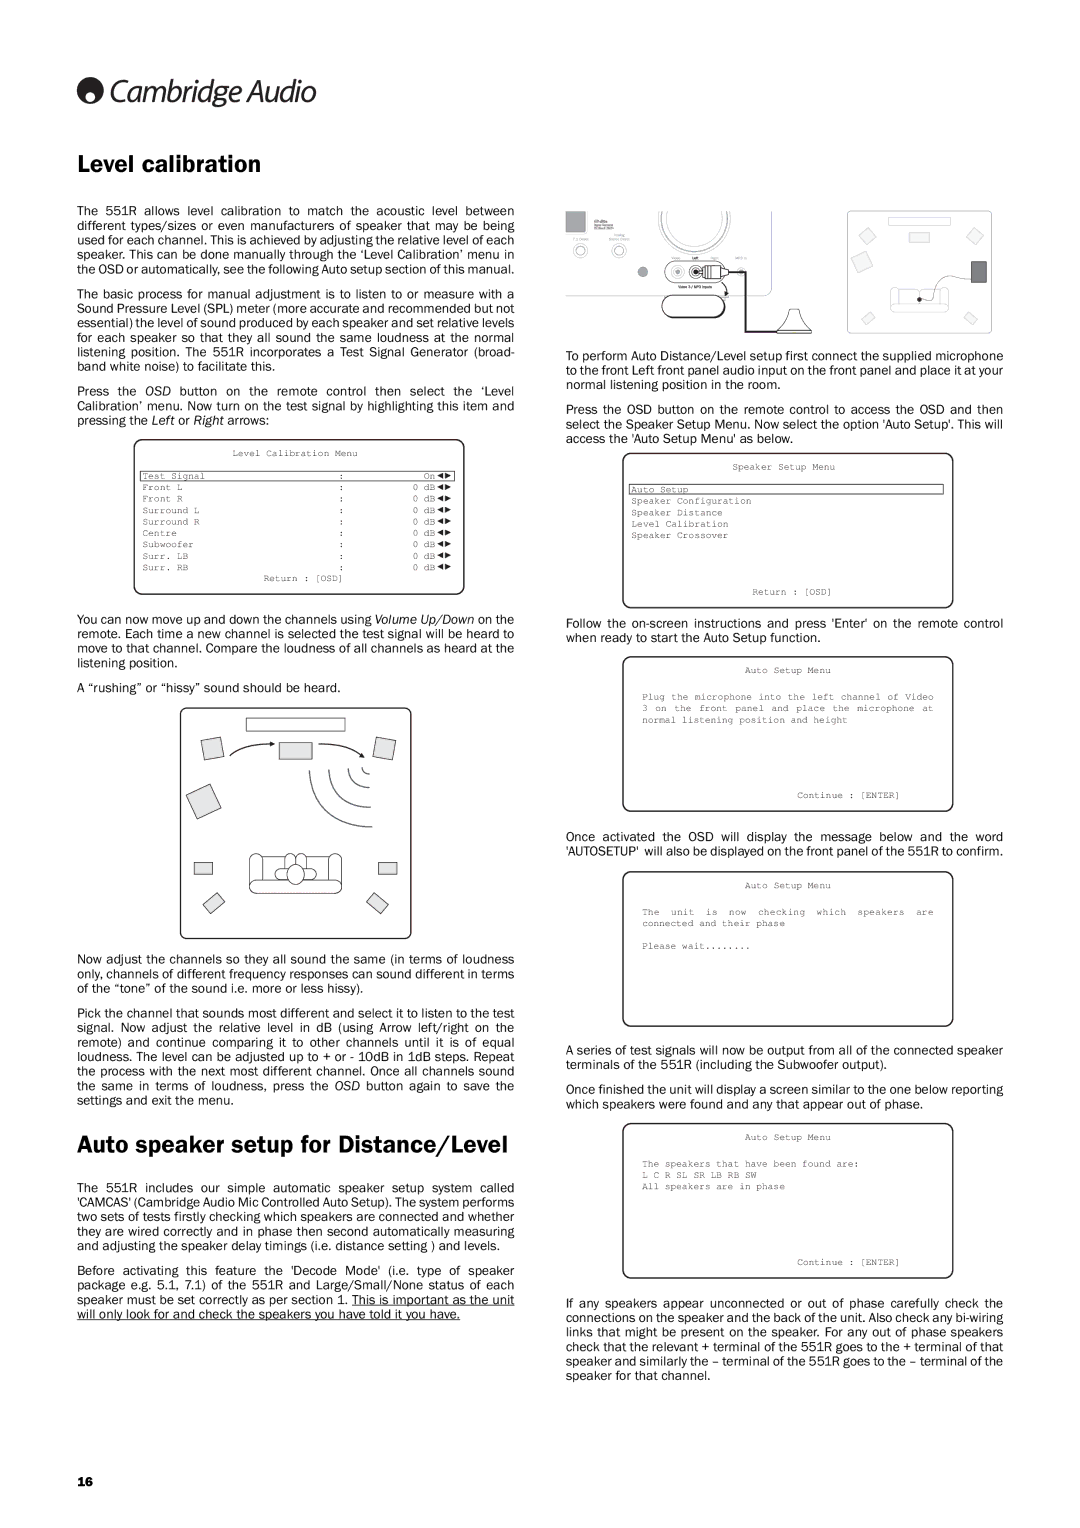
551R specifications
The Cambridge Audio 551R is a versatile and sophisticated A/V receiver that stands out in its class, designed for audiophiles and home theater enthusiasts alike. Combining cutting-edge technology with elegant design, the 551R delivers a remarkable audio-visual experience.At the heart of the 551R is its robust amplification system, which offers 100 watts per channel across seven channels. This provides ample power to drive a wide variety of speakers, ensuring dynamic sound across all listening levels. The receiver features a high-quality digital signal processing unit that enhances audio performance while accommodating the latest high-definition formats.
One of the standout features of the Cambridge Audio 551R is its extensive connectivity options. With multiple HDMI inputs, the 551R allows for seamless integration with various devices, such as Blu-ray players, gaming consoles, and streaming devices. The HDMI inputs support 3D video and 4K pass-through, ensuring compatibility with modern home entertainment systems. Additionally, it includes multiple digital and analog inputs, allowing users to connect traditional audio sources.
The 551R employs a sophisticated user interface, complete with an intuitive on-screen display. This makes navigating through settings and configurations effortless, even for those who may not be tech-savvy. The receiver also comes with a remote control that offers convenient access to essential functions.
Cambridge Audio places high importance on sound quality, and the 551R is no exception. Its premium components, including a high-grade DAC (Digital to Analog Converter) and carefully selected capacitors, contribute to achieving an exceptionally clean and natural sound signature. The receiver also offers various sound modes and equalization settings, which allow users to tailor the audio output to their room’s acoustics and personal preferences.
Another key characteristic is the inclusion of advanced video processing technologies. The 551R can upscale standard video sources to near-HD quality, enhancing the overall viewing experience. This is especially beneficial for older content or lower-resolution media, allowing users to make the most of their display’s capabilities.
In summary, the Cambridge Audio 551R A/V receiver is a powerful and versatile product that brings together exceptional sound quality, extensive connectivity options, and user-friendly functionality. Whether for music appreciation or cinematic experiences, the 551R is designed to satisfy the most discerning audio and video aficionados, making it an excellent choice for any home entertainment setup.