640Razur specifications
The Cambridge Audio 640R is a high-fidelity AV receiver that has gained recognition for its remarkable performance and sophisticated features. Engineered to deliver a premium audio experience, this receiver excels in both music and home theater applications.One of the standout features of the 640R is its ability to handle a wide range of audio formats. With support for advanced surround sound formats such as Dolby TrueHD and DTS-HD Master Audio, the receiver is capable of producing high-definition audio that enhances the clarity and detail of films and music. The 640R also supports standard formats like Dolby Digital and DTS, making it highly versatile.
At the heart of the 640R is Cambridge Audio's proprietary components, including high-quality capacitors and resistors, designed to minimize noise and distortion. This ensures that the audio output remains clean and transparent, providing a true representation of the source material. The receiver offers a robust power output, ensuring effortless dynamic range and delivering impactful sound, whether it's a subtle dialogue or explosive action scenes.
Another key feature of the Cambridge Audio 640R is its extensive connectivity options. It boasts multiple HDMI inputs, allowing users to connect various devices such as Blu-ray players, gaming consoles, and streaming devices. Additionally, the receiver supports HDMI video scaling, enabling the upscaling of standard definition signals to 1080p, which enhances the viewing experience on high-definition screens.
The 640R also includes multiple analog and digital inputs, ensuring compatibility with legacy devices alongside modern technology. A dedicated preamp output allows for the addition of external amplifiers, enhancing the system's scalability for audiophiles looking to create a bespoke setup.
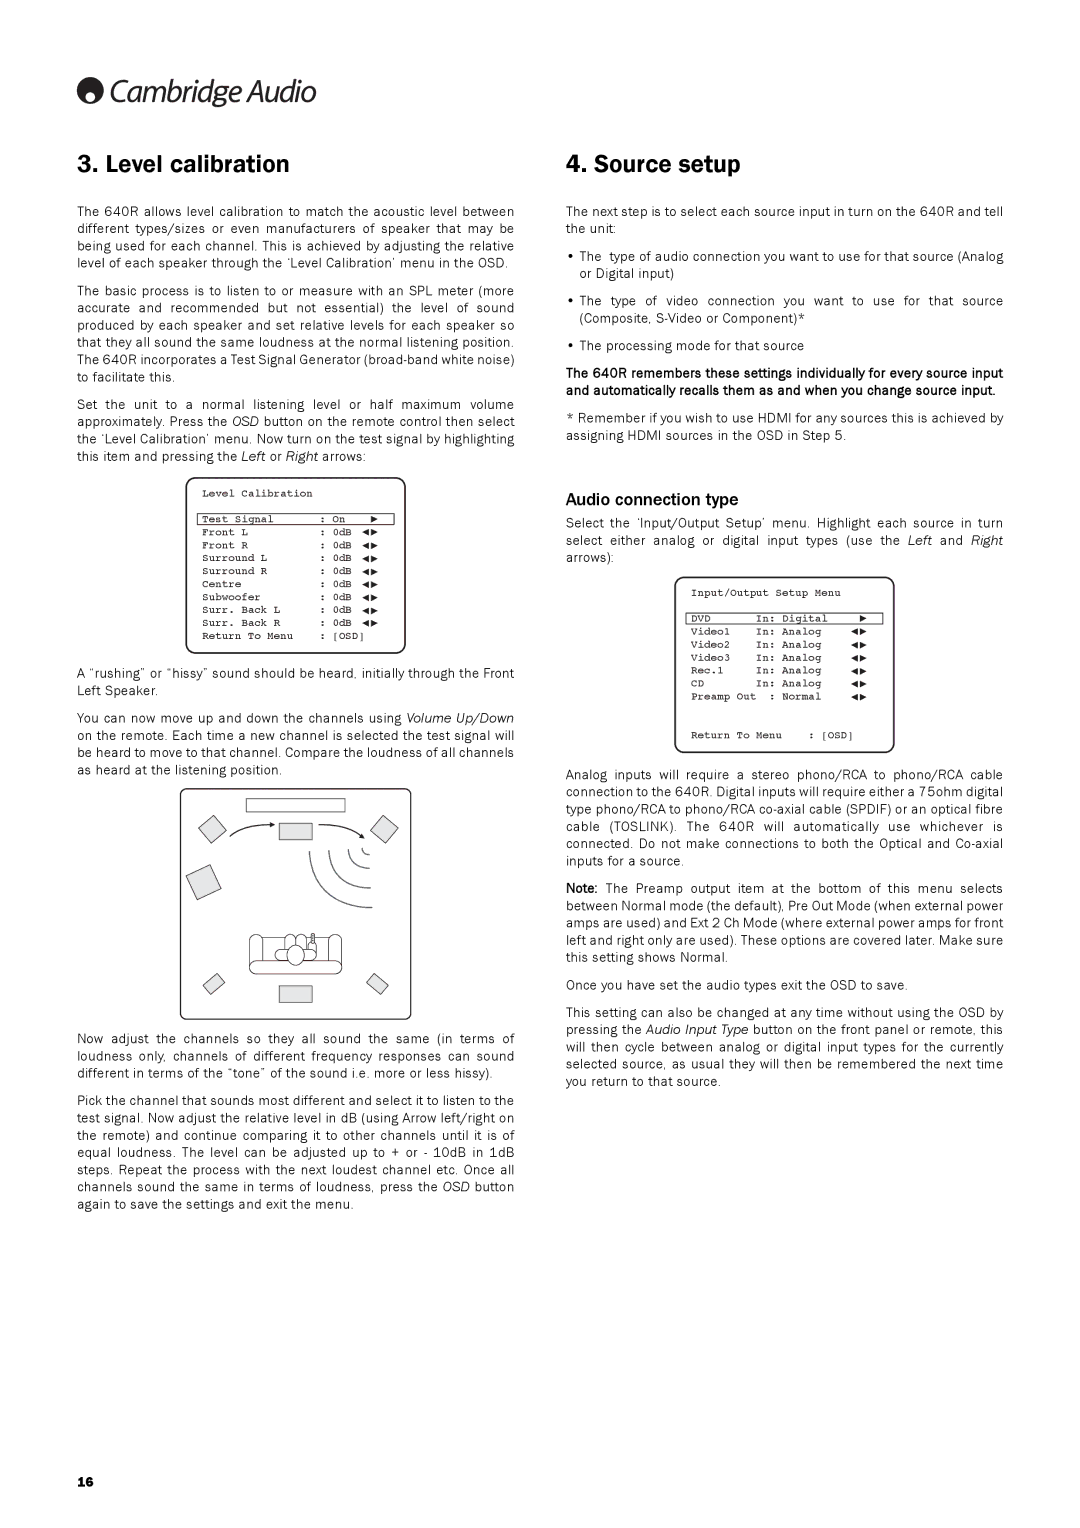
Moreover, the Cambridge Audio 640R features an intuitive user interface and remote control, making it user-friendly even for those new to home audio systems. The on-screen display simplifies the selection of sources and adjustment of settings, while the advanced configuration options allow for precise customizations.
In summary, the Cambridge Audio 640R stands out as an exceptional AV receiver, combining audiophile-grade components with modern features. With its powerful performance, advanced surround sound capabilities, and extensive connectivity, it caters to both music lovers and home theater enthusiasts, making it a compelling choice for anyone looking to enhance their audio experience.