TT50 specifications
Cambridge Audio has long been a respected name in the realm of high-fidelity audio equipment, and their TT50 turntable exemplifies this commitment to quality and innovation. A perfect blend of modern technology and classic design, the TT50 delivers a remarkable vinyl listening experience that will appeal to both audiophiles and casual listeners.One of the standout features of the Cambridge Audio TT50 is its belt-drive mechanism. This design significantly reduces motor vibrations, resulting in a purer sound output. The turntable utilizes a low-noise motor, which contributes to the exceptional audio clarity, allowing listeners to enjoy the warm and rich tones associated with vinyl records without unwanted interference.
The TT50 is equipped with a pre-mounted, high-quality moving magnet cartridge. This cartridge is designed to provide accurate tracking and reproduce sound with outstanding detail and dynamic range. Additionally, the adjustable tonearm allows for precise alignment and tracking, accommodating various record types and ensuring optimal performance across different vinyl genres.
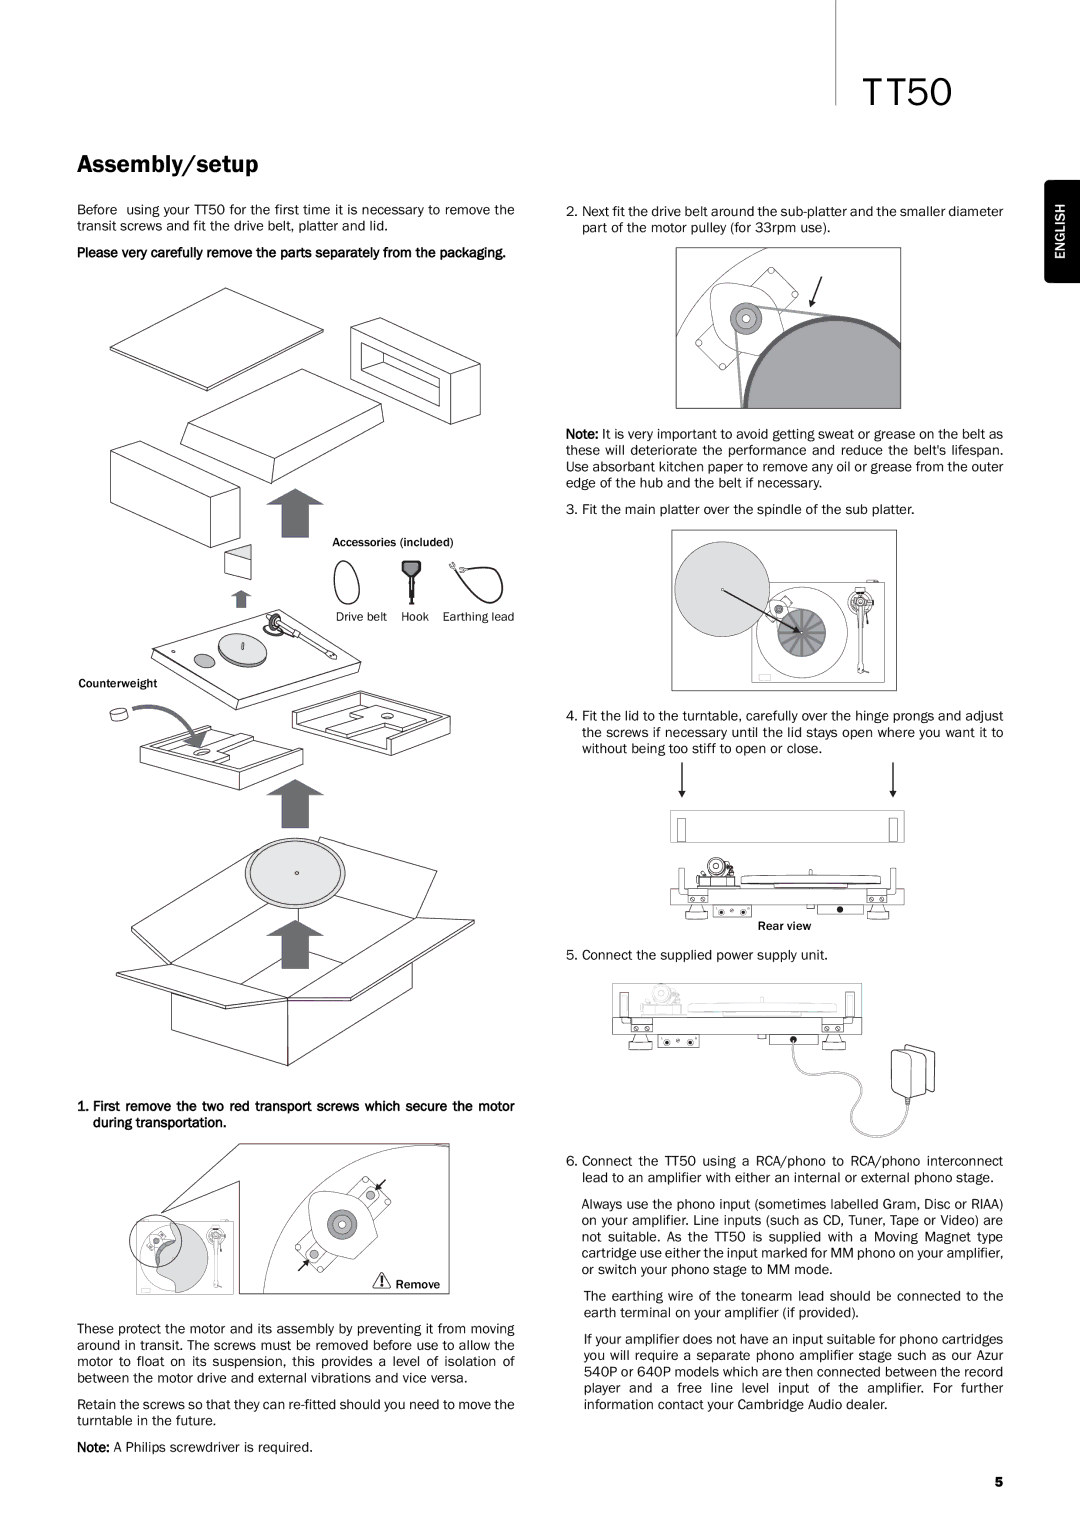
Another notable characteristic of the TT50 is its user-friendly interface and ease of setup. With standard RCA outputs, it can easily connect to a variety of amplifiers or powered speakers. Whether you're an experienced vinyl collector or new to the format, the TT50 is designed to make your journey into vinyl as seamless as possible.
In terms of aesthetics, the Cambridge Audio TT50 boasts a sleek, minimalist design that will complement any home décor. The turntable features a robust plinth designed to minimize resonance, providing a stable platform for playback. The combination of high-quality materials and thoughtful design elements ensures durability and longevity.
The TT50 also embraces modern technology with features such as a USB connectivity option, enabling users to digitize their vinyl collection easily. This allows for a seamless integration of analog and digital formats, ensuring that classic records can be preserved and enjoyed in various modern ways.
Overall, the Cambridge Audio TT50 turntable embodies a perfect synthesis of tradition and innovation, offering exceptional sound quality, user-friendly features, and stylish design. It stands as an excellent choice for anyone looking to explore or deepen their appreciation for vinyl music. Whether for nostalgia or sheer audio pleasure, the TT50 is a fantastic entry point into the world of vinyl.

