Assembly Instructions and Parts List | PW132000AV |
System Connection
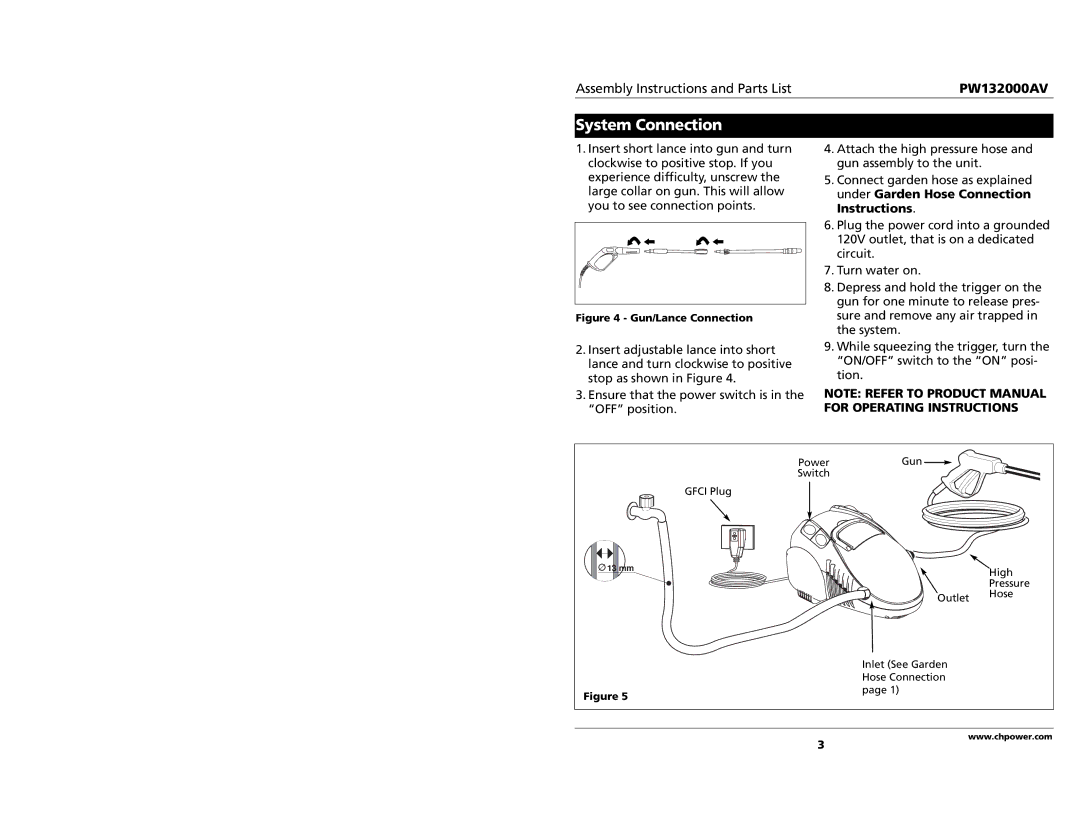
1.Insert short lance into gun and turn clockwise to positive stop. If you experience difficulty, unscrew the large collar on gun. This will allow you to see connection points.
Figure 4 - Gun/Lance Connection |
2.Insert adjustable lance into short lance and turn clockwise to positive stop as shown in Figure 4.
3.Ensure that the power switch is in the “OFF” position.
4.Attach the high pressure hose and gun assembly to the unit.
5.Connect garden hose as explained under Garden Hose Connection Instructions.
6.Plug the power cord into a grounded 120V outlet, that is on a dedicated circuit.
7.Turn water on.
8.Depress and hold the trigger on the gun for one minute to release pres- sure and remove any air trapped in the system.
9.While squeezing the trigger, turn the “ON/OFF” switch to the “ON” posi- tion.
NOTE: REFER TO PRODUCT MANUAL FOR OPERATING INSTRUCTIONS
Power | Gun |
|
Switch |
|
|
GFCI Plug |
|
|
13 mm |
| High |
|
| |
|
| Pressure |
| Outlet | Hose |
|
| |
| Inlet (See Garden |
|
| Hose Connection |
|
Figure 5 | page 1) |
|
|
| |
3 | www.chpower.com | |
|
| |
