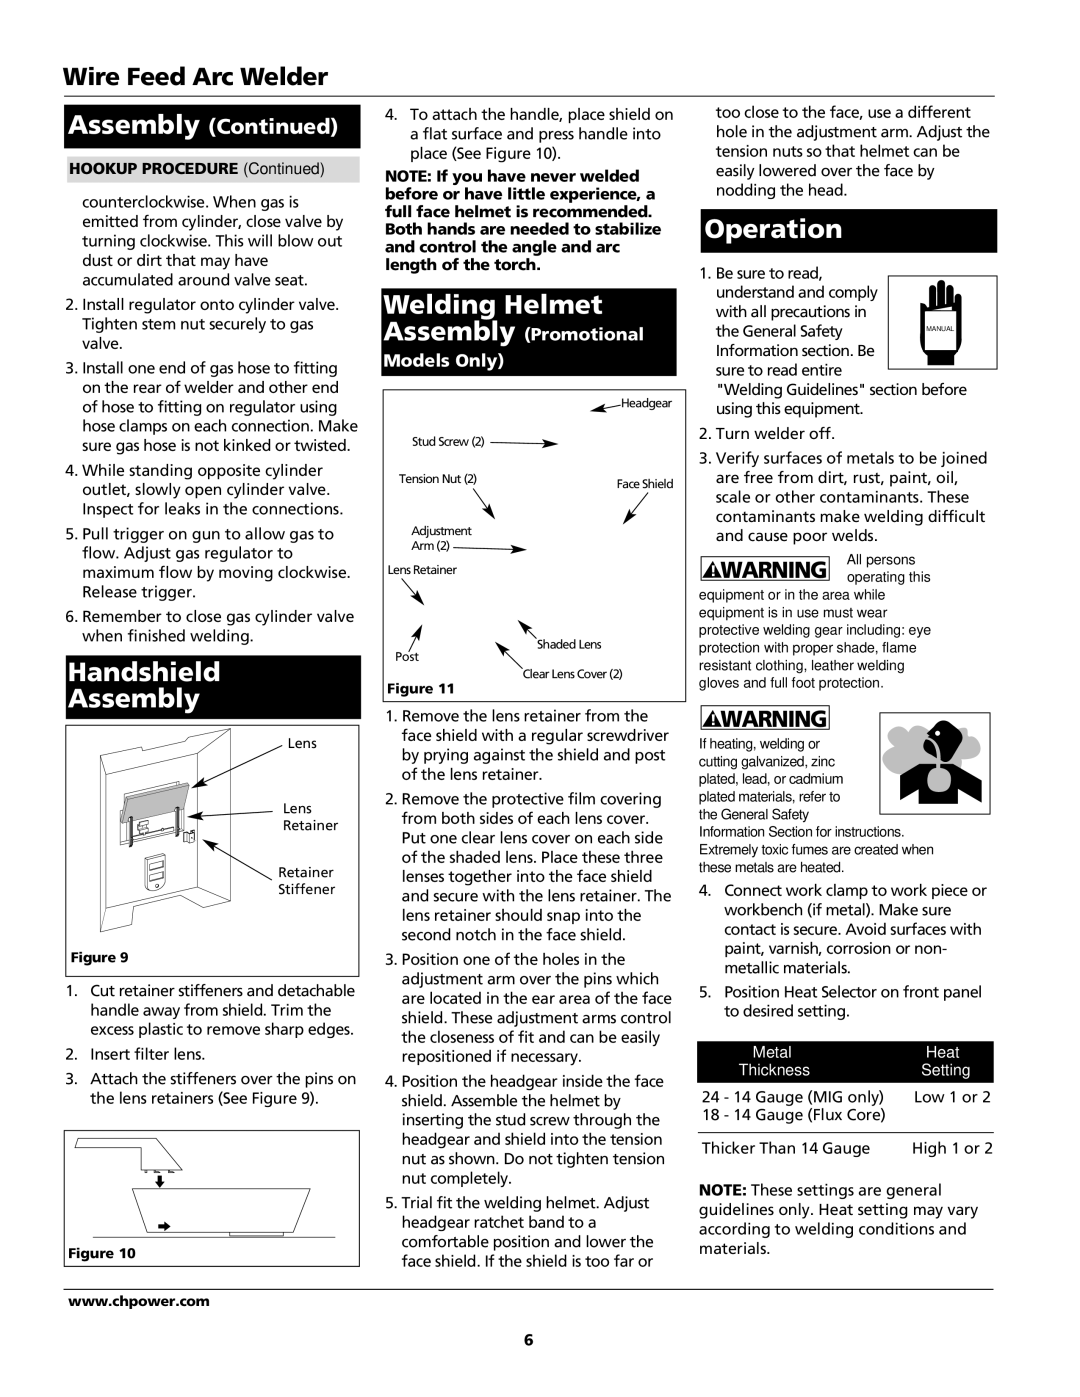
Campbell Hausfeld WG2044 Operation, Welding Helmet, Handshield, Assembly Promotional, Models Only

Models: WG2045 WG2044 WG2040 WG3000

1 44
Download 44 pages 34.48 Kb
Page 6
Image 6

Wire Feed Arc Welder


Assembly (Continued)

4. To attach the handle, place shield on


too close to the face, use a different

a flat surface and press handle into


hole in the adjustment arm. Adjust the

HOOKUP PROCEDURE (Continued)

place (See Figure 10).


tension nuts so that helmet can be

NOTE: If you have never welded


easily lowered over the face by


nodding the head.


counterclockwise. When gas is

before or have little experience, a


full face helmet is recommended.


emitted from cylinder, close valve by

Operation


Both hands are needed to stabilize


turning clockwise. This will blow out


and control the angle and arc


dust or dirt that may have


length of the torch.


1. Be sure to read,


accumulated around valve seat.


Welding Helmet


understand and comply


2. Install regulator onto cylinder valve.


with all precautions in


Tighten stem nut securely to gas

Assembly (Promotional


the General Safety


MANUAL


valve.


Models Only)


Information section. Be


3. Install one end of gas hose to fitting


sure to read entire


on the rear of welder and other end


Headgear


"Welding Guidelines" section before


of hose to fitting on regulator using


using this equipment.


hose clamps on each connection. Make

Stud Screw (2)


2. Turn welder off.


sure gas hose is not kinked or twisted.


3. Verify surfaces of metals to be joined

4. While standing opposite cylinder


Tension Nut (2)

Face Shield


are free from dirt, rust, paint, oil,


outlet, slowly open cylinder valve.


scale or other contaminants. These


Inspect for leaks in the connections.


contaminants make welding difficult

5. Pull trigger on gun to allow gas to

Adjustment


and cause poor welds.


flow. Adjust gas regulator to

Arm (2)


All persons


! WARNING


maximum flow by moving clockwise.

Lens Retainer


operating this


Release trigger.


equipment or in the area while

6. Remember to close gas cylinder valve


equipment is in use must wear


when finished welding.

Shaded Lens


protective welding gear including: eye


protection with proper shade, flame


Handshield

Post


resistant clothing, leather welding

Clear Lens Cover (2)

gloves and full foot protection.

Figure 11


Assembly


1. Remove the lens retainer from the

! WARNING


Lens

face shield with a regular screwdriver

If heating, welding or


by prying against the shield and post


cutting galvanized, zinc


of the lens retainer.


plated, lead, or cadmium


Lens

2. Remove the protective film covering

plated materials, refer to


from both sides of each lens cover.

the General Safety


Retainer


Put one clear lens cover on each side

Information Section for instructions.


Extremely toxic fumes are created when


of the shaded lens. Place these three


Retainer

these metals are heated.


lenses together into the face shield


4.

Connect work clamp to work piece or


Stiffener

and secure with the lens retainer. The


workbench (if metal). Make sure


lens retainer should snap into the


contact is secure. Avoid surfaces with


second notch in the face shield.


paint, varnish, corrosion or non-

Figure 9

3. Position one of the holes in the


metallic materials.


adjustment arm over the pins which


1.

Cut retainer stiffeners and detachable

5.

Position Heat Selector on front panel

are located in the ear area of the face


handle away from shield. Trim the


to desired setting.


shield. These adjustment arms control


excess plastic to remove sharp edges.


the closeness of fit and can be easily


2.

Insert filter lens.


Metal


Heat

repositioned if necessary.


3. Attach the stiffeners over the pins on

4. Position the headgear inside the face


Thickness


Setting

24 - 14 Gauge (MIG only)

Low 1 or 2


the lens retainers (See Figure 9).

shield. Assemble the helmet by


inserting the stud screw through the

18 - 14 Gauge (Flux Core)


headgear and shield into the tension

Thicker Than 14 Gauge

High 1 or 2


nut as shown. Do not tighten tension


nut completely.


NOTE: These settings are general


5. Trial fit the welding helmet. Adjust


guidelines only. Heat setting may vary


headgear ratchet band to a


according to welding conditions and


comfortable position and lower the

Figure 10

materials.


face shield. If the shield is too far or


www.chpower.com


6

Page 6
Image 6
Campbell Hausfeld WG2044, WG3000, WG2045, WG2040 Operation, Welding Helmet, Handshield, Assembly Promotional, Models Only

WG2045, WG2044, WG2040, WG3000 specifications

The Campbell Hausfeld WG3000, WG2040, WG2044, and WG2045 are a collection of high-performance pressure washers designed to deliver exceptional cleaning power for a variety of tasks. Whether you are tackling tough grime on driveways or washing vehicles, these models come equipped with advanced features and technologies tailored to meet diverse cleaning needs.

The WG3000 is renowned for its robust 3000 PSI performance, making it a powerhouse for heavy-duty cleaning jobs. Its electric start motor provides effortless startup, eliminating the hassle of pull cords. This model is equipped with a durable pump that enhances longevity while ensuring consistent water pressure. Additionally, its ergonomic design includes a comfortable handle and wheels for easy maneuverability, allowing users to navigate different terrains with minimal effort.

The WG2040, featuring a 2040 PSI output, is perfect for medium-duty cleaning tasks. It boasts a compact design that makes storage and transport a breeze. The WG2040 is equipped with an adjustable spray nozzle, providing versatility for various cleaning applications, from gentle rinsing to intense pressure washing. With its lightweight frame and built-in detergent tank, users can seamlessly switch between washing and rinsing, enhancing efficiency.

On the other hand, the WG2044 model builds on the WG2040's strengths while offering additional features such as an onboard detergent tank and larger wheels for enhanced stability during operation. Its 2040 PSI power ensures that it can tackle tough stains on surfaces like patios or wooden decks, while its quick-connect spray tips allow for swift changes between different spray patterns.

Meanwhile, the WG2045 takes versatility to the next level with its multi-function accessory kit, which includes various nozzles and brushes. This model stands out with its 2045 PSI capacity, ideal for medium to heavy-duty tasks. Its design focuses on user convenience, featuring an easy-to-assemble structure and a robust hose reel that keeps the hose organized and free from tangles.

Overall, the Campbell Hausfeld WG3000, WG2040, WG2044, and WG2045 are engineered with durability and functionality in mind. Their advanced features, such as adjustable nozzles, onboard detergent tanks, and user-friendly designs, make them exceptional choices for anyone seeking quality performance in their pressure washing tasks. Whether for home maintenance or professional use, these models present an optimal blend of power, versatility, and convenience.