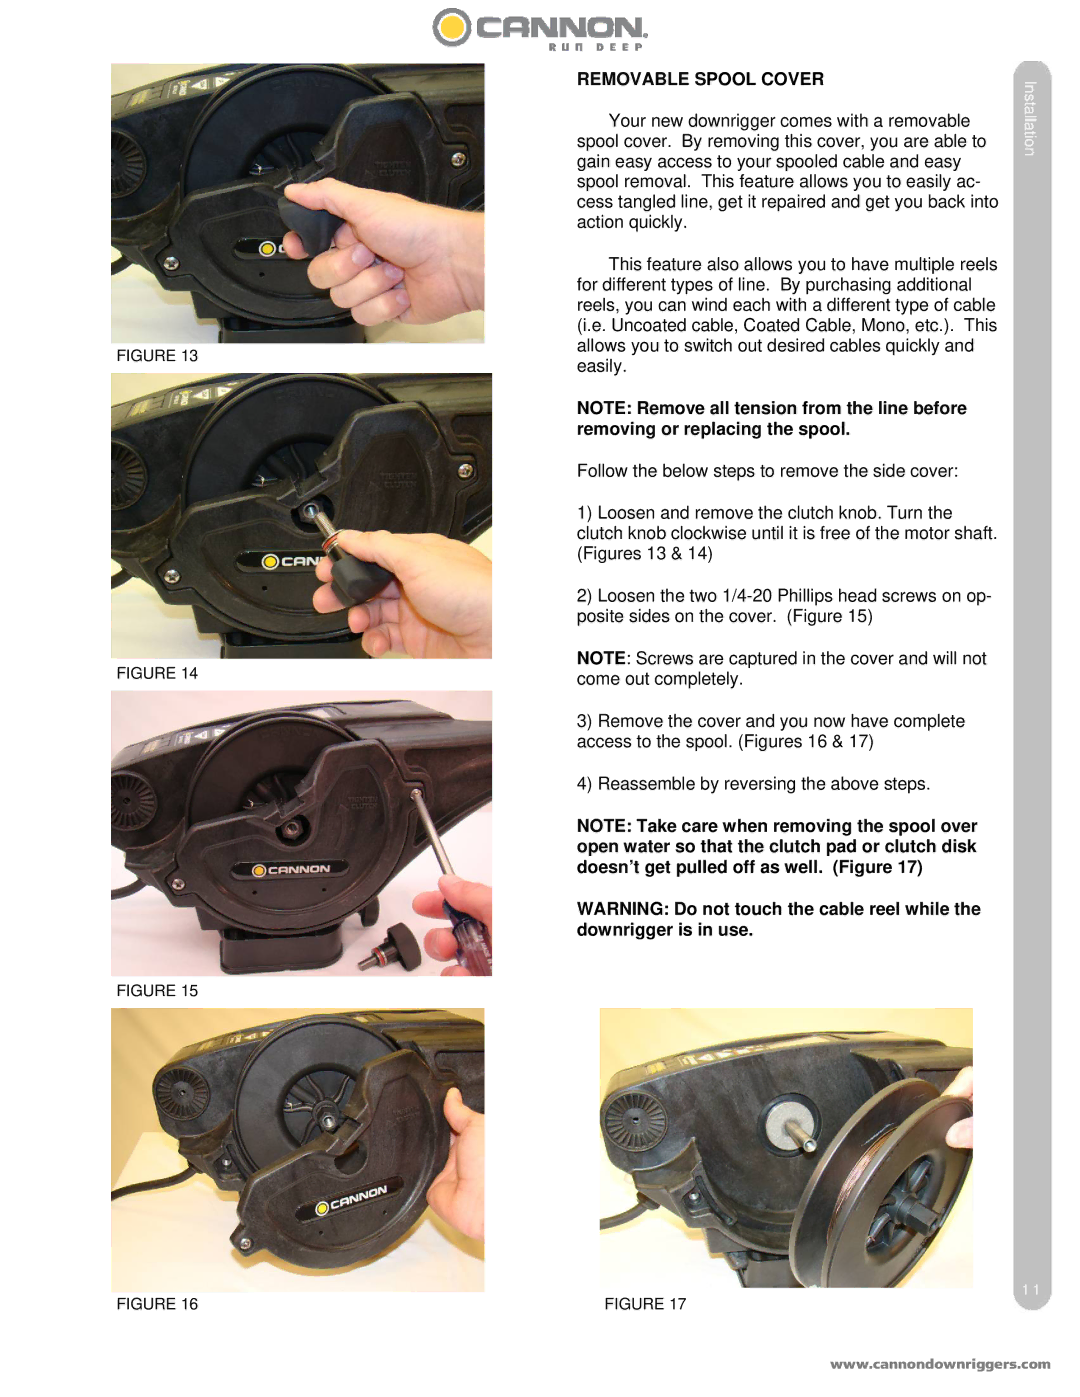
FIGURE 13
FIGURE 14
FIGURE 15
FIGURE 16
REMOVABLE SPOOL COVER | Installation |
Your new downrigger comes with a removable | |
spool cover. By removing this cover, you are able to |
|
gain easy access to your spooled cable and easy |
|
spool removal. This feature allows you to easily ac- |
|
cess tangled line, get it repaired and get you back into |
|
action quickly. |
|
This feature also allows you to have multiple reels |
|
for different types of line. By purchasing additional |
|
reels, you can wind each with a different type of cable |
|
(i.e. Uncoated cable, Coated Cable, Mono, etc.). This |
|
allows you to switch out desired cables quickly and |
|
easily. |
|
NOTE: Remove all tension from the line before |
|
removing or replacing the spool. |
|
Follow the below steps to remove the side cover: |
|
1)Loosen and remove the clutch knob. Turn the clutch knob clockwise until it is free of the motor shaft. (Figures 13 & 14)
2)Loosen the two
NOTE: Screws are captured in the cover and will not come out completely.
3)Remove the cover and you now have complete access to the spool. (Figures 16 & 17)
4)Reassemble by reversing the above steps.
NOTE: Take care when removing the spool over open water so that the clutch pad or clutch disk doesn’t get pulled off as well. (Figure 17)
WARNING: Do not touch the cable reel while the downrigger is in use.
11
FIGURE 17
www.cannondownriggers.com
