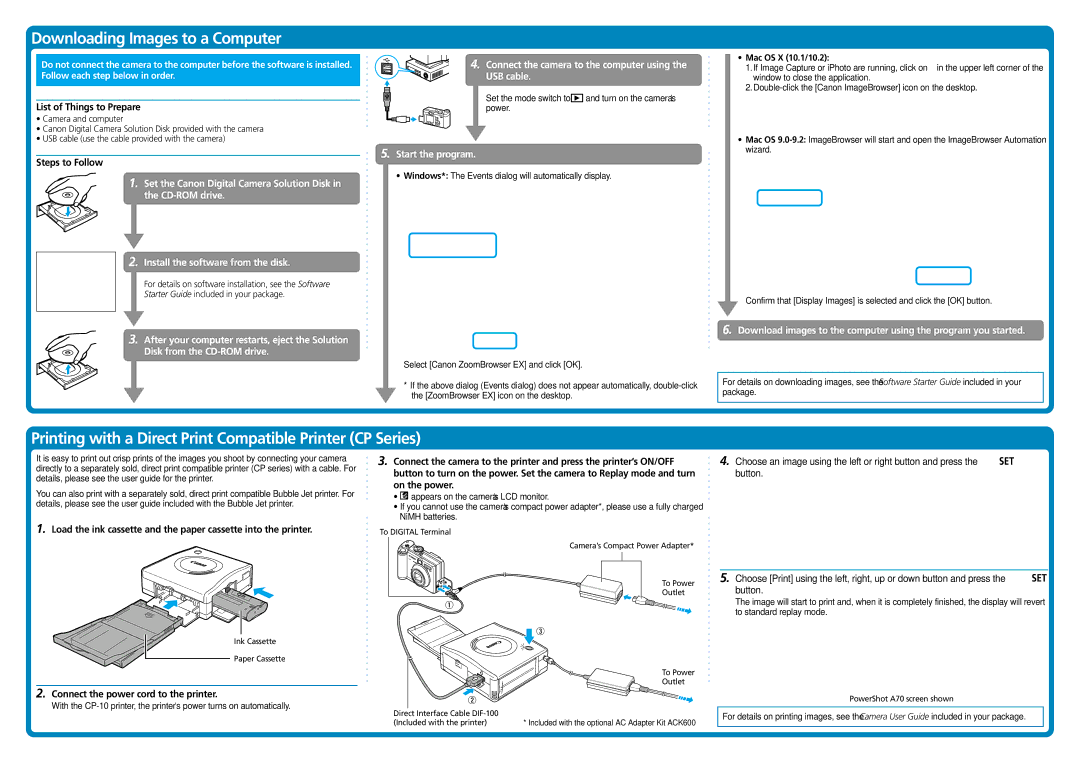
Downloading Images to a Computer
Do not connect the camera to the computer before the software is installed. Follow each step below in order.
List of Things to Prepare
•Camera and computer
•Canon Digital Camera Solution Disk provided with the camera
•USB cable (use the cable provided with the camera)
Steps to Follow
1.Set the Canon Digital Camera Solution Disk in
the
2.Install the software from the disk.
For details on software installation, see the Software Starter Guide included in your package.
3.After your computer restarts, eject the Solution
Disk from the
4. Connect the camera to the computer using the USB cable.
Set the mode switch to ![]() and turn on the camera’s power.
and turn on the camera’s power.
5.Start the program.
• Windows*: The Events dialog will automatically display.
Select [Canon ZoomBrowser EX] and click [OK].
* If the above dialog (Events dialog) does not appear automatically,
•Mac OS X (10.1/10.2):
1.If Image Capture or iPhoto are running, click on ![]() in the upper left corner of the window to close the application.
in the upper left corner of the window to close the application.
2.
•Mac OS
Confirm that [Display Images] is selected and click the [OK] button.
6.Download images to the computer using the program you started.
For details on downloading images, see the Software Starter Guide included in your package.
Printing with a Direct Print Compatible Printer (CP Series)
It is easy to print out crisp prints of the images you shoot by connecting your camera directly to a separately sold, direct print compatible printer (CP series) with a cable. For details, please see the user guide for the printer.
You can also print with a separately sold, direct print compatible Bubble Jet printer. For details, please see the user guide included with the Bubble Jet printer.
1.Load the ink cassette and the paper cassette into the printer.
Ink Cassette
Paper Cassette
2.Connect the power cord to the printer.
With the
3.Connect the camera to the printer and press the printer’s ON/OFF button to turn on the power. Set the camera to Replay mode and turn on the power.
•![]() appears on the camera’s LCD monitor.
appears on the camera’s LCD monitor.
•If you cannot use the camera’s compact power adapter*, please use a fully charged NiMH batteries.
To DIGITAL Terminal
Camera’s Compact Power Adapter*
To Power
Outlet
To Power
Outlet
Direct Interface Cable |
|
(Included with the printer) | * Included with the optional AC Adapter Kit ACK600 |
4.Choose an image using the left or right button and press the ![]()
![]() button.
button.
5.Choose [Print] using the left, right, up or down button and press the ![]()
![]() button.
button.
The image will start to print and, when it is completely finished, the display will revert to standard replay mode.
PowerShot A70 screen shown
For details on printing images, see the Camera User Guide included in your package.