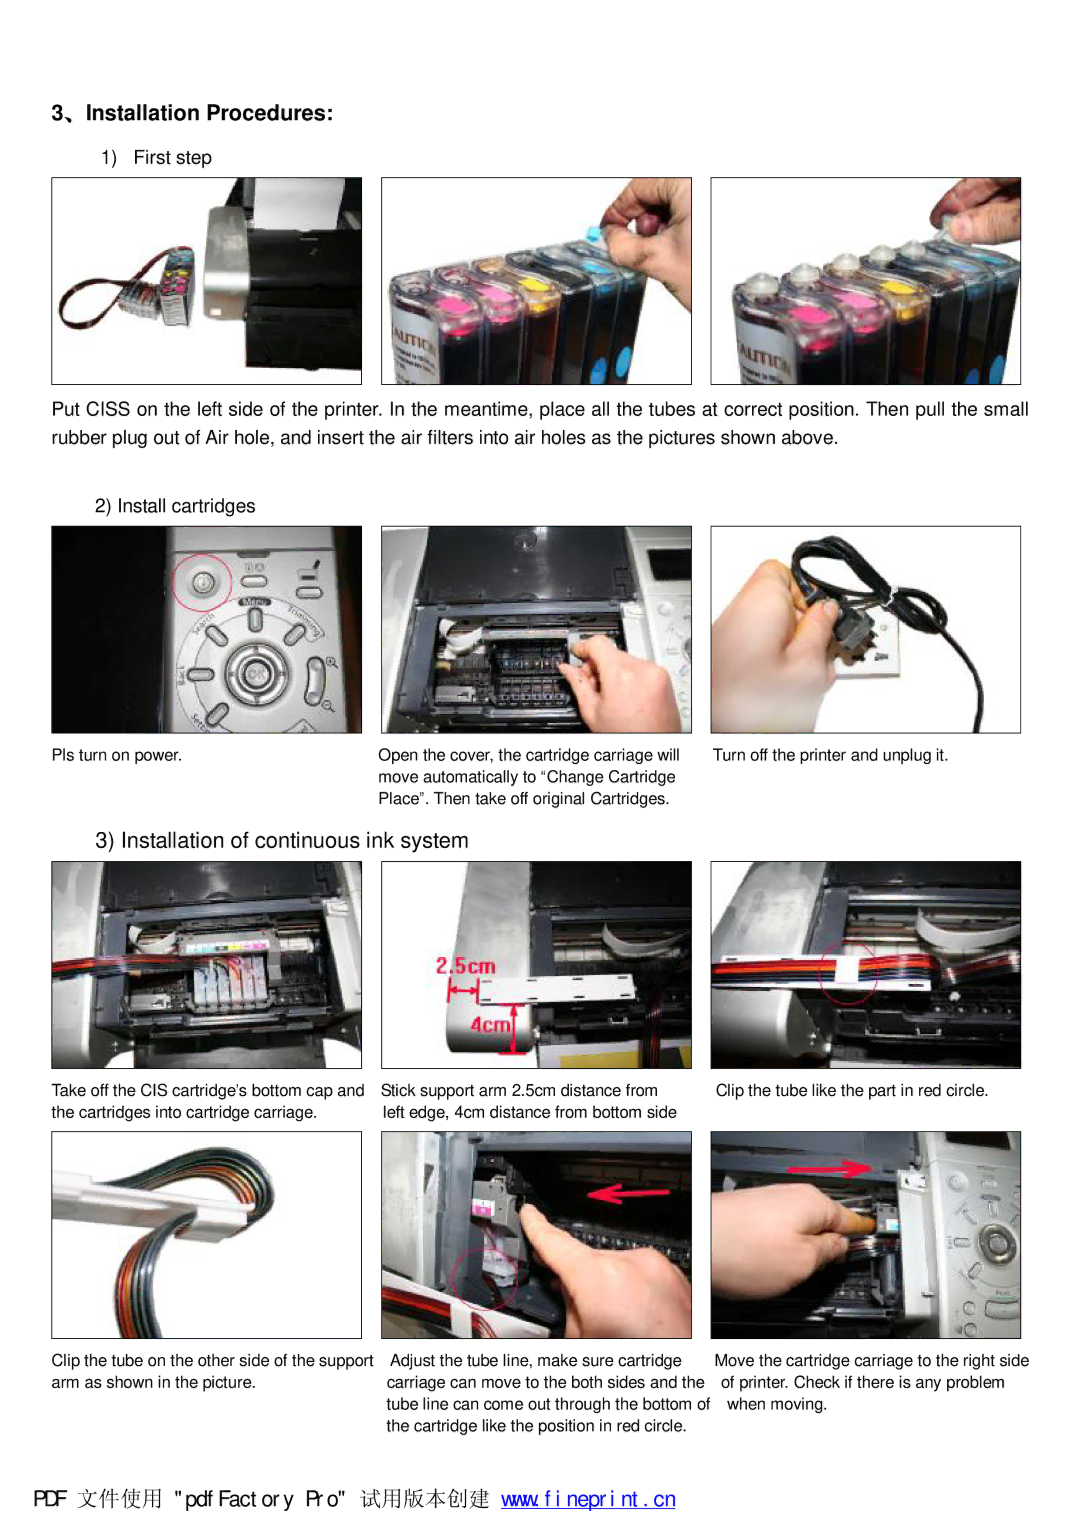
3、Installation Procedures:
1) First step
Put CISS on the left side of the printer. In the meantime, place all the tubes at correct position. Then pull the small rubber plug out of Air hole, and insert the air filters into air holes as the pictures shown above.
2) Install cartridges
Pls turn on power. | Open the cover, the cartridge carriage will | Turn off the printer and unplug it. |
| move automatically to “Change Cartridge |
|
| Place”. Then take off original Cartridges. |
|
3) Installation of continuous ink system
Take off the CIS cartridge’s bottom cap and the cartridges into cartridge carriage.
Stick support arm 2.5cm distance from left edge, 4cm distance from bottom side
Clip the tube like the part in red circle.
Clip the tube on the other side of the support arm as shown in the picture.
Adjust the tube line, make sure cartridge carriage can move to the both sides and the tube line can come out through the bottom of the cartridge like the position in red circle.
Move the cartridge carriage to the right side of printer. Check if there is any problem when moving.
PDF 文件使用 "pdfFactory Pro" 试用版本创建 www.fineprint.cn