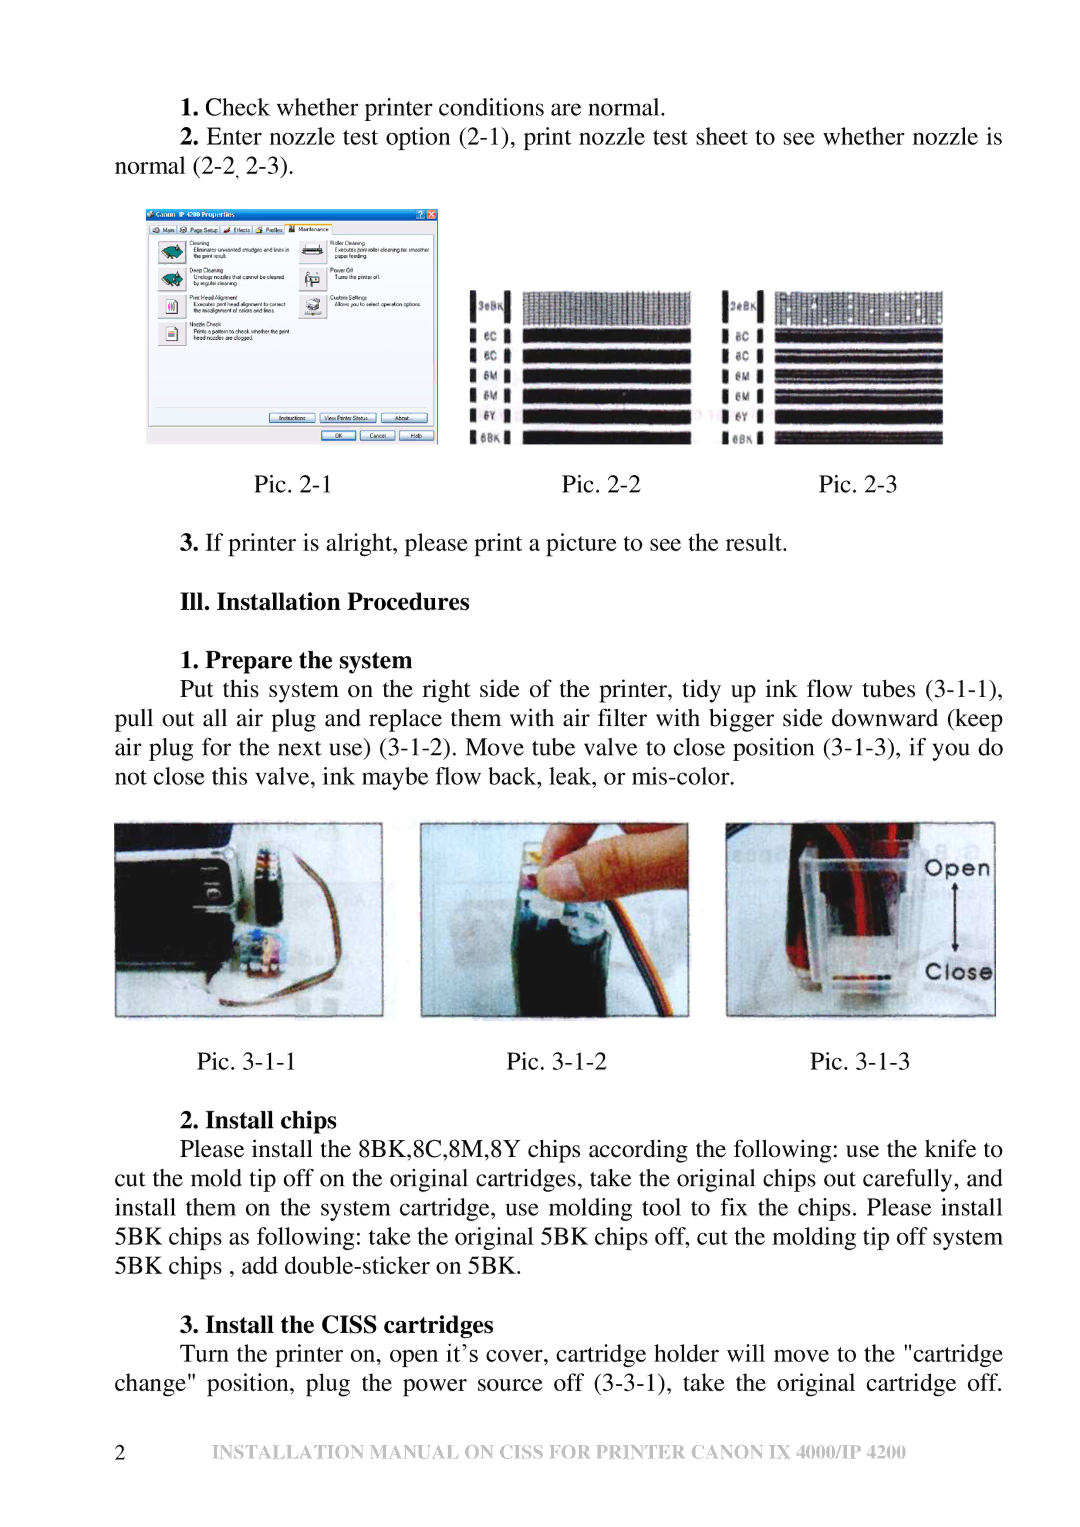
1.Check whether printer conditions are normal.
2.Enter nozzle test option
Pic. | Pic. | Pic. |
3.If printer is alright, please print a picture to see the result.
Ill. Installation Procedures
1. Prepare the system
Put this system on the right side of the printer, tidy up ink flow tubes
Pic. | Pic. | Pic. |
2. Install chips
Please install the 8BK,8C,8M,8Y chips according the following: use the knife to cut the mold tip off on the original cartridges, take the original chips out carefully, and install them on the system cartridge, use molding tool to fix the chips. Please install 5BK chips as following: take the original 5BK chips off, cut the molding tip off system 5BK chips , add
3. Install the CISS cartridges
Turn the printer on, open it’s cover, cartridge holder will move to the "cartridge change" position, plug the power source off
2INSTALLATION MANUAL ON CISS FOR PRINTER CANON IX 4000/IP 4200