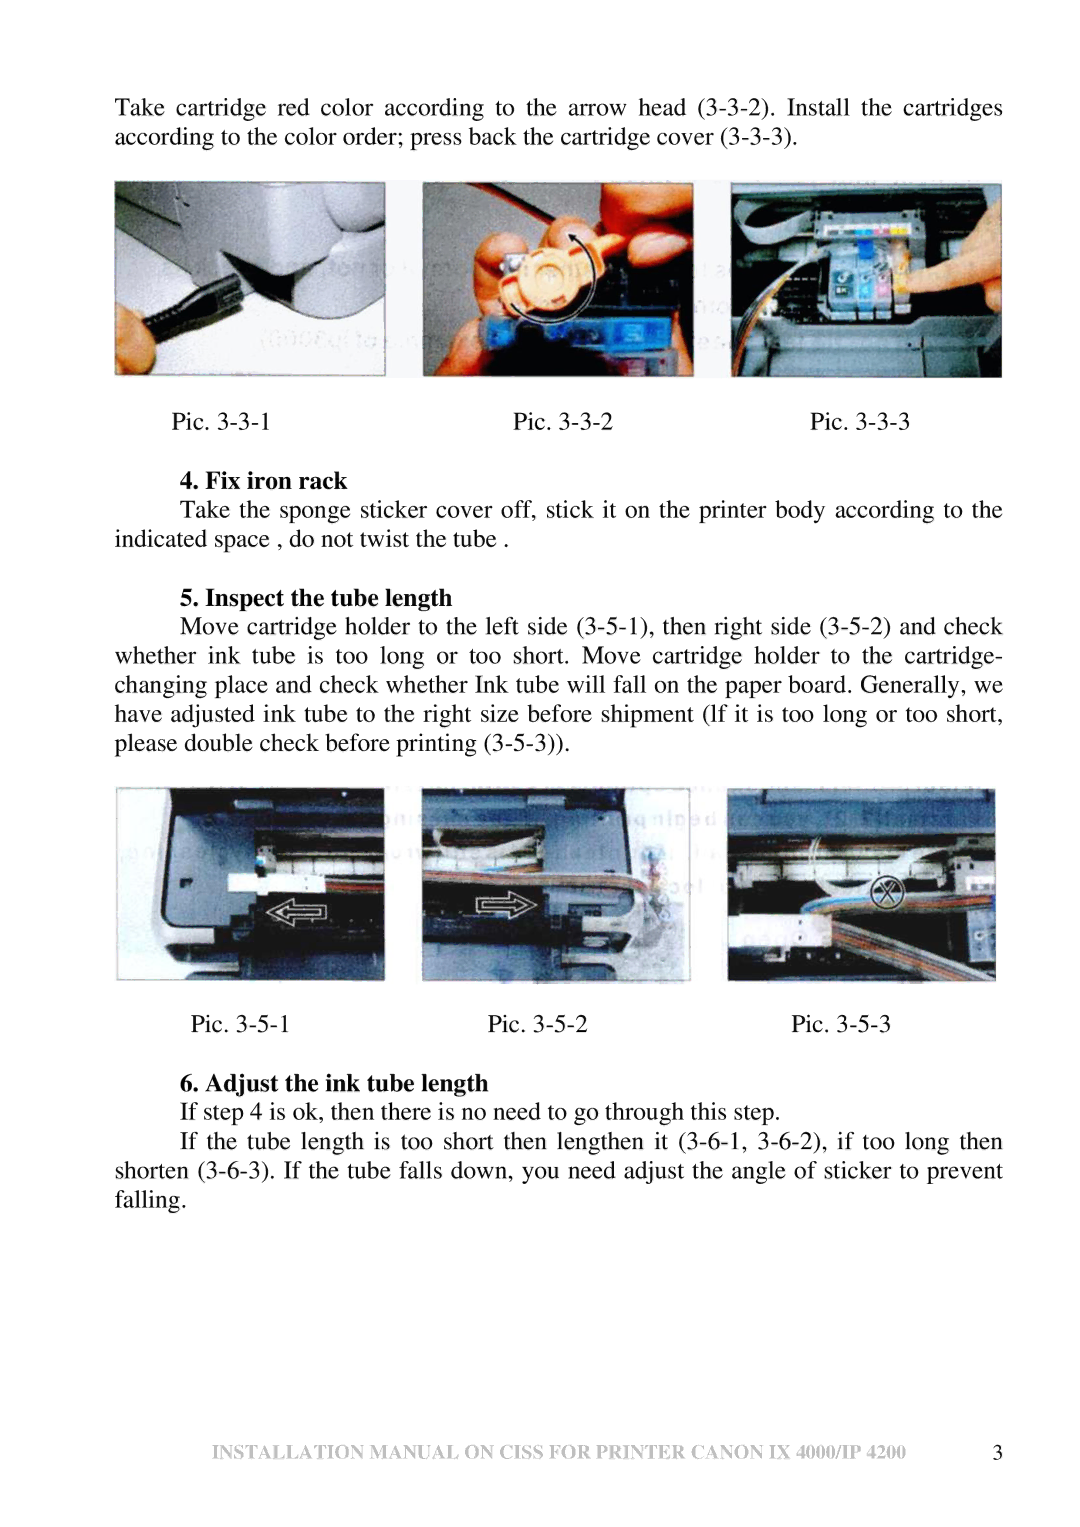
Take cartridge red color according to the arrow head (3-3-2). Install the cartridges according to the color order; press back the cartridge cover (3-3-3).
Pic. 3-3-1 | Pic. 3-3-2 | Pic. 3-3-3 |
4. Fix iron rack
Take the sponge sticker cover off, stick it on the printer body according to the indicated space , do not twist the tube .
5. Inspect the tube length
Move cartridge holder to the left side (3-5-1), then right side (3-5-2) and check whether ink tube is too long or too short. Move cartridge holder to the cartridge- changing place and check whether Ink tube will fall on the paper board. Generally, we have adjusted ink tube to the right size before shipment (lf it is too long or too short, please double check before printing (3-5-3)).
Pic. 3-5-1 | Pic. 3-5-2 | Pic. 3-5-3 |
6. Adjust the ink tube length
If step 4 is ok, then there is no need to go through this step.
If the tube length is too short then lengthen it (3-6-1, 3-6-2), if too long then shorten (3-6-3). If the tube falls down, you need adjust the angle of sticker to prevent falling.
INSTALLATION MANUAL ON CISS FOR PRINTER CANON IX 4000/IP 4200 | 3 |

