
33CS specifications
The Carrier 33CS is a cornerstone in modern air conditioning systems, designed to deliver optimal comfort, efficiency, and reliability in diverse residential and commercial applications. This model stands out due to its innovative features and advanced technologies that prioritize user experience and energy savings.One of the main features of the Carrier 33CS is its variable-speed inverter compressor, which allows for precise temperature control. This technology adjusts the cooling output based on the current demand, ensuring that the system operates at its peak efficiency. As a result, the unit not only maintains a consistent indoor climate but also minimizes energy consumption, leading to significant cost savings on utility bills.
The Carrier 33CS is equipped with a high SEER (Seasonal Energy Efficiency Ratio) rating, reflecting its exceptional energy efficiency. This rating makes the unit an environmentally friendly choice, aligning with modern standards for reducing carbon footprints. With its eco-friendly refrigerant, the model also meets stringent regulations, making it suitable for environmentally conscious consumers.
Durability is another hallmark of the Carrier 33CS. Constructed from robust materials, the system is designed to withstand harsh weather conditions, ensuring long-term performance. Additionally, the unit features a corrosion-resistant cabinet that extends its lifespan and maintains its aesthetic appeal over time.
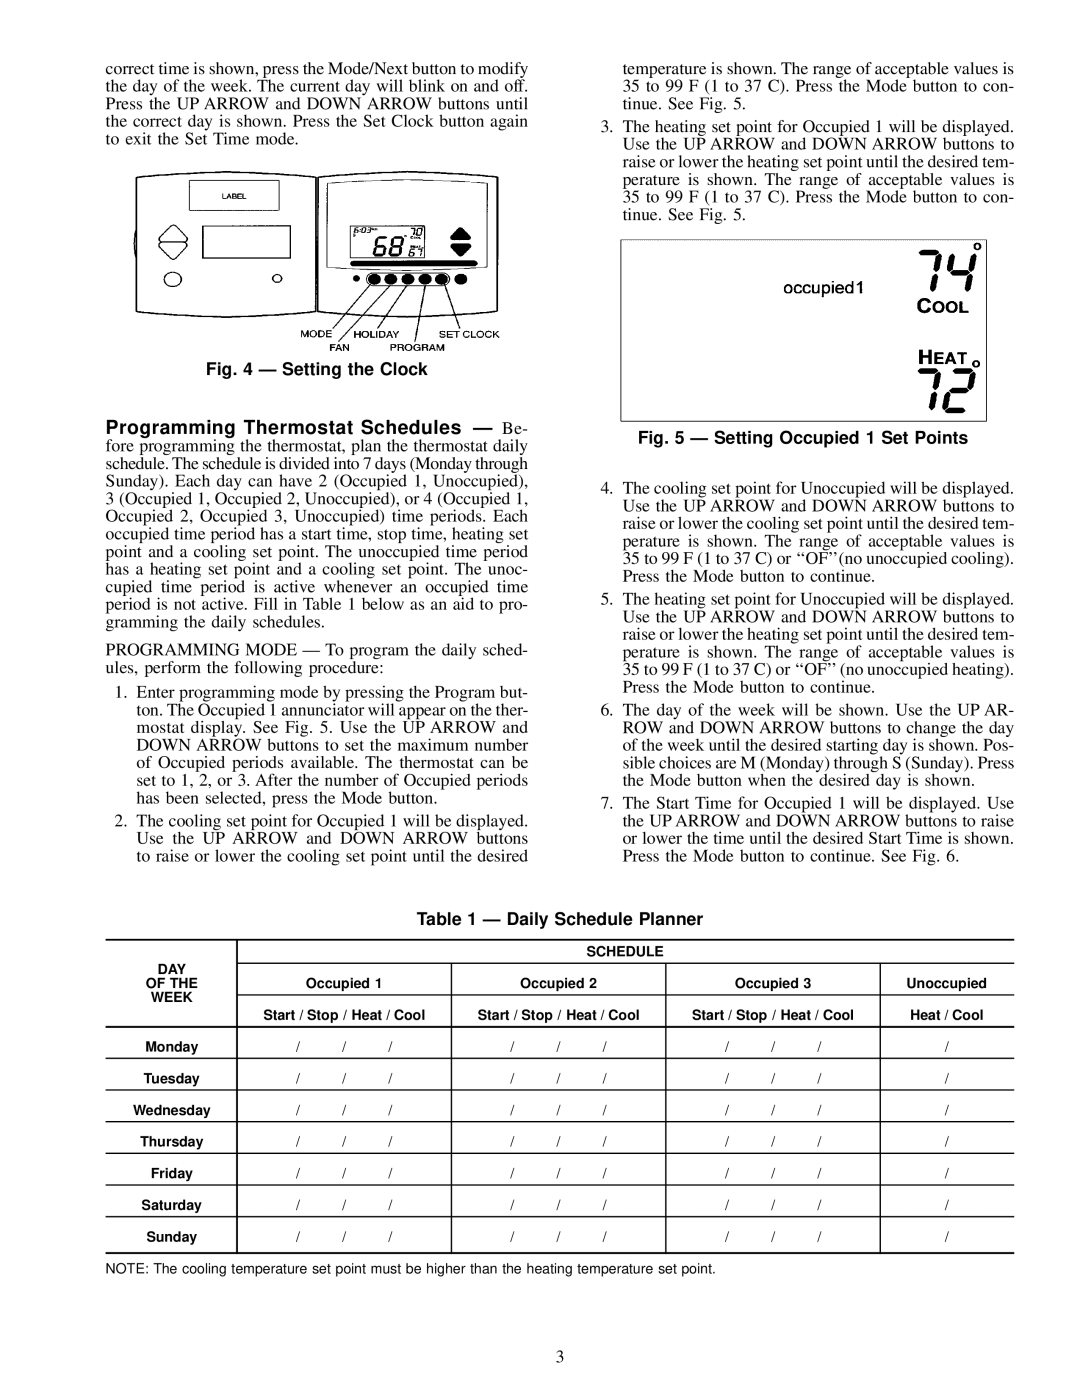
User-friendly controls are integral to the Carrier 33CS. The system often comes with a programmable thermostat that allows users to set schedules and preferences, ensuring that the space is always at the desired temperature. Many models also offer smart connectivity, enabling users to manage their home climate remotely via smartphones or other smart devices.
Quiet operation is another significant advantage of the Carrier 33CS. The advanced design and insulation reduce noise levels, making it an ideal choice for both residential and commercial settings, where disturbances can be problematic.
In summary, the Carrier 33CS embodies a fusion of technology, efficiency, and comfort. With its variable-speed inverter compressor, high SEER rating, durable construction, user-friendly controls, and quiet operation, it remains a leading choice for those seeking a reliable air conditioning solution. Whether in a home or business setting, the 33CS is built to meet the cooling needs of any environment while promoting energy savings and user satisfaction.