ED1928 Mounting Bracket Kit Installation Manual |
| |
The following are the recommended steps to install the |
| |
onto a Dodge Charger using the ED1928 mounting bracket kit. |
| |
The speaker is mounted in the general area shown in Fig. 1 located |
| |
behind the grill. |
| |
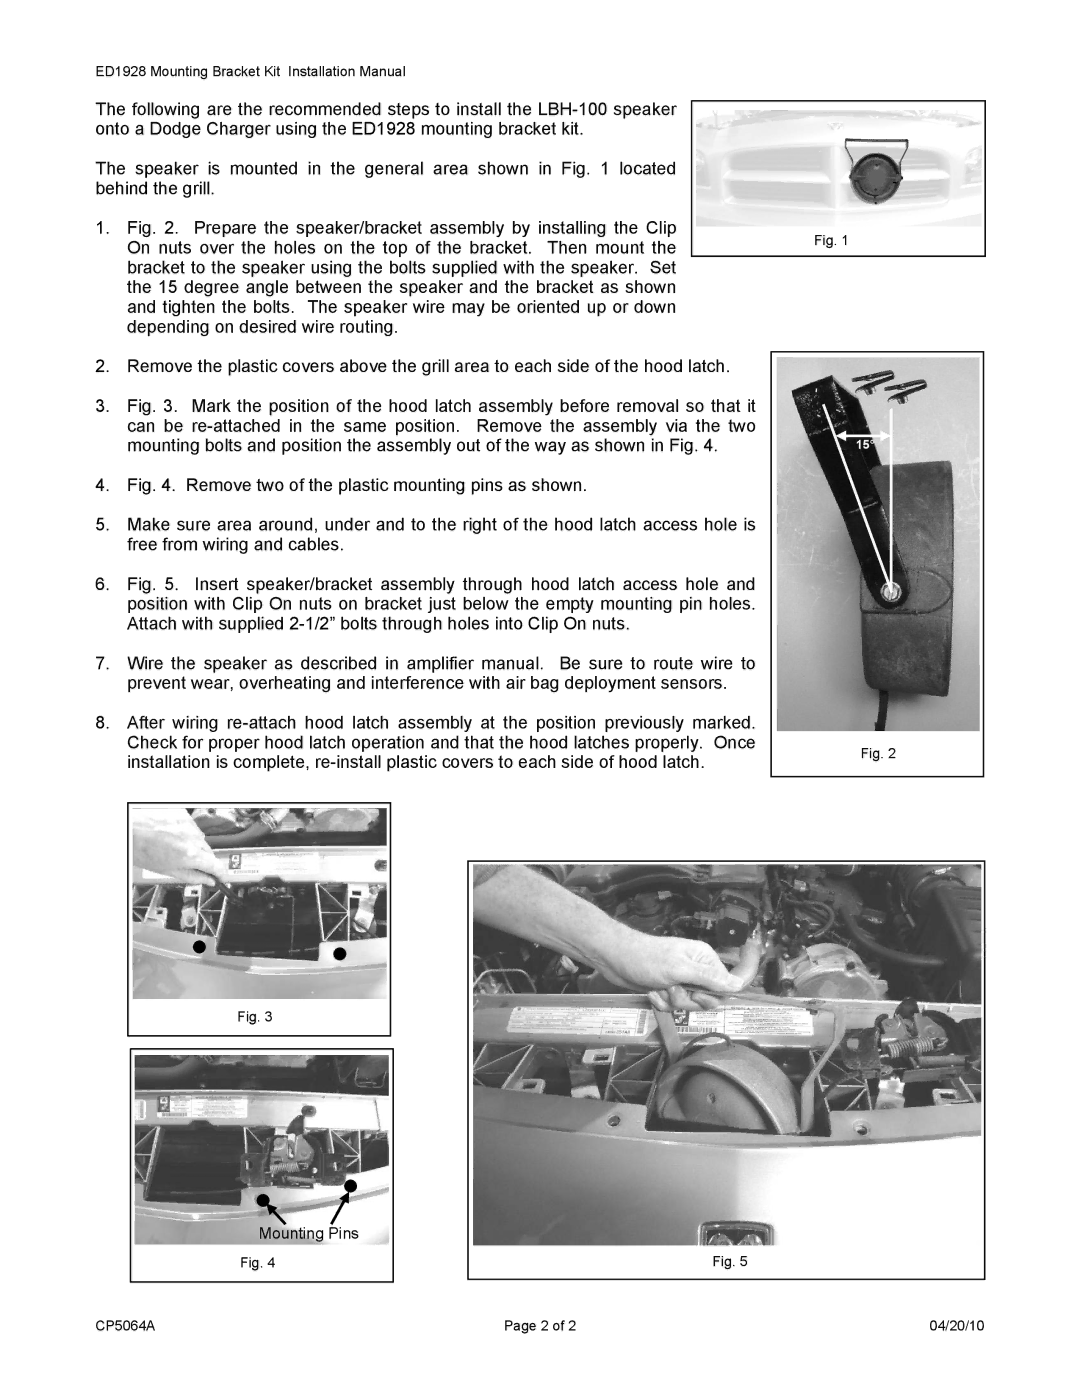
1. Fig. 2. Prepare the speaker/bracket assembly by installing the Clip | Fig. 1 | |
On nuts over the holes on the top of the bracket. Then mount the | ||
|
bracket to the speaker using the bolts supplied with the speaker. Set the 15 degree angle between the speaker and the bracket as shown and tighten the bolts. The speaker wire may be oriented up or down depending on desired wire routing.
2.Remove the plastic covers above the grill area to each side of the hood latch.
3.Fig. 3. Mark the position of the hood latch assembly before removal so that it can be re-attached in the same position. Remove the assembly via the two
mounting bolts and position the assembly out of the way as shown in Fig. 4. | 15° |
4.Fig. 4. Remove two of the plastic mounting pins as shown.
5.Make sure area around, under and to the right of the hood latch access hole is free from wiring and cables.
6.Fig. 5. Insert speaker/bracket assembly through hood latch access hole and position with Clip On nuts on bracket just below the empty mounting pin holes. Attach with supplied 2-1/2” bolts through holes into Clip On nuts.
7.Wire the speaker as described in amplifier manual. Be sure to route wire to prevent wear, overheating and interference with air bag deployment sensors.
8.After wiring re-attach hood latch assembly at the position previously marked.
Check for proper hood latch operation and that the hood latches properly. Once | Fig. 2 | |
installation is complete, | ||
|
Fig. 3
Mounting Pins
Fig. 4
Fig. 5
CP5064A | Page 2 of 2 | 04/20/10 |
