
CX1272 specifications
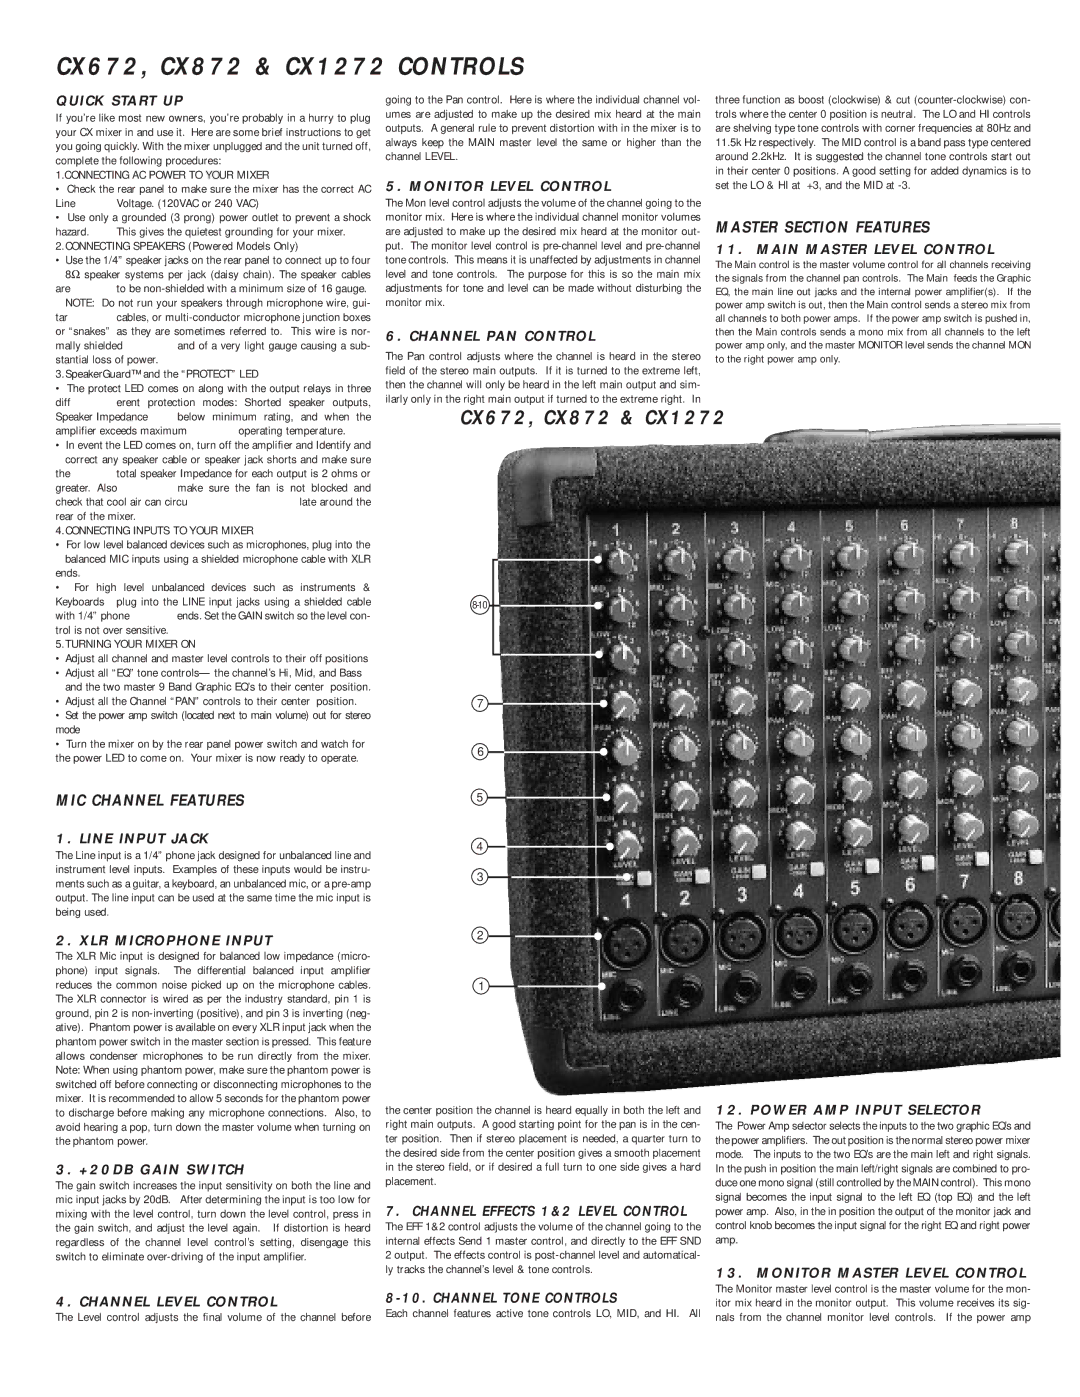
The Carvin CX1272 is a versatile and powerful audio mixing console designed for various professional sound reinforcement applications. Known for its high-quality audio performance and user-friendly interface, the CX1272 is a favorite among musicians, sound engineers, and event organizers alike.One of the standout features of the CX1272 is its 12 microphone inputs, each equipped with premium-quality preamps that deliver exceptional sound clarity and warmth. These preamps provide an impressive headroom, making them suitable for a wide range of sound sources, from vocals to instruments. Additionally, each channel includes a 3-band EQ, allowing users to sculpt their sound effectively for any performance setting.
The CX1272 is designed with flexibility in mind. It offers a total of 12 outputs, including main outputs, auxiliary sends, and sub-group outputs. This arrangement is ideal for live performances where monitoring and effects routing are crucial. The auxiliary sends are particularly useful for creating monitor mixes for performers on stage, enhancing the overall performance experience.
A significant technological feature of the CX1272 is its built-in digital effects processor. This integrated system provides a range of effects, such as reverb, delay, and chorus, which can be applied to individual channels or the main mix. This eliminates the need for external effects processors, making the CX1272 a compact and efficient solution for live sound applications.
The console also benefits from robust construction, featuring a durable chassis designed to withstand the rigors of touring and live performances. Its intuitive layout and clear labeling ensure that sound engineers can work quickly under pressure, making adjustments during performances seamlessly.
In terms of connectivity, the CX1272 includes a variety of input and output options, ensuring compatibility with a wide range of audio equipment. The XLR, TRS, and RCA inputs provide flexibility for various audio sources, while the balanced outputs minimize interference and noise for cleaner sound transmission.
Overall, the Carvin CX1272 is a powerful mixer that blends quality, flexibility, and durability. Whether for live performances, studio recordings, or event productions, its advanced features and solid construction make it a reliable choice for audio professionals. With its user-friendly design and high performance, the CX1272 continues to be a popular option for those looking to deliver outstanding sound.