®3
W-85 CONTROL INSTALLATION
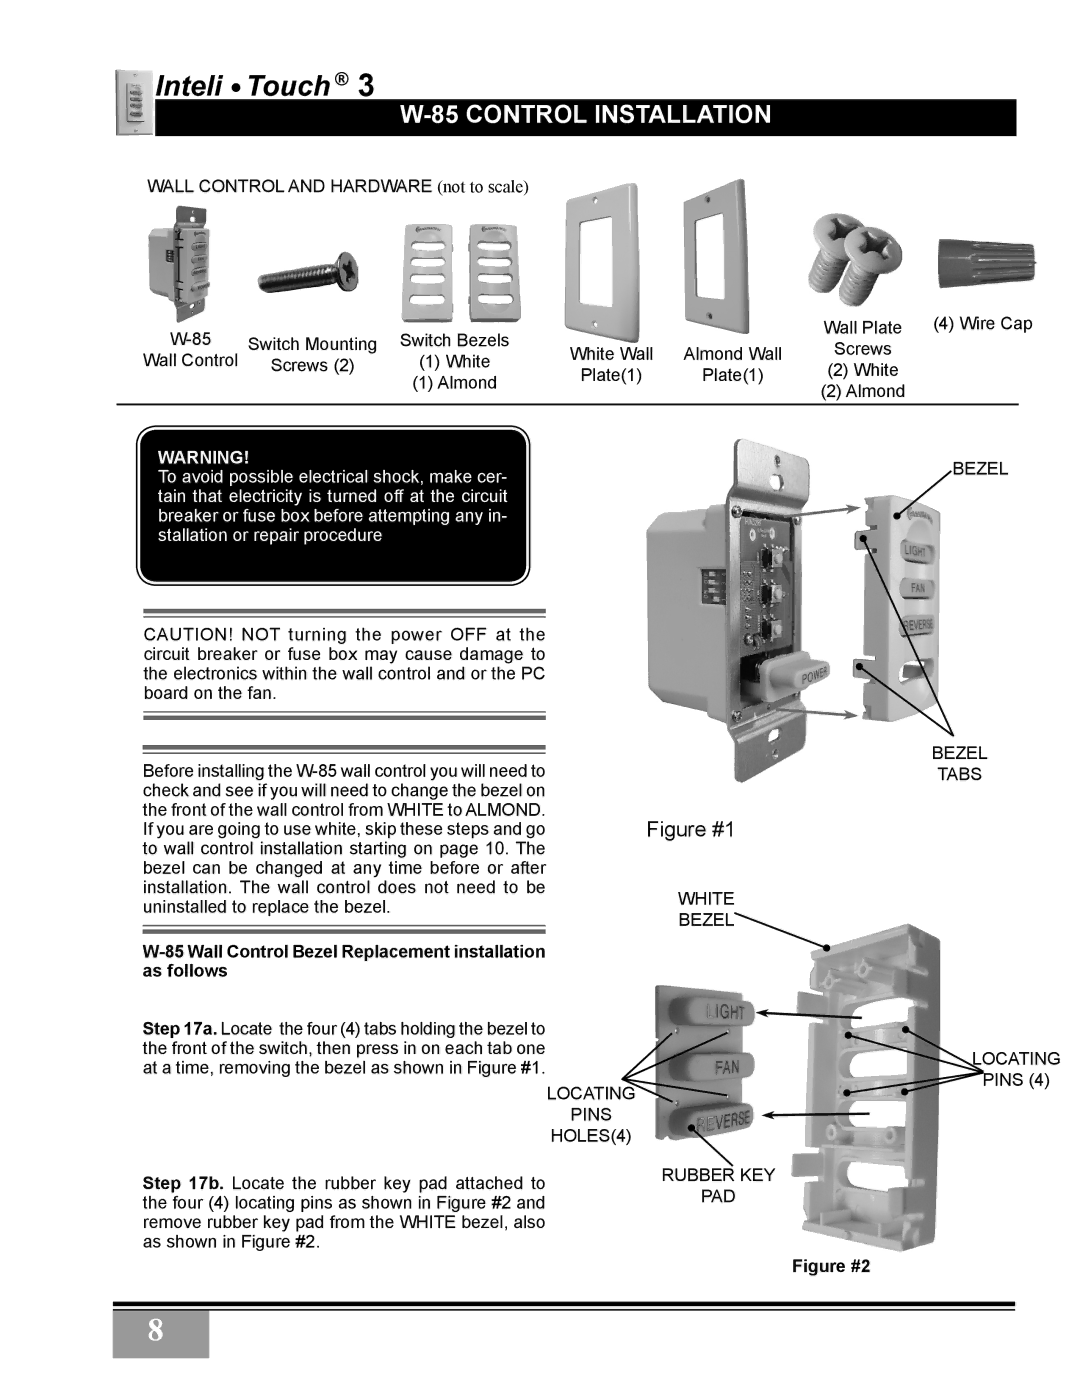
WALL CONTROL AND HARDWARE (not to scale)
Switch Mounting | Switch Bezels |
|
| Wall Plate | (4) Wire Cap | ||
White Wall | Almond Wall | Screws |
|
| |||
Wall Control | (1) White |
|
| ||||
Screws (2) | Plate(1) | Plate(1) | (2) White |
|
| ||
| (1) Almond |
|
| ||||
|
|
|
| (2) Almond |
|
| |
|
|
|
|
|
|
| |
WARNING!
To avoid possible electrical shock, make cer- tain that electricity is turned off at the circuit breaker or fuse box before attempting any in- stallation or repair procedure
CAUTION! NOT turning the power OFF at the circuit breaker or fuse box may cause damage to the electronics within the wall control and or the PC board on the fan.
Before installing the
W-85 Wall Control Bezel Replacement installation as follows
Figure #1
WHITE
BEZEL
BEZEL
BEZEL
TABS
Step 17a. Locate the four (4) tabs holding the bezel to the front of the switch, then press in on each tab one at a time, removing the bezel as shown in Figure #1.
LOCATING
PINS
HOLES(4)
Step 17b. Locate the rubber key pad attached to the four (4) locating pins as shown in Figure #2 and remove rubber key pad from the WHITE bezel, also as shown in Figure #2.
LOCATING
![]() PINS (4)
PINS (4)
RUBBER KEY
PAD
Figure #2
8