Wall Control
www.CasablancaFanCo.com 1.888.227.2178 ![]()
Drill Holes
Painter’s
Tape
Template
Screw |
Drywall |
Anchors |
Template |
Drywall |
Template |
Before
Cover Plate
After
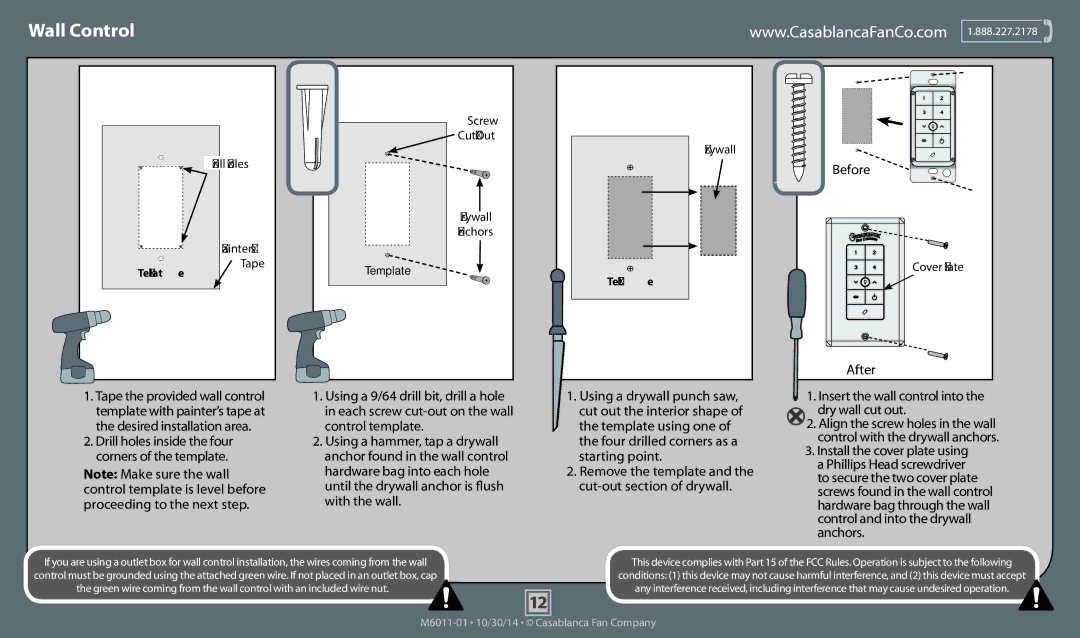
1.Tape the provided wall control template with painter’s tape at the desired installation area.
2.Drill holes inside the four corners of the template.
Note: Make sure the wall control template is level before proceeding to the next step.
1.Using a 9/64 drill bit, drill a hole in each screw
2.Using a hammer, tap a drywall anchor found in the wall control hardware bag into each hole until the drywall anchor is flush with the wall.
1.Using a drywall punch saw, cut out the interior shape of the template using one of the four drilled corners as a starting point.
2.Remove the template and the
1. Insert the wall control into the dry wall cut out.
2.Align the screw holes in the wall control with the drywall anchors.
3.Install the cover plate using a Phillips Head screwdriver to secure the two cover plate screws found in the wall control hardware bag through the wall control and into the drywall anchors.
If you are using a outlet box for wall control installation, the wires coming from the wall control must be grounded using the attached green wire. If not placed in an outlet box, cap
the green wire coming from the wall control with an included wire nut.
This device complies with Part 15 of the FCC Rules. Operation is subject to the following
conditions: (1) this device may not cause harmful interference, and (2) this device must accept
any interference received, including interference that may cause undesired operation.
12
