| DIAGNOSTIC PROGRAM |
| Message on LCD |
■Initial Setting | |
1. Connect an AC adaptor. |
■ How to start diagnostic program
1. Press the “POWER” button while pressing the “0 Up” and “START/STOP” buttons.
SONG BANK
■Diagnostic program
1. MODE Swtich check
1 Press “CASIO CHORD” button.
TEST
RHYTH | TEST |
|
2Press “FINGERED” button.
TONE
3Press “NORMAL” button.
SONG BANK
2. SWITCH check
1Press “0” button.
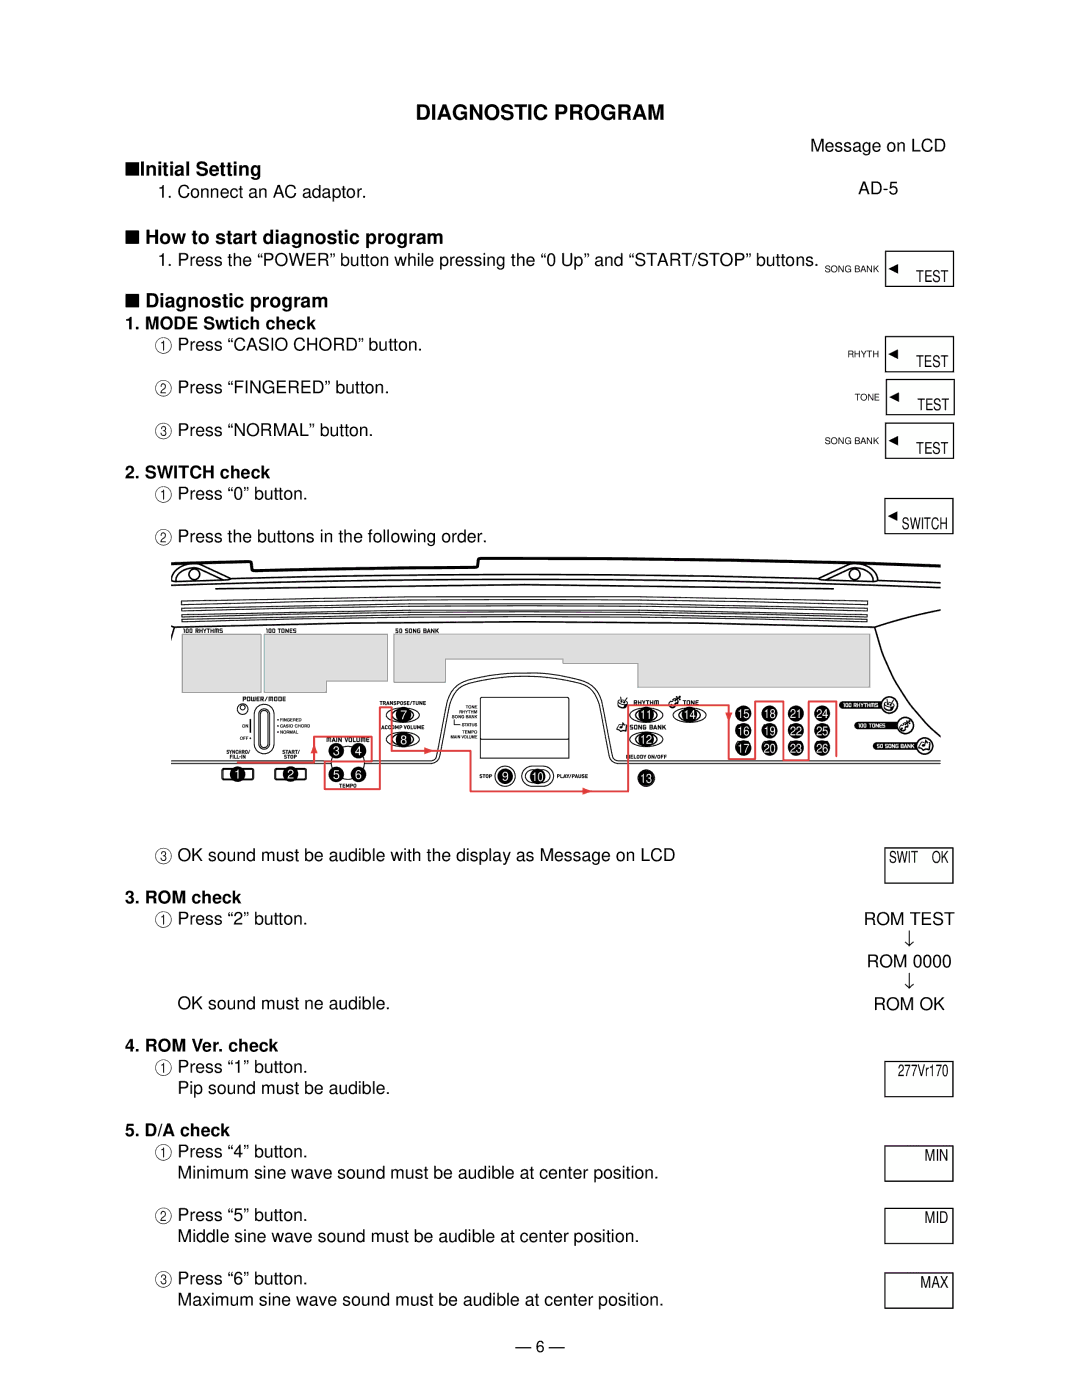
2Press the buttons in the following order.
TEST
TEST
SWITCH
1 2
3 | 4 |
5 | 6 |
7
8
9 10
11 | 14 | 15 | 18 | 21 | 24 |
12 |
| 16 | 19 | 22 | 25 |
| 17 | 20 | 23 | 26 | |
|
| ||||
13 |
|
|
|
|
|
3OK sound must be audible with the display as Message on LCD
3.ROM check
1Press “2” button.
OK sound must ne audible.
4.ROM Ver. check
1Press “1” button.
Pip sound must be audible.
5.D/A check
1Press “4” button.
Minimum sine wave sound must be audible at center position.
2Press “5” button.
Middle sine wave sound must be audible at center position.
3Press “6” button.
Maximum sine wave sound must be audible at center position.
SWIT OK
ROM TEST
↓
ROM 0000
↓
ROM OK
277Vr170
MIN
MID
MAX
— 6 —
