8.Decide which RAID setting you want, and, following the diagram to the right, move the jumper shunts to cover the appropriate pins. (On the diagram to the right, grey indicates that a pin is covered; white indicates an uncovered pin.)
The jumper shunts may be moved by gently pulling them upwards (vertically) until they are free, then pushing them downwards onto the appropriate two pins.
NOTE: If switching from any mode to RAID 1 mode, you must first configure the jumper block to “Single” mode. Then connect your drive to your computer, turn on your drive, and repeat step 5
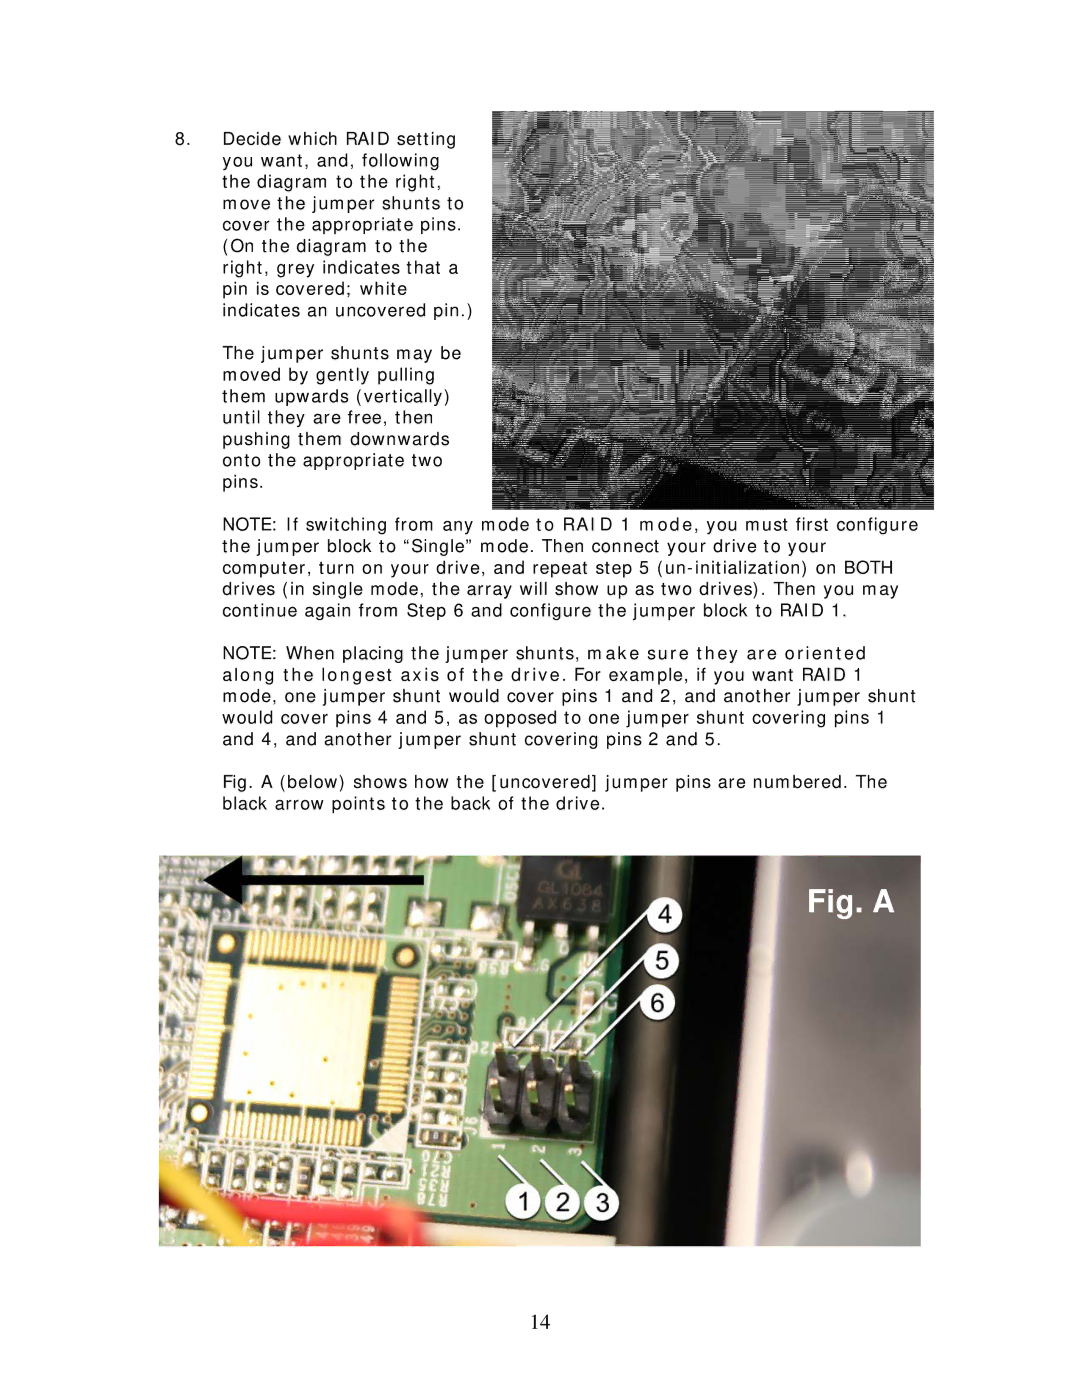
NOTE: When placing the jumper shunts, make sure they are oriented along the longest axis of the drive. For example, if you want RAID 1 mode, one jumper shunt would cover pins 1 and 2, and another jumper shunt would cover pins 4 and 5, as opposed to one jumper shunt covering pins 1 and 4, and another jumper shunt covering pins 2 and 5.
Fig. A (below) shows how the [uncovered] jumper pins are numbered. The black arrow points to the back of the drive.
Fig. A
14
