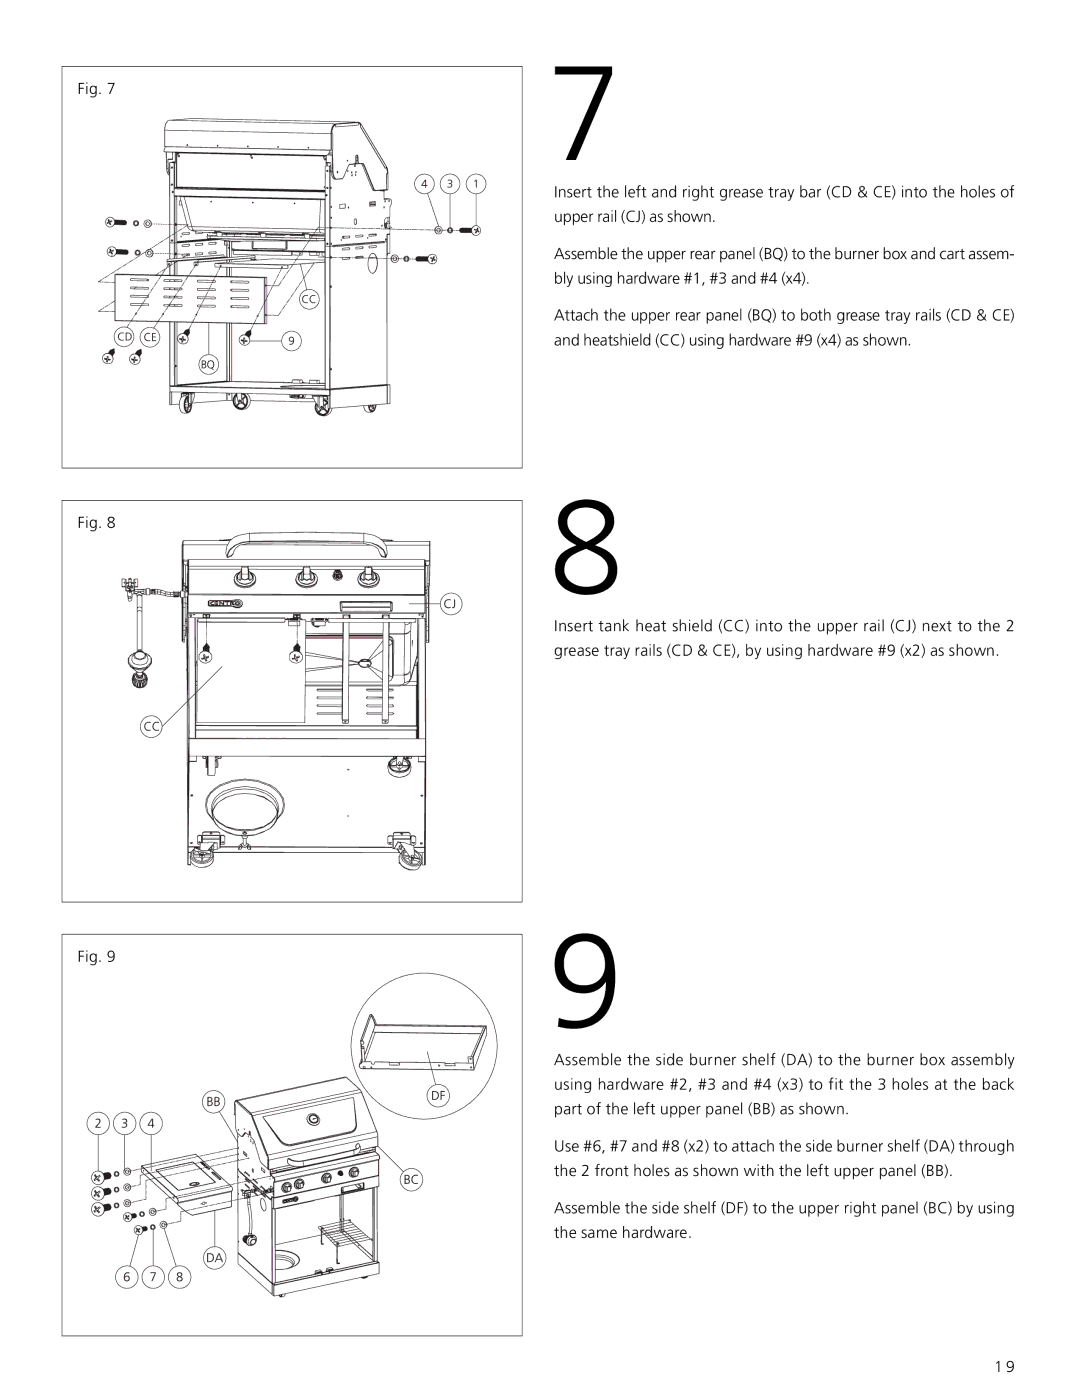
Fig. 7
BQ
Fig. 8
Fig. 9
7
Insert the left and right grease tray bar (CD & CE) into the holes of upper rail (CJ) as shown.
Assemble the upper rear panel (BQ) to the burner box and cart assem- bly using hardware #1, #3 and #4 (x4).
Attach the upper rear panel (BQ) to both grease tray rails (CD & CE) and heatshield (CC) using hardware #9 (x4) as shown.
8
Insert tank heat shield (CC) into the upper rail (CJ) next to the 2 grease tray rails (CD & CE), by using hardware #9 (x2) as shown.
9
Assemble the side burner shelf (DA) to the burner box assembly using hardware #2, #3 and #4 (x3) to fit the 3 holes at the back part of the left upper panel (BB) as shown.
Use #6, #7 and #8 (x2) to attach the side burner shelf (DA) through the 2 front holes as shown with the left upper panel (BB).
Assemble the side shelf (DF) to the upper right panel (BC) by using the same hardware.
1 9