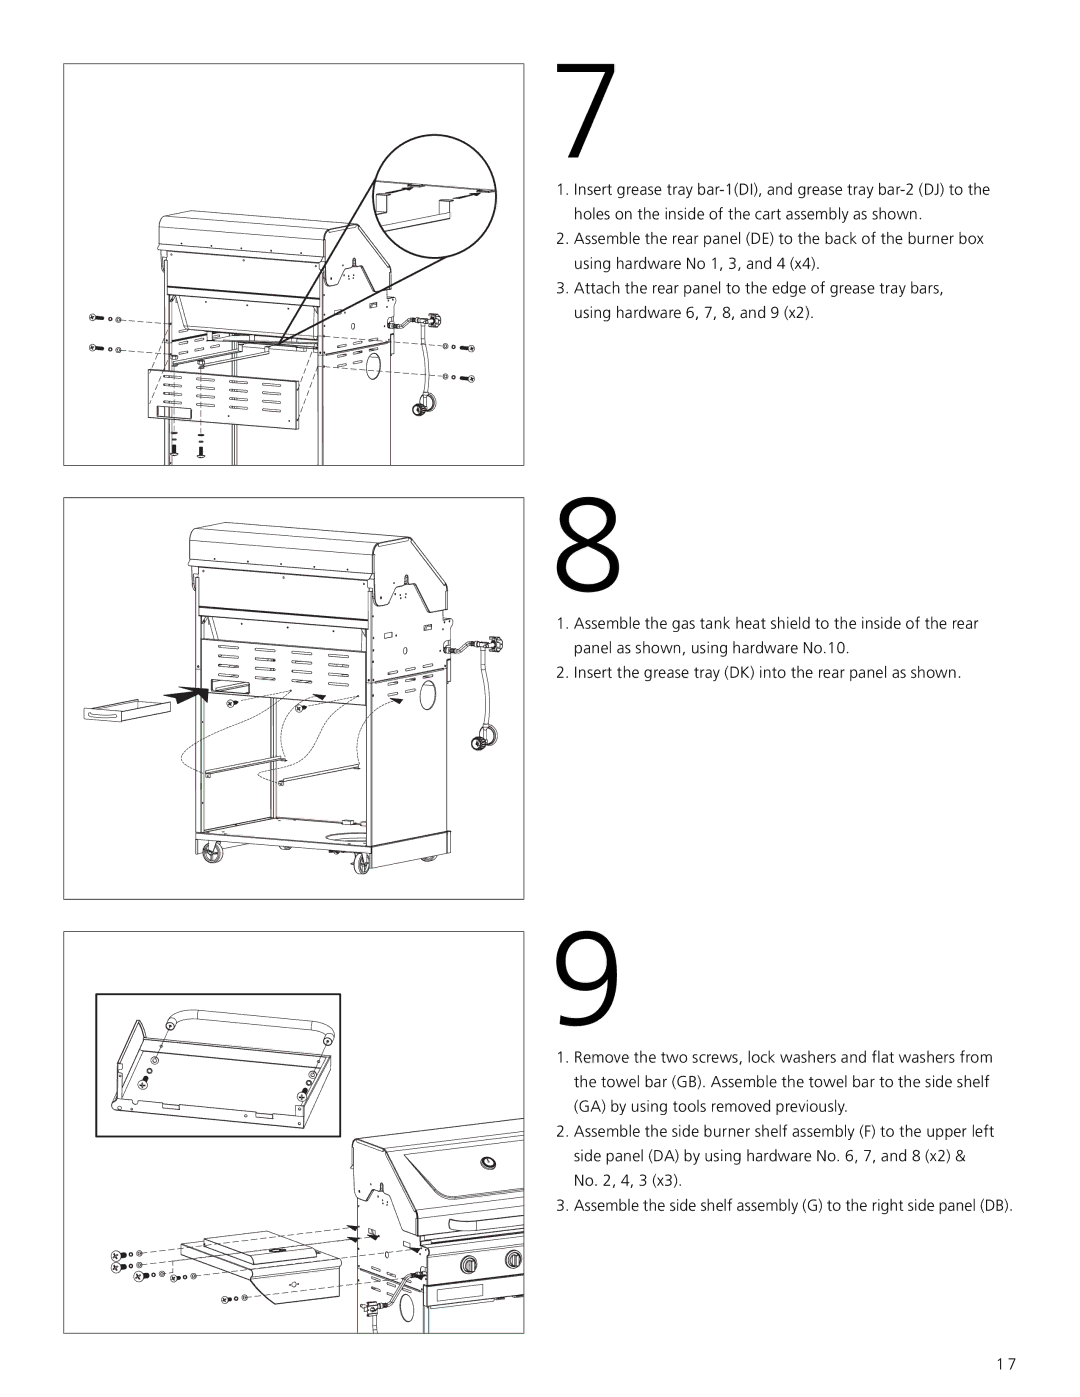
7
1. Insert grease tray
2. Assemble the rear panel (DE) to the back of the burner box using hardware No 1, 3, and 4 (x4).
3. Attach the rear panel to the edge of grease tray bars, using hardware 6, 7, 8, and 9 (x2).
8
1. Assemble the gas tank heat shield to the inside of the rear panel as shown, using hardware No.10.
2. Insert the grease tray (DK) into the rear panel as shown.
9
1. Remove the two screws, lock washers and flat washers from the towel bar (GB). Assemble the towel bar to the side shelf (GA) by using tools removed previously.
2. Assemble the side burner shelf assembly (F) to the upper left side panel (DA) by using hardware No. 6, 7, and 8 (x2) & No. 2, 4, 3 (x3).
3. Assemble the side shelf assembly (G) to the right side panel (DB).
1 7