ASSEMBLY INSTRUCTIONS
13
DD
DD
A
B
C
DC
DE
D
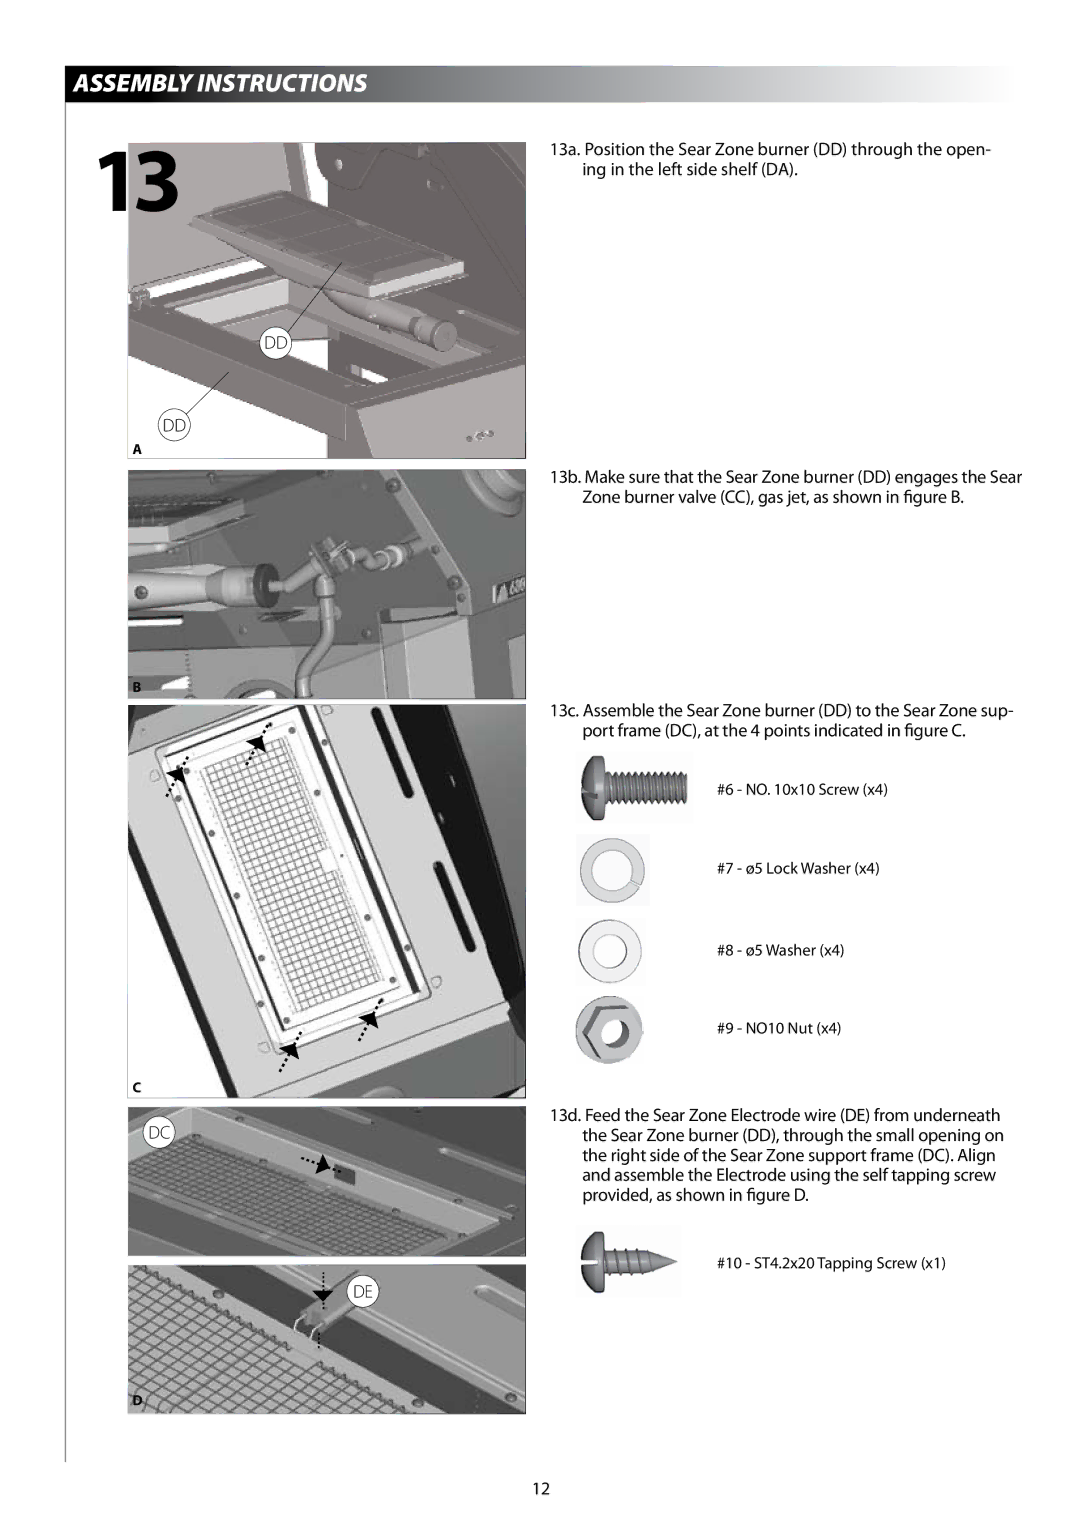
13a. Position the Sear Zone burner (DD) through the open- ing in the left side shelf (DA).
13b. Make sure that the Sear Zone burner (DD) engages the Sear Zone burner valve (CC), gas jet, as shown in figure B.
13c. Assemble the Sear Zone burner (DD) to the Sear Zone sup- port frame (DC), at the 4 points indicated in figure C.
#6 - NO. 10x10 Screw (x4)
#7 - ø5 Lock Washer (x4)
#8 - ø5 Washer (x4)
#9 - NO10 Nut (x4)
13d. Feed the Sear Zone Electrode wire (DE) from underneath the Sear Zone burner (DD), through the small opening on the right side of the Sear Zone support frame (DC). Align and assemble the Electrode using the self tapping screw provided, as shown in figure D.
#10 - ST4.2x20 Tapping Screw (x1)
12
