9. Polarity Switch
Changes the polarity of the subwoofer, also referred to as the “phase.” Listen and adjust for maximum bass.
10. Variable Low Pass (Sub frequencies)
When sending a full range signal to the subwoofer, the variable LPF blocks HF signals above indicated frequencies from reaching the subwoofer.
Note This control only affects the sub in Master mode, if your sub is in Slave mode it will receive this setting from the Master sub).
Tip If your sub sounds “muddy” or “muffled” try turning this control counter clockwise to the 9 o’clock position or lower.
CVA-121
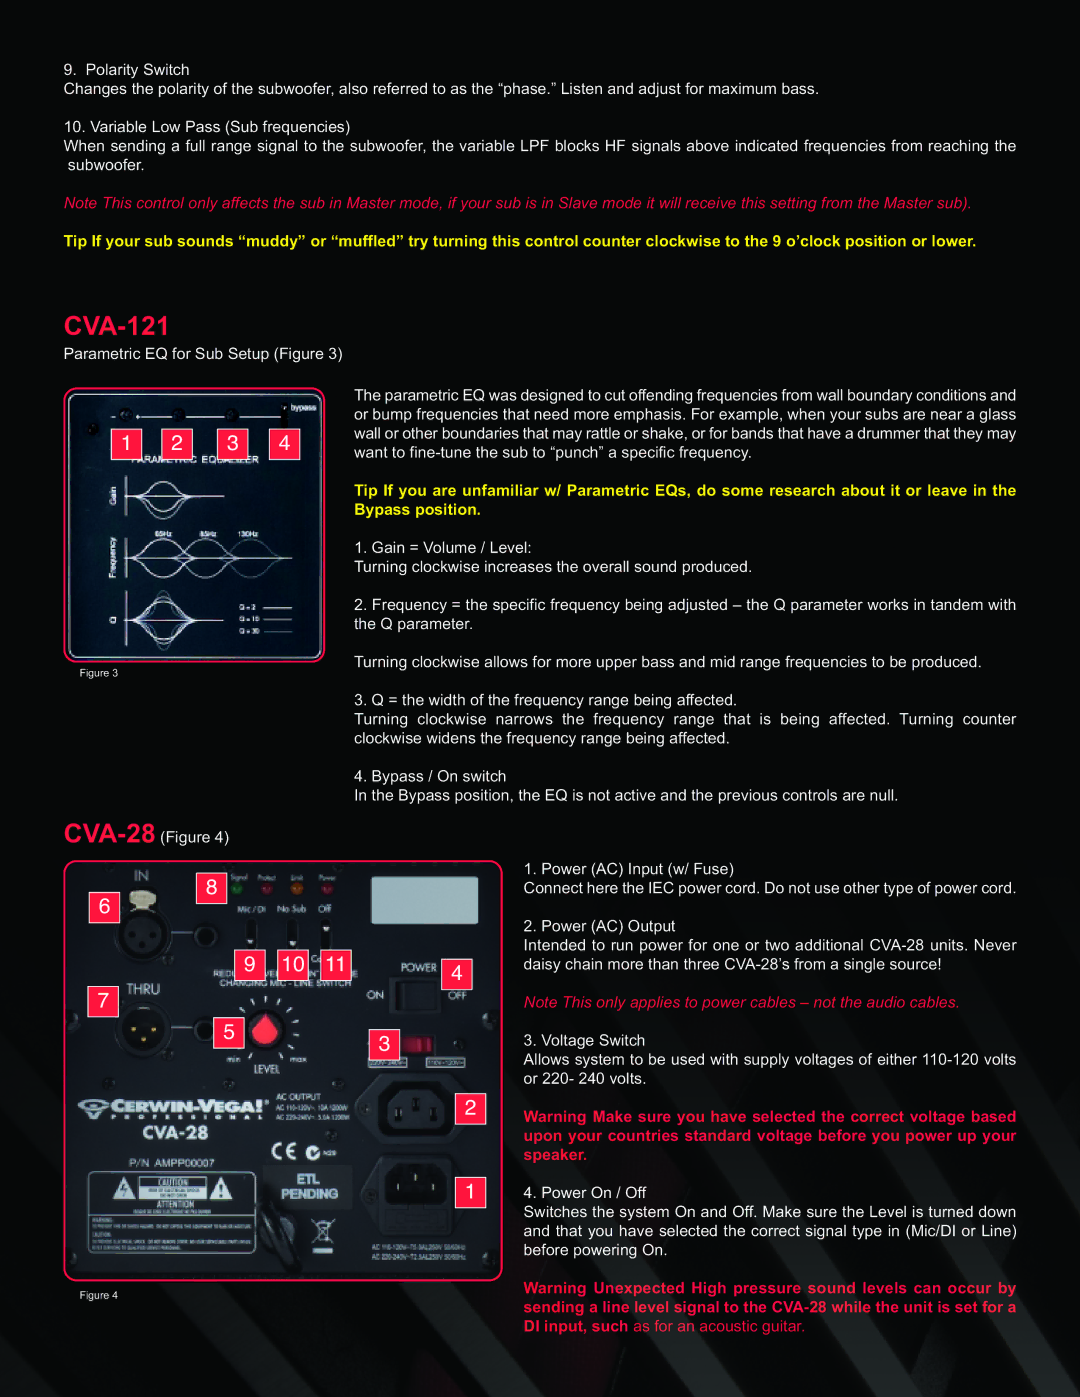
Parametric EQ for Sub Setup (Figure 3)
1 ![]()
![]() 2
2 ![]()
![]() 3
3 ![]()
![]() 4
4
Figure 3
6 8
7 | 9 | 10 | 11 |
5 |
|
| |
|
|
|
Figure 4
The parametric EQ was designed to cut offending frequencies from wall boundary conditions and or bump frequencies that need more emphasis. For example, when your subs are near a glass wall or other boundaries that may rattle or shake, or for bands that have a drummer that they may want to
Tip If you are unfamiliar w/ Parametric EQs, do some research about it or leave in the Bypass position.
1. Gain = Volume / Level:
Turning clockwise increases the overall sound produced.
2.Frequency = the specific frequency being adjusted – the Q parameter works in tandem with the Q parameter.
Turning clockwise allows for more upper bass and mid range frequencies to be produced.
3. Q = the width of the frequency range being affected.
Turning clockwise narrows the frequency range that is being affected. Turning counter clockwise widens the frequency range being affected.
4. Bypass / On switch
In the Bypass position, the EQ is not active and the previous controls are null.
|
| 1. Power (AC) Input (w/ Fuse) |
|
| Connect here the IEC power cord. Do not use other type of power cord. |
|
| 2. Power (AC) Output |
4 | Intended to run power for one or two additional | |
daisy chain more than three | ||
3 |
| Note This only applies to power cables – not the audio cables. |
| 3. Voltage Switch | |
| Allows system to be used with supply voltages of either | |
2 | or 220- 240 volts. | |
Warning Make sure you have selected the correct voltage based | ||
|
| upon your countries standard voltage before you power up your |
| 1 | speaker. |
| 4. Power On / Off | |
|
| Switches the system On and Off. Make sure the Level is turned down |
|
| and that you have selected the correct signal type in (Mic/DI or Line) |
|
| before powering On. |
|
| Warning Unexpected High pressure sound levels can occur by |
|
| sending a line level signal to the |
|
| DI input, such as for an acoustic guitar. |
