15
B
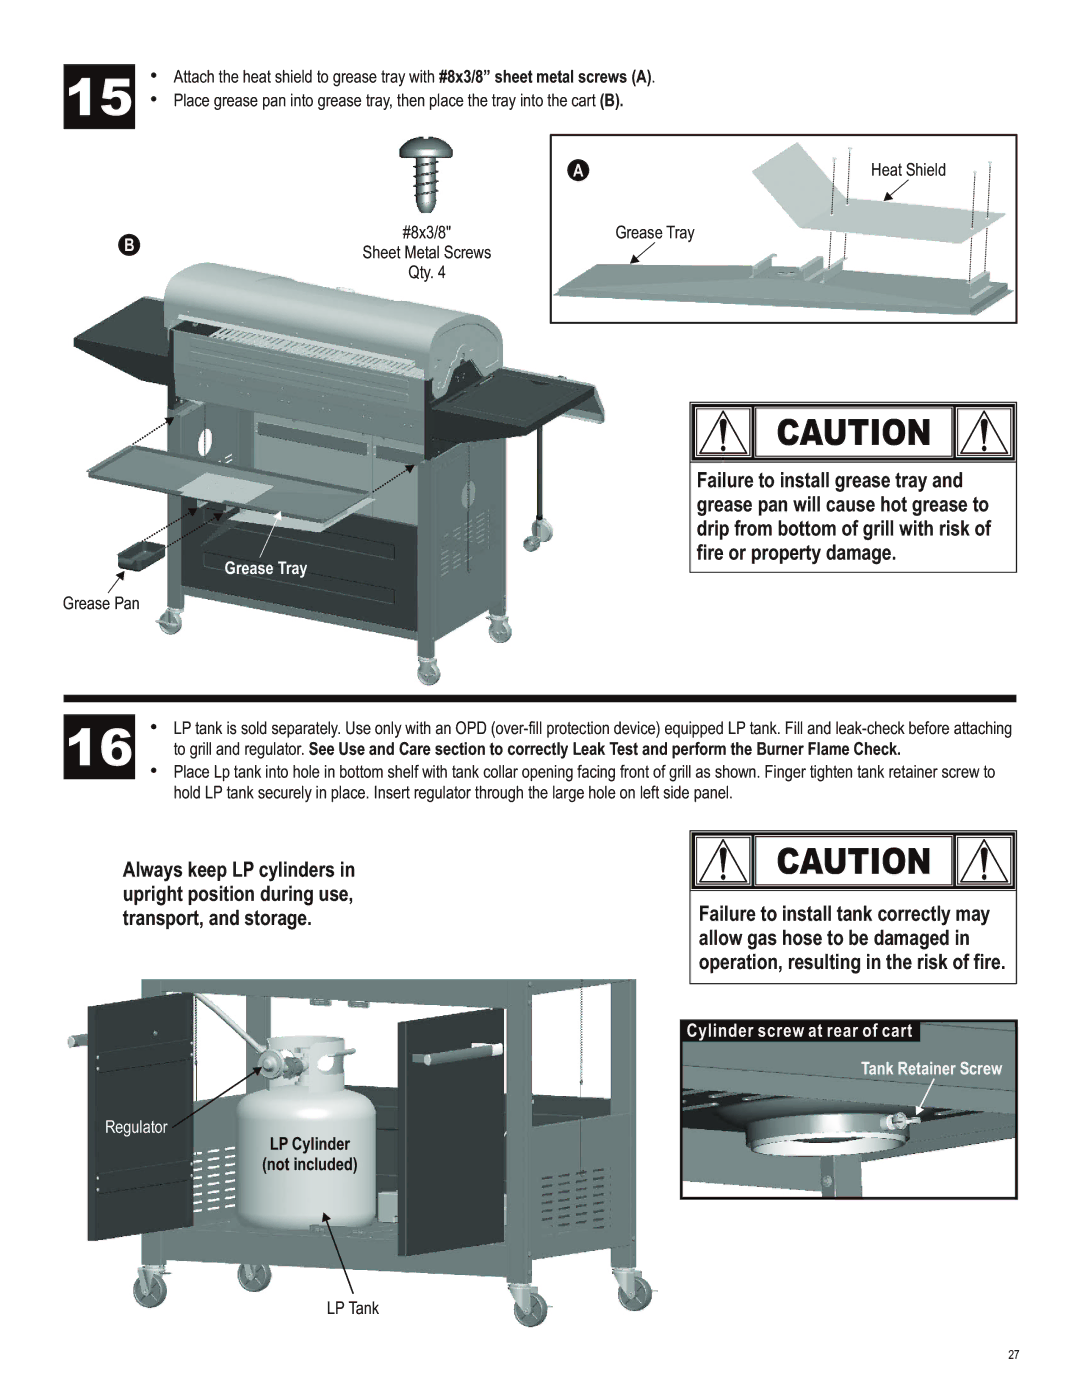
•Attach the heat shield to grease tray with #8x3/8” sheet metal screws (A).
•Place grease pan into grease tray, then place the tray into the cart (B).
A | Heat Shield |
#8x3/8" | Grease Tray |
Sheet Metal Screws |
|
Qty. 4 |
|
Grease Tray
Grease Pan
CAUTION ![]()
![]()
Failure to install grease tray and grease pan will cause hot grease to drip from bottom of grill with risk of fire or property damage.
•LP tank is sold separately. Use only with an OPD
16 | to grill and regulator. See Use and Care section to correctly Leak Test and perform the Burner Flame Check. |
•Place Lp tank into hole in bottom shelf with tank collar opening facing front of grill as shown. Finger tighten tank retainer screw to hold LP tank securely in place. Insert regulator through the large hole on left side panel.
Always keep LP cylinders in upright position during use, transport, and storage.
CAUTION ![]()
![]()
Failure to install tank correctly may allow gas hose to be damaged in operation, resulting in the risk of fire.
Regulator
LP Cylinder
(not included)
Cylinder screw at rear of cart |
Tank Retainer Screw |
LP Tank
27
