ASSEMBLY
1
Left Leg
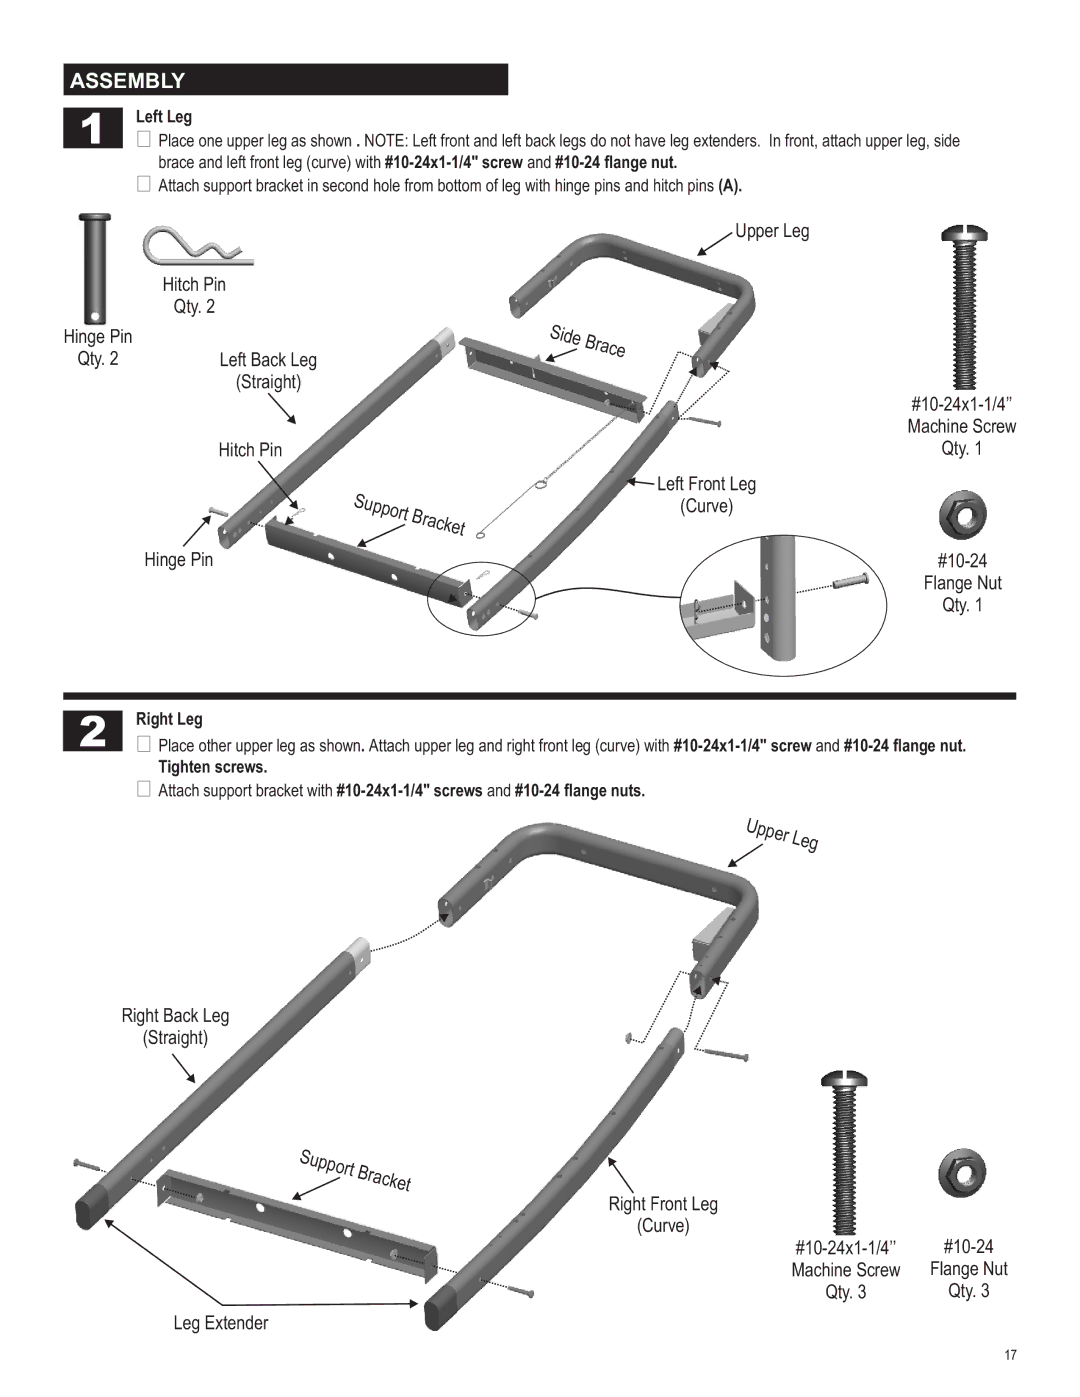
‘Place one upper leg as shown . NOTE: Left front and left back legs do not have leg extenders. In front, attach upper leg, side brace and left front leg (curve) with
‘Attach support bracket in second hole from bottom of leg with hinge pins and hitch pins (A).
| Hitch Pin |
| Qty. 2 |
Hinge Pin |
|
Qty. 2 | Left Back Leg |
| (Straight) |
| Hitch Pin |
Support Bracket
Hinge Pin
![]() Upper Leg
Upper Leg
Side Brace
![]() Left Front Leg (Curve)
Left Front Leg (Curve)
Flange Nut
Qty. 1
2
Right Leg
‘Place other upper leg as shown. Attach upper leg and right front leg (curve) with
Tighten screws.
‘Attach support bracket with
Upper Leg
Right Back Leg
(Straight)
Support Bracket
Right Front Leg
(Curve)
Machine Screw | Flange Nut |
Qty. 3 | Qty. 3 |
Leg Extender
17
