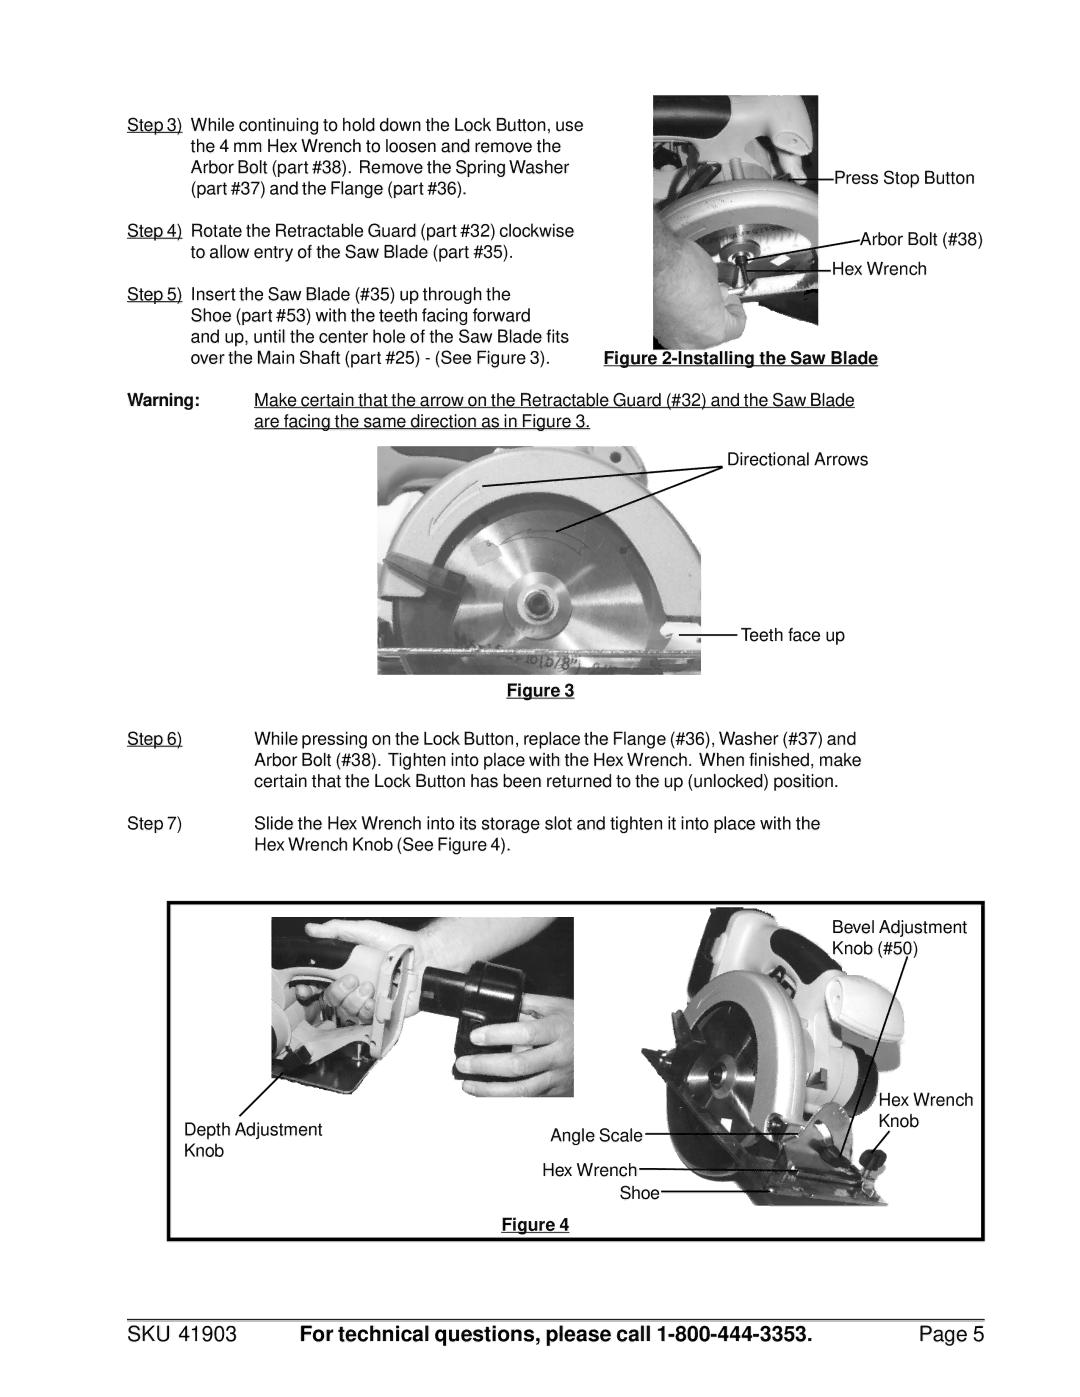
Step 3) While continuing to hold down the Lock Button, use the 4 mm Hex Wrench to loosen and remove the Arbor Bolt (part #38). Remove the Spring Washer (part #37) and the Flange (part #36).
Step 4) Rotate the Retractable Guard (part #32) clockwise
to allow entry of the Saw Blade (part #35).
Step 5) Insert the Saw Blade (#35) up through the Shoe (part #53) with the teeth facing forward and up, until the center hole of the Saw Blade fits over the Main Shaft (part #25) - (See Figure 3).
Press Stop Button
Arbor Bolt (#38)
Hex Wrench
Figure 2-Installing the Saw Blade
Warning: Make certain that the arrow on the Retractable Guard (#32) and the Saw Blade are facing the same direction as in Figure 3.
Directional Arrows
|
|
|
| Teeth face up |
|
|
|
| |
|
| Figure 3 | ||
Step 6) | While pressing on the Lock Button, replace the Flange (#36), Washer (#37) and | |||
|
| Arbor Bolt (#38). Tighten into place with the Hex Wrench. When finished, make | ||
|
| certain that the Lock Button has been returned to the up (unlocked) position. | ||
Step 7) | Slide the Hex Wrench into its storage slot and tighten it into place with the | |||
|
| Hex Wrench Knob (See Figure 4). | ||
|
|
|
|
|
|
|
|
| Bevel Adjustment |
|
|
|
| Knob (#50) |
|
|
|
|
| Hex Wrench | |
Depth Adjustment |
|
|
|
| Knob | |
Angle Scale | ||||||
Knob | ||||||
Hex Wrench | ||||||
| ||||||
| Shoe |
|
|
| ||
|
| |||||
| Figure 4 | |||||
SKU 41903 | For technical questions, please call | Page 5 |
