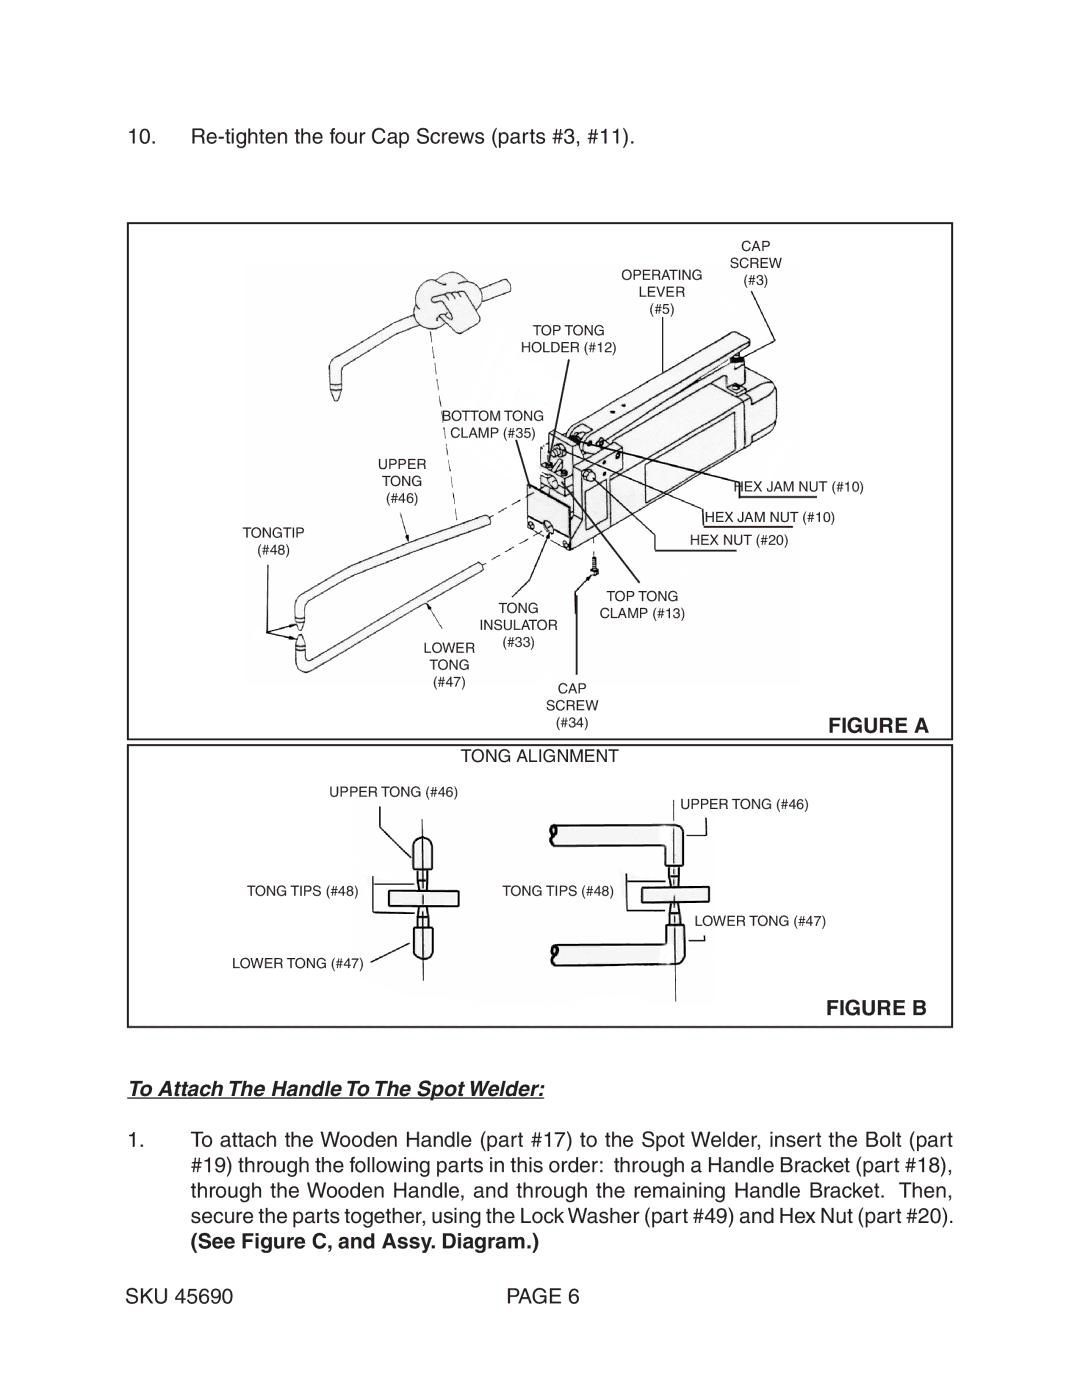
10.Re-tighten the four Cap Screws (parts #3, #11).
|
|
|
|
|
|
| CAP |
|
|
| OPERATING | SCREW | |||
|
|
| (#3) | ||||
|
|
| LEVER |
| |||
|
|
|
|
|
| ||
|
|
| (#5) |
|
|
| |
| TOP TONG |
|
|
| |||
| HOLDER (#12) |
|
|
| |||
BOTTOM TONG |
|
|
|
|
| ||
CLAMP (#35) |
|
|
|
|
| ||
UPPER |
|
|
|
|
|
|
|
TONG |
|
|
|
|
| HEX JAM NUT (#10) | |
(#46) |
|
|
|
|
| ||
|
|
|
|
|
|
| |
TONGTIP |
|
|
|
|
| HEX JAM NUT (#10) | |
|
|
|
| HEX NUT (#20) | |||
(#48) |
|
|
|
| |||
|
|
|
|
|
|
| |
TONG |
| TOP TONG |
|
|
| ||
|
|
|
|
| |||
|
|
|
|
| |||
|
| CLAMP (#13) |
|
|
| ||
| INSULATOR |
|
|
|
| ||
|
|
|
|
|
|
| |
LOWER | (#33) |
|
|
|
|
|
|
|
|
|
|
|
|
| |
TONG |
|
|
|
|
|
|
|
(#47) | CAP |
|
|
|
|
| |
|
|
|
|
|
| ||
| SCREW |
|
|
|
| FIGURE A | |
| (#34) |
|
|
|
| ||
TONG ALIGNMENT
UPPER TONG (#46)
UPPER TONG (#46)
TONG TIPS (#48) | TONG TIPS (#48) |
LOWER TONG (#47)
LOWER TONG (#47)
FIGURE B
To Attach The Handle To The Spot Welder:
1.To attach the Wooden Handle (part #17) to the Spot Welder, insert the Bolt (part #19) through the following parts in this order: through a Handle Bracket (part #18), through the Wooden Handle, and through the remaining Handle Bracket. Then, secure the parts together, using the Lock Washer (part #49) and Hex Nut (part #20).
(See Figure C, and Assy. Diagram.)
SKU 45690 | PAGE 6 |
