CHANGING THE NOZZLE |
|
|
|
1. Push the Switch Lock (21) to the Off position, and | (3) | (2) | (1) |
|
remove the battery.
2.Unscrew the Nozzle (1) by turning it counterclockwise.
Make sure that the Valve (2) remains in the Cylinder (4).
3.Insert the new Nozzle (1) into the Cylinder (4) and securely tighten it clockwise.
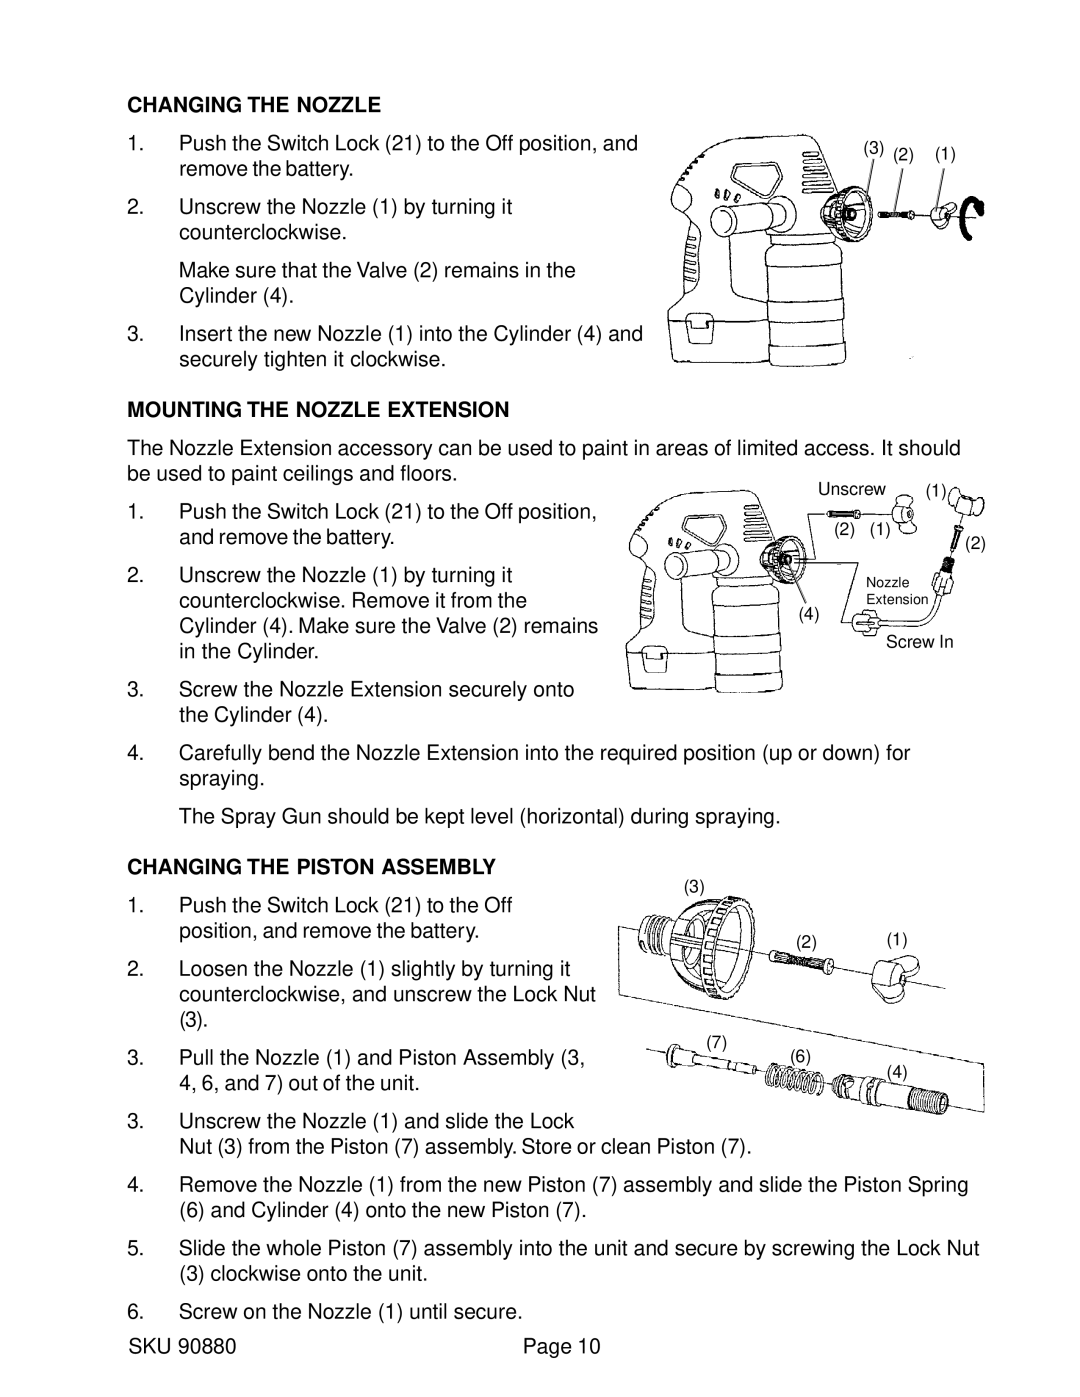
MOUNTING THE NOZZLE EXTENSION
The Nozzle Extension accessory can be used to paint in areas of limited access. It should be used to paint ceilings and floors.
Unscrew (1)
1. | Push the Switch Lock (21) to the Off position, | (2) | (1) |
| and remove the battery. | ||
|
| (2) | |
2. | Unscrew the Nozzle (1) by turning it |
| Nozzle |
| counterclockwise. Remove it from the | (4) | Extension |
| Cylinder (4). Make sure the Valve (2) remains |
| |
|
|
|
in the Cylinder. | Screw In |
|
3.Screw the Nozzle Extension securely onto the Cylinder (4).
4.Carefully bend the Nozzle Extension into the required position (up or down) for spraying.
The Spray Gun should be kept level (horizontal) during spraying.
CHANGING THE PISTON ASSEMBLY
1. Push the Switch Lock (21) to the Off | (3) |
|
|
| |
position, and remove the battery. | (2) | (1) |
|
2.Loosen the Nozzle (1) slightly by turning it counterclockwise, and unscrew the Lock Nut
(3).
3. | Pull the Nozzle (1) and Piston Assembly (3, | (7) |
(6) |
4, 6, and 7) out of the unit.
(4)
3.Unscrew the Nozzle (1) and slide the Lock
Nut (3) from the Piston (7) assembly. Store or clean Piston (7).
4.Remove the Nozzle (1) from the new Piston (7) assembly and slide the Piston Spring
(6)and Cylinder (4) onto the new Piston (7).
5.Slide the whole Piston (7) assembly into the unit and secure by screwing the Lock Nut
(3)clockwise onto the unit.
6.Screw on the Nozzle (1) until secure.
SKU 90880 | Page 10 |