3.Check to make sure the Blade Guard (2) moves freely upward and downward.
(See Figure D.)
4.Close the Left Side Cutting Table (26). (See Figure D.)
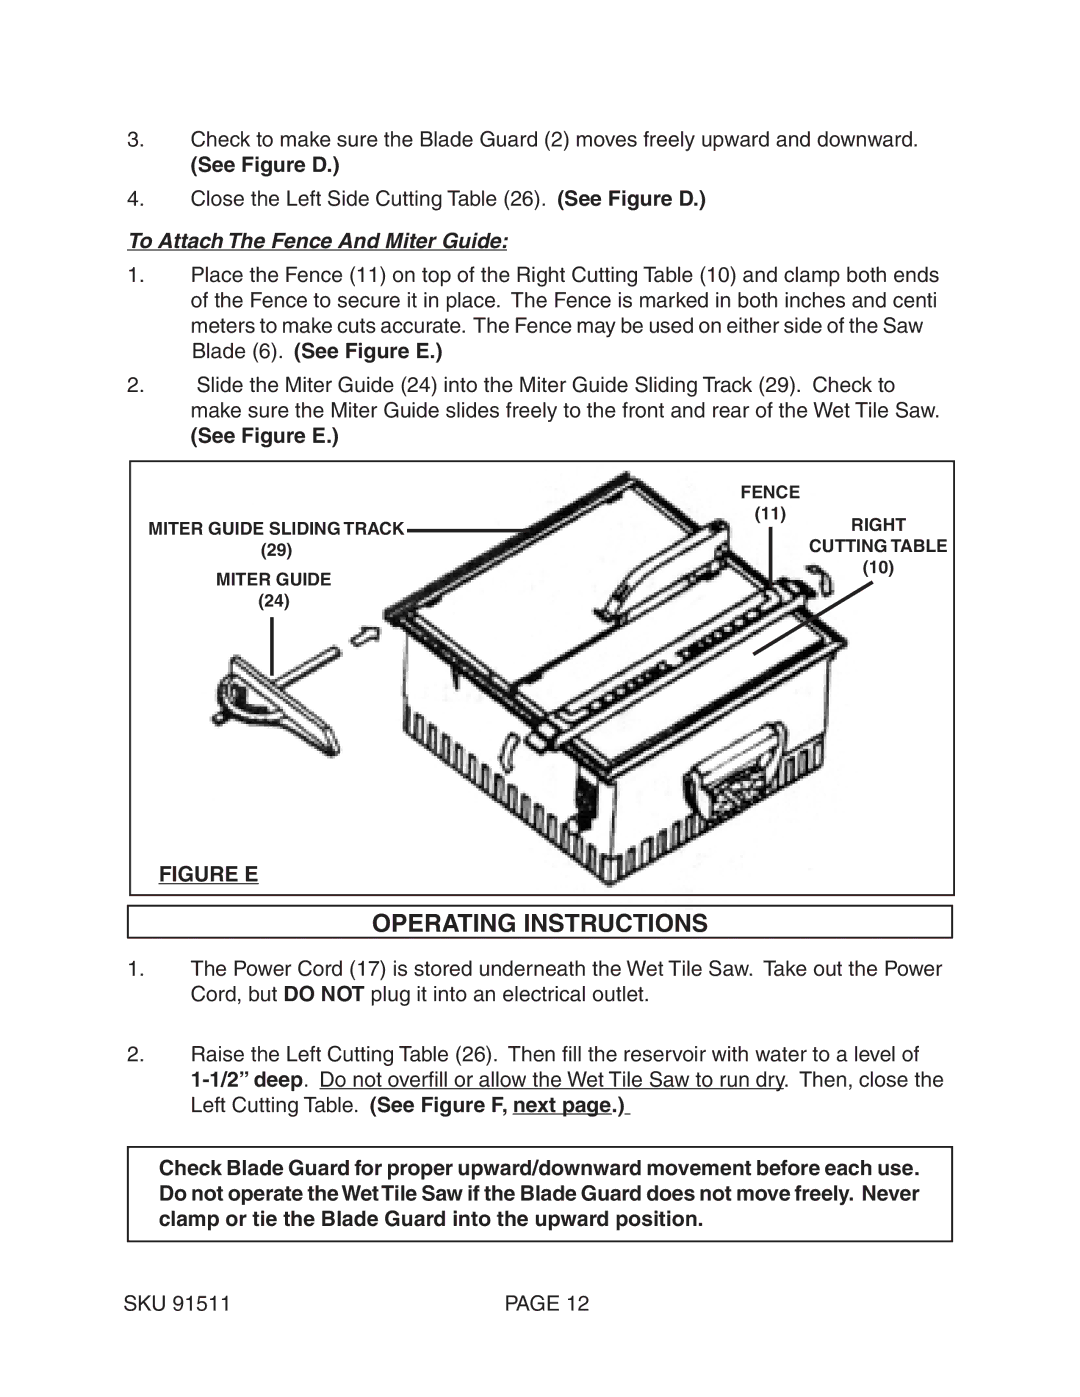
To Attach The Fence And Miter Guide:
1.Place the Fence (11) on top of the Right Cutting Table (10) and clamp both ends of the Fence to secure it in place. The Fence is marked in both inches and centi meters to make cuts accurate. The Fence may be used on either side of the Saw Blade (6). (See Figure E.)
2.Slide the Miter Guide (24) into the Miter Guide Sliding Track (29). Check to make sure the Miter Guide slides freely to the front and rear of the Wet Tile Saw.
(See Figure E.)
|
| FENCE |
| |
MITER GUIDE SLIDING TRACK | (11) | RIGHT | ||
|
|
| ||
(29) |
|
|
| CUTTING TABLE |
MITER GUIDE |
|
|
| (10) |
|
|
|
| |
(24) |
|
|
|
|
FIGURE E
OPERATING INSTRUCTIONS
1.The Power Cord (17) is stored underneath the Wet Tile Saw. Take out the Power Cord, but DO NOT plug it into an electrical outlet.
2.Raise the Left Cutting Table (26). Then fill the reservoir with water to a level of
Check Blade Guard for proper upward/downward movement before each use. Do not operate the WetTile Saw if the Blade Guard does not move freely. Never clamp or tie the Blade Guard into the upward position.
SKU 91511 | PAGE 12 |