Model | Installation Instructions |
INSPECT MOUNT BEFORE INSTALLATION
1.Carefully inspect the mount for shipping damage (see figure 1). If any damage is apparent, call your carrier claims agent and do not continue with the installation until the carrier has reviewed the damage.
NOTE: Read all assembly instructions before starting
2. Carefully inspect mount components for damage.
MOUNT INSTALLATION
The mount is shipped
CAUTION: If the total combined weight of the projector, projector mount, and lower mounting pipe exceeds 15lbs, the CMA 347 vibration mount needs to be reconfigured for weights over 15lbs. Weigh all parts before beginning installation.
If the total combined weight of the projector, projector mount, and lower mounting pipe is 15lbs or below, proceed with mount installation. If the total combined weight of the projector, projector mount, and lower mounting pipe is over 15lbs, see
NOTE: Keep the vibration mount as close as possible to the projector by minimizing the length of the lower mounting pipe.
1.Thread Upper mounting pipe (190) into Ceiling plate (180).
2.Secure NPT 1 1/2” upper mounting pipe (190) to ceiling plate (180) following the installation instructions provided with the ceiling plate (180).
3.Thread mount top (10) onto NPT 1 1/2” upper mounting pipe (190).
NOTE: Ensure there is no direct contact between mount and surrounding structure. Any contact could allow vibration transfer to the projector.
4.Secure NPT 1 1/2” upper mounting pipe (190) to mount top (10) using
5.Thread NPT 1 1/2” lower mounting pipe (200) into mount bottom (20).
6.Secure NPT 1 1/2” lower mounting pipe (200) to mount bottom (20) using
lower mounting pipe (200).
7.Thread projector mount (210) onto lower NPT 1 1/2" lower mounting pipe (200).
8.Secure NPT 1 1/2” lower mounting pipe (200) to projector mount (210) following the installation instructions provided with the projector mount (210).
9.With the weight of the installation on the
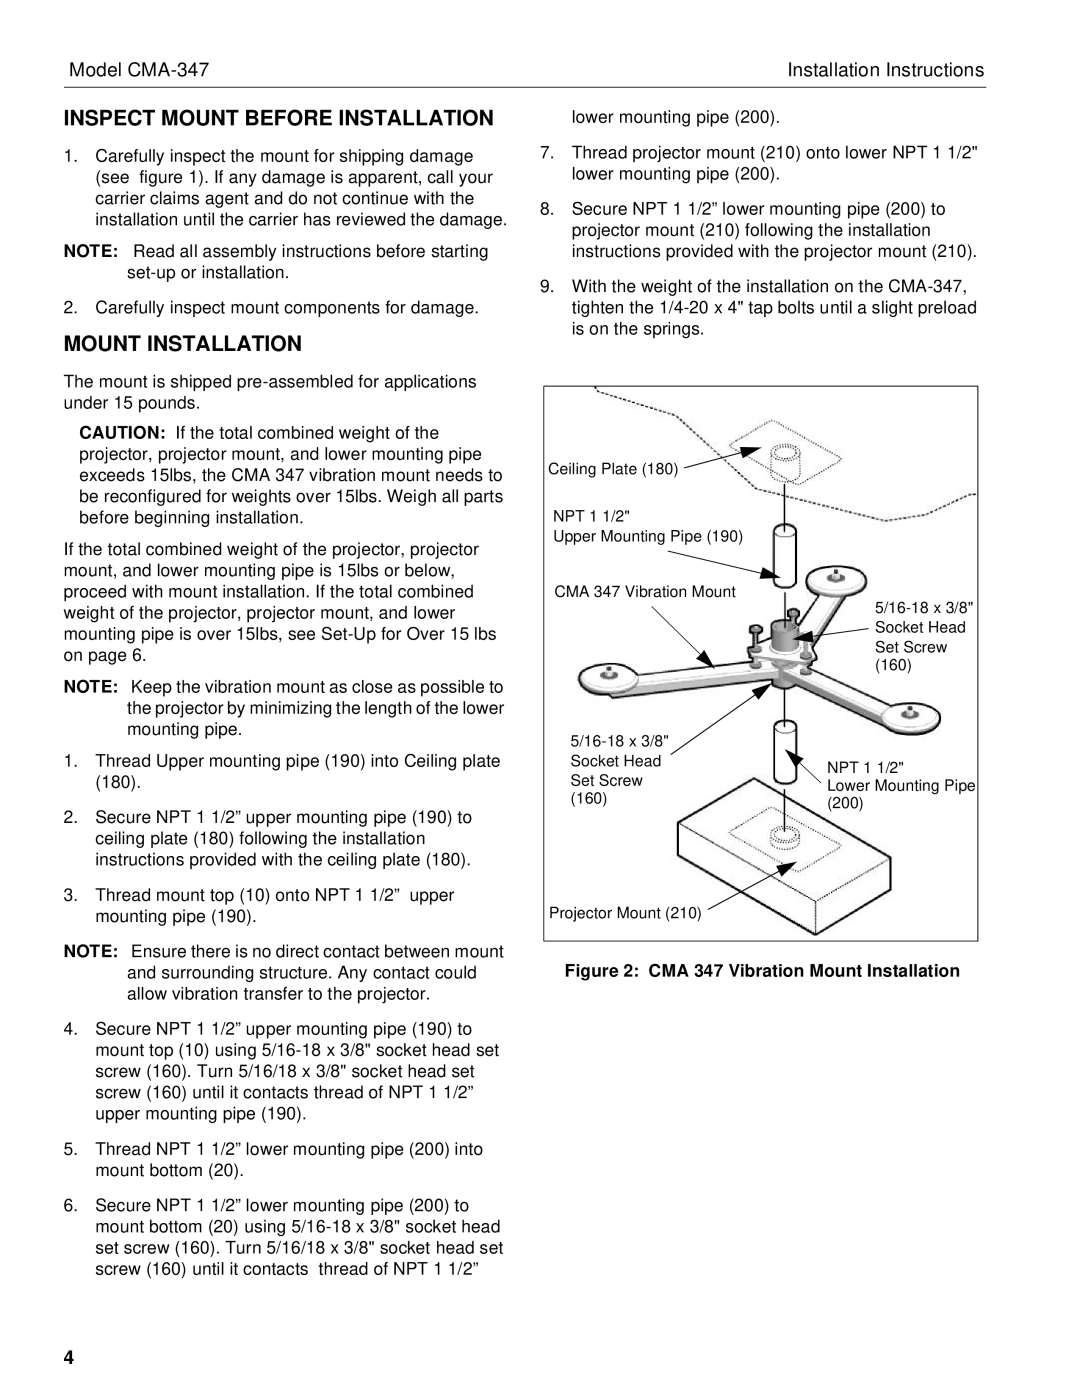
Ceiling Plate (180)
NPT 1 1/2"
Upper Mounting Pipe (190)
CMA 347 Vibration Mount
| ||
Socket Head | NPT 1 1/2" | |
Set Screw | ||
Lower Mounting Pipe | ||
(160) | (200) |
Projector Mount (210)
Figure 2: CMA 347 Vibration Mount Installation
4