Installation Instructions |
CONTENTS |
|
INSPECT THE UNIT BEFORE INSTALLING | 3 |
PARTS | 3 |
TOOLS REQUIRED FOR INSTALLATION | 4 |
INSTRUCTIONS | 4 |
Installing Top Stud Spanning Adapter to Wall | 4 |
Attaching Stud Spanning Adapter to Wall Arm | 5 |
Attaching Wall Arm to |
|
Spanning Adapter | 5 |
Attaching Bottom Stud Spanning Adapter to Wall | 6 |
Attaching Front Cover | 6 |
Connecting NPT Pipe or Nipple to Wall Arm | 6 |
INSPECT THE UNIT BEFORE INSTALLING
Unpack the carton. Carefully inspect the parts for shipping damage. Verify contents listed in Table 1.
If you are missing any of the listed parts, contact Customer Service at:
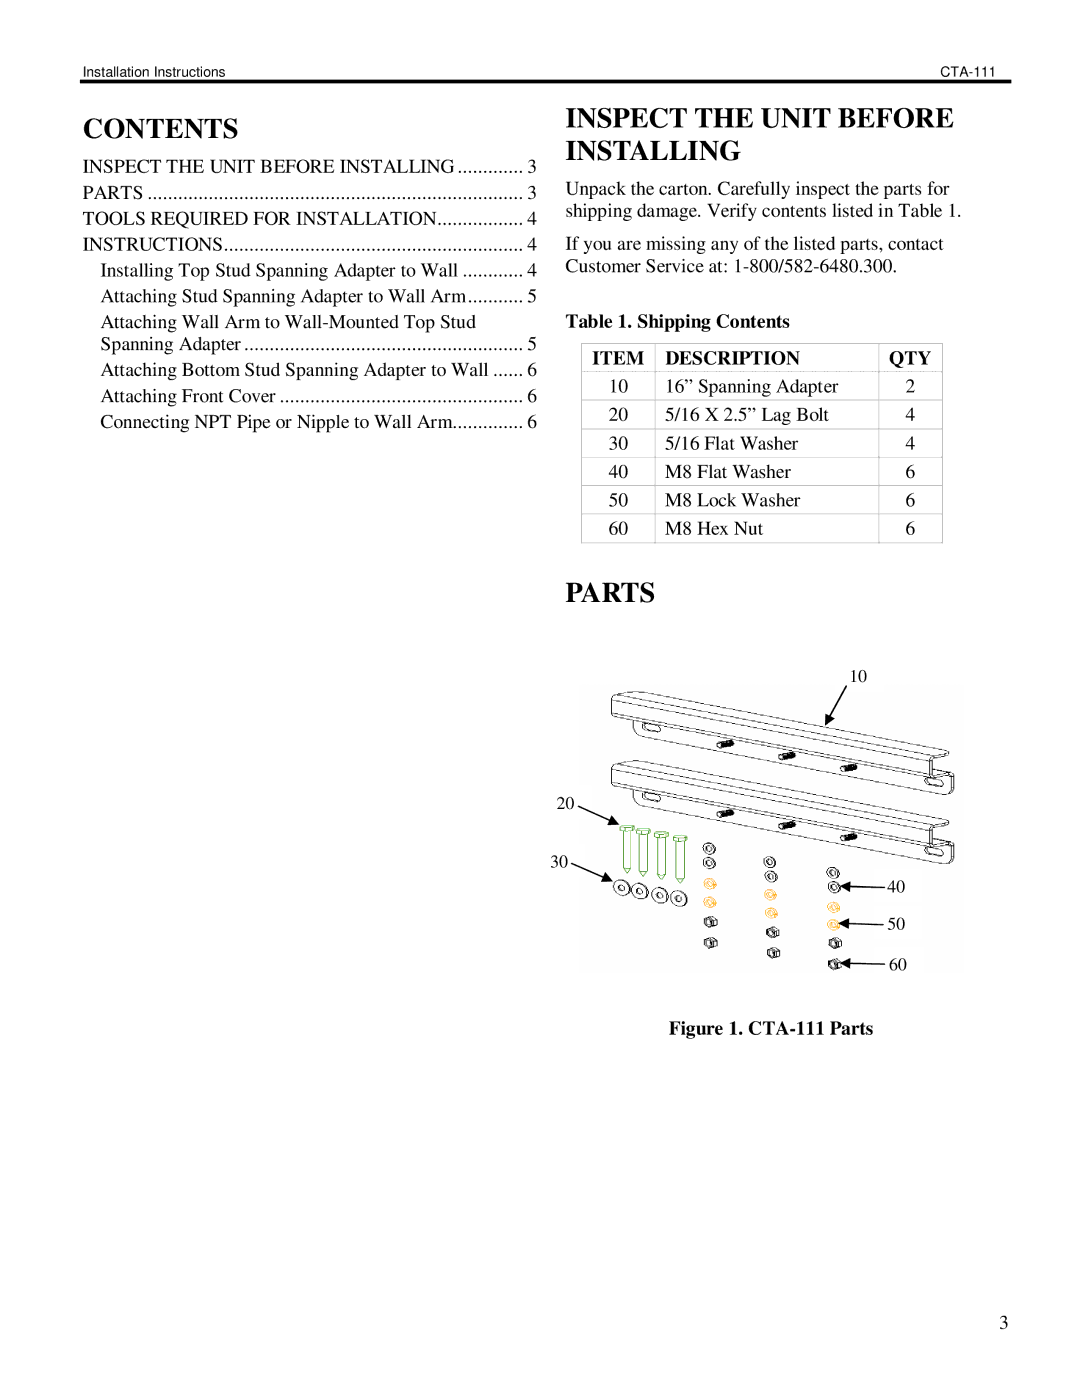
Table 1. Shipping Contents
ITEM | DESCRIPTION | QTY |
10 | 16” Spanning Adapter | 2 |
20 | 5/16 X 2.5” Lag Bolt | 4 |
|
|
|
30 | 5/16 Flat Washer | 4 |
40 | M8 Flat Washer | 6 |
50 | M8 Lock Washer | 6 |
60 | M8 Hex Nut | 6 |
PARTS
10
20
30
![]() 40
40
![]() 50
50 ![]() 60
60
Figure 1. CTA-111 Parts
3
