Installation Instructions |
STEP 2
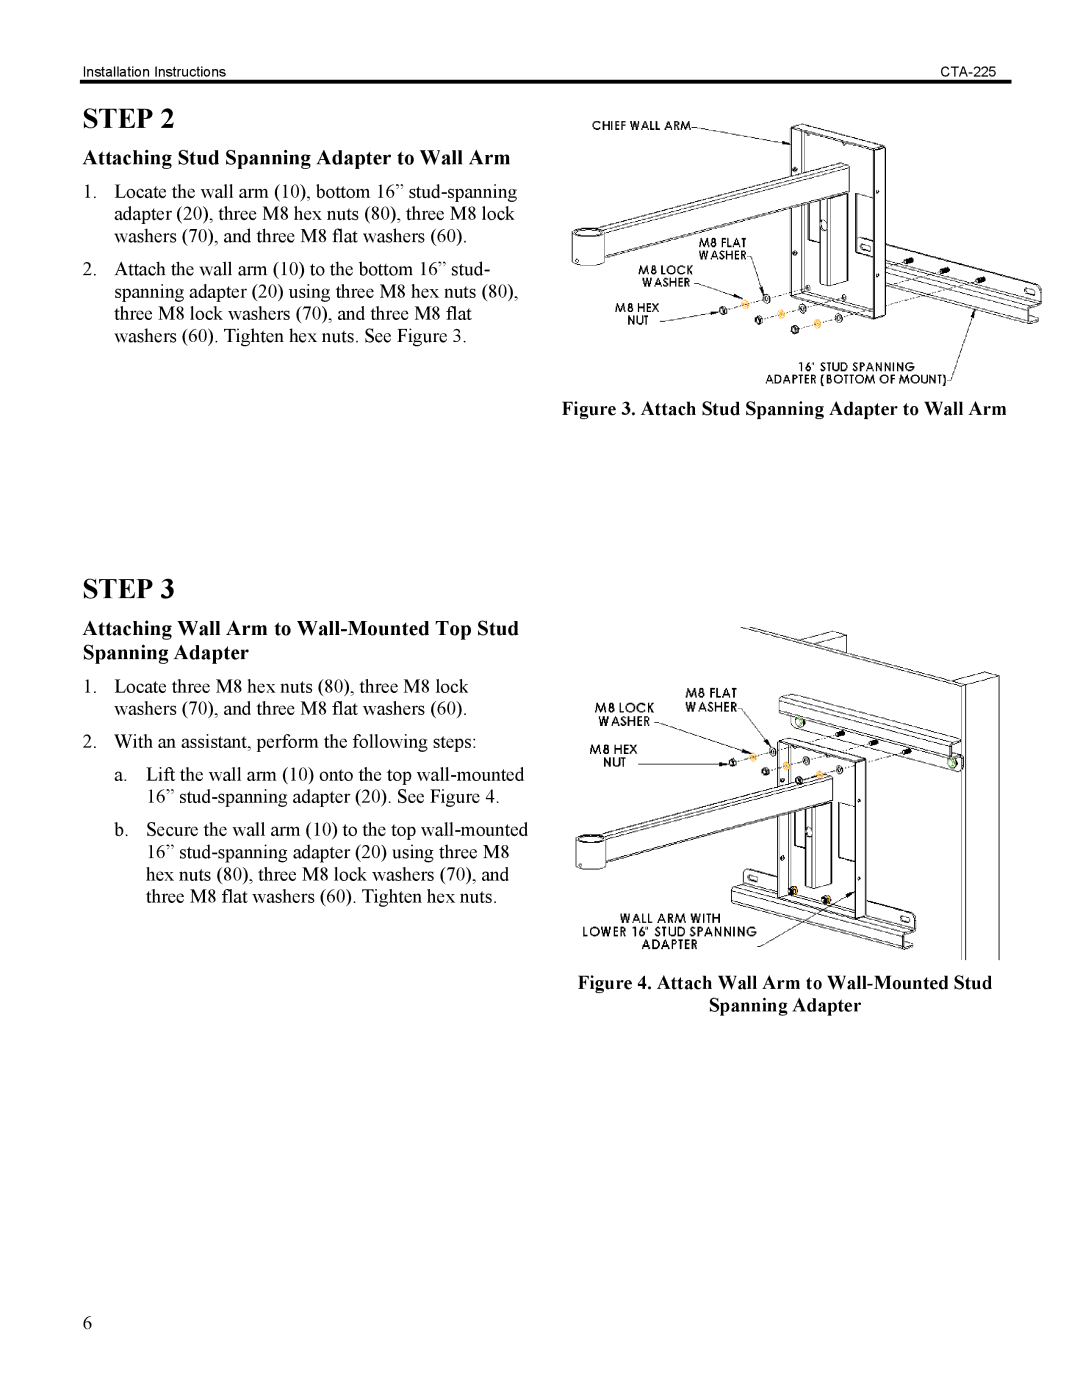
Attaching Stud Spanning Adapter to Wall Arm
1.Locate the wall arm (10), bottom 16”
2.Attach the wall arm (10) to the bottom 16” stud- spanning adapter (20) using three M8 hex nuts (80), three M8 lock washers (70), and three M8 flat washers (60). Tighten hex nuts. See Figure 3.
Figure 3. Attach Stud Spanning Adapter to Wall Arm
STEP 3
Attaching Wall Arm to Wall-Mounted Top Stud
Spanning Adapter
1.Locate three M8 hex nuts (80), three M8 lock washers (70), and three M8 flat washers (60).
2.With an assistant, perform the following steps:
a.Lift the wall arm (10) onto the top
b.Secure the wall arm (10) to the top
Figure 4. Attach Wall Arm to Wall-Mounted Stud
Spanning Adapter
6