Installation Instructions | FSA1018 |
Preparation of Existing Mount
If mount has previously been installed:
1.Remove display from mount following instructions provided with mount.
2.Remove mount from wall following instructions provided with mount.
3.Proceed to step 4.
If mount has not previously been installed:
4.Remove mount wall plate from swing arm assembly by removing screw, washers and spacers, pivot pin and locknut. (See Figure 2)
Screw
Swing Arm
Washers
Spacer
Pivot Pin
Existing Wall Plate
Locknut
NOTE: Wall plate and hardware removed is not required for steel stud installation. It may be discarded or kept for future use in a
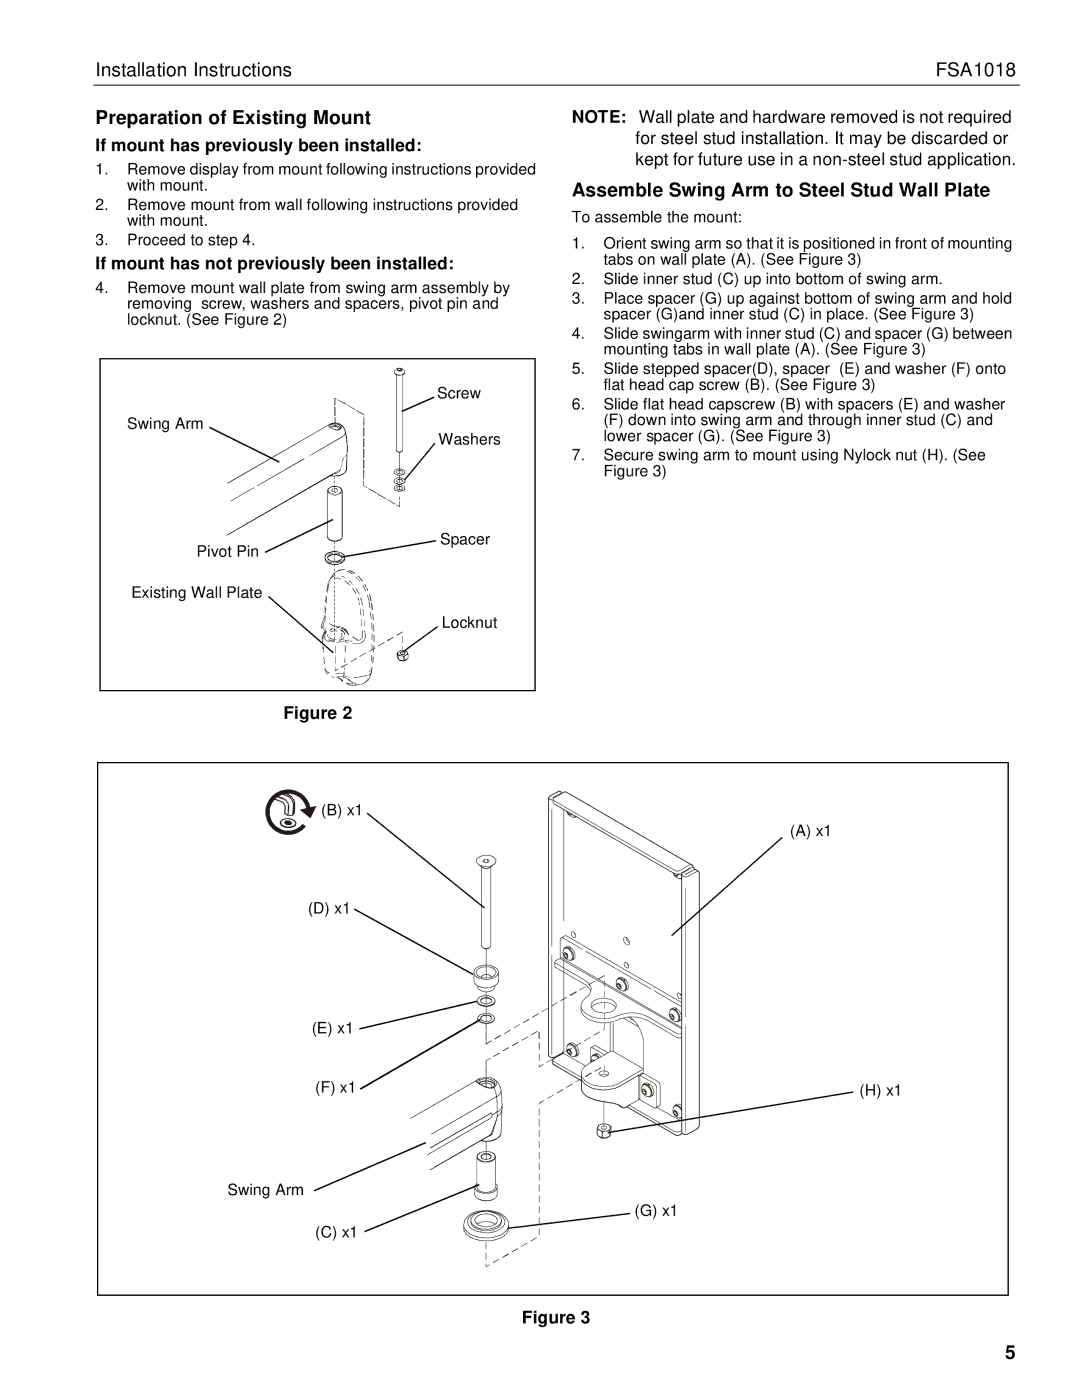
Assemble Swing Arm to Steel Stud Wall Plate
To assemble the mount:
1.Orient swing arm so that it is positioned in front of mounting tabs on wall plate (A). (See Figure 3)
2.Slide inner stud (C) up into bottom of swing arm.
3.Place spacer (G) up against bottom of swing arm and hold spacer (G)and inner stud (C) in place. (See Figure 3)
4.Slide swingarm with inner stud (C) and spacer (G) between mounting tabs in wall plate (A). (See Figure 3)
5.Slide stepped spacer(D), spacer (E) and washer (F) onto flat head cap screw (B). (See Figure 3)
6.Slide flat head capscrew (B) with spacers (E) and washer
(F) down into swing arm and through inner stud (C) and lower spacer (G). (See Figure 3)
7.Secure swing arm to mount using Nylock nut (H). (See Figure 3)
Figure 2
(B) x1 |
|
| (A) x1 |
(D) x1 |
|
(E) x1 |
|
(F) x1 | (H) x1 |
Swing Arm |
|
| (G) x1 |
(C) x1 |
|
Figure 3
5